Nothing frustrates bakers more than waiting hours for dough to rise… only to end up with a dense, flat loaf.
When dough fails, most people blame yeast, flour, or the recipe.
But in reality, nearly every “dead dough” problem comes down to one critical factor:
Fermentation temperature control.
Let’s break down exactly why dough stalls — and how to fix it permanently.
The Real Science Behind Dough Rising
Yeast doesn’t just “inflate” dough randomly.
It performs a complex biological process involving:
- Enzymatic starch breakdown
- Sugar metabolism
- CO₂ gas production
- Gluten network expansion
When yeast consumes sugars, it releases carbon dioxide. That gas gets trapped in the gluten matrix, causing dough to expand.
However, this entire process is extremely temperature-sensitive.
If the environment is too cold, enzyme activity slows dramatically.
If it’s too hot, yeast cells die — stopping fermentation completely.
That’s why stable proofing conditions are essential.
The 5 Real Reasons Your Dough Isn’t Rising
1. Your Kitchen Is Too Cold
Most homes sit between 65–72°F, which is far below the optimal yeast activity zone.
Ideal fermentation range:
- 75–85°F for most doughs
- 78–82°F for sourdough
Below this range, yeast metabolism slows, resulting in:
- Weak gas production
- Dense crumb
- Extremely long rise times
This is the most common reason dough “fails.”
2. Temperature Fluctuations Are Killing Fermentation
Even if your kitchen occasionally warms up, inconsistent temperature swings can disrupt yeast activity.
Each drop in temperature forces yeast to go dormant, resetting fermentation progress.
This leads to:
- Unpredictable proofing times
- Poor gluten development
- Underproofed loaves
Consistency matters more than warmth alone.
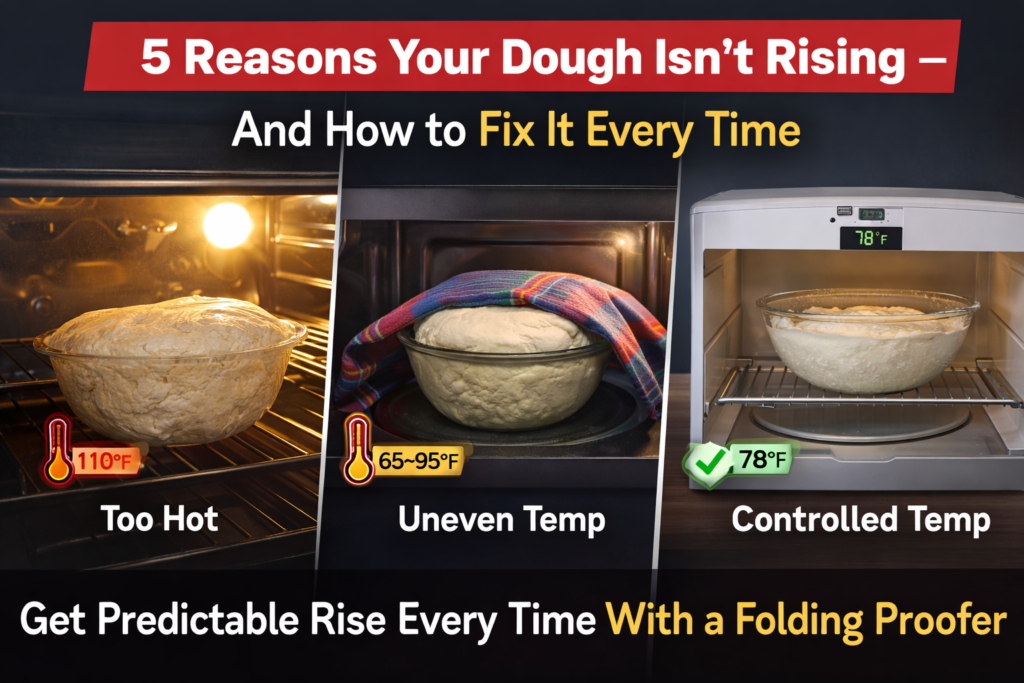
3. The Oven Light Trick Can Backfire (Seriously)
Many bakers use the “oven light method” for proofing.
But here’s the dangerous truth:
An oven with the light on can easily reach 100–110°F without you realizing it.
At this temperature:
- Wild yeast in sourdough can begin to die
- Enzymatic activity becomes unbalanced
- Dough structure weakens
This often causes:
- Collapsed loaves
- Over-acidification
- Flat, gummy crumb
What feels like a “warm environment” can actually be destroying your fermentation.
4. DIY Proofing Setups Create Uneven Heat
Common home hacks include:
- Microwaves with hot water bowls
- Heating pads
- Dishwashers
- Sunlit countertops
These methods create hot spots and cold zones, which result in:
- Uneven rise
- Poor gas retention
- Structural instability in dough
Yeast thrives in steady conditions — not fluctuating environments.
5. Your Dough Starts Too Cold
Even if you proof in a warm spot, starting with cold dough can delay fermentation for hours.
Cold water, cold flour, and cool room temperatures combine to create a “slow start” that many bakers misinterpret as failed yeast.
Why DIY Proofing Methods Often Fail
The biggest problem with DIY proofing isn’t warmth — it’s lack of precision.
Improvised setups cannot maintain:
- Stable temperatures
- Even heat distribution
- Controlled humidity
As a result, fermentation becomes unpredictable.
One batch might rise perfectly, while the next struggles under identical conditions.
This inconsistency is what drives many bakers to look for a controlled solution.
How a Folding Proofer Fixes All 5 Problems
A folding proofer creates a stable micro-environment specifically designed for fermentation.
It eliminates the guesswork by providing:
Precise Temperature Control
You can set exact proofing temperatures within optimal yeast activity ranges.
Consistent Heat Distribution
No drafts, no hot spots, no sudden temperature drops.
Reliable Fermentation Timing
Dough rises at predictable speeds every time.
Protection Against Overheating
Unlike ovens, temperatures remain stable and safe for yeast.
For serious bakers, this stability dramatically improves consistency.
What Happens When Proofing Conditions Are Controlled
Once temperature variables are removed, you’ll typically see:
- Faster and more predictable rises
- Larger dough expansion
- Stronger gluten development
- Better oven spring
- Improved crumb structure
Many bakers find their results become consistent almost immediately.
When a Controlled Proofing Environment Makes the Biggest Difference
A dedicated proofing setup is most beneficial if you:
- Bake sourdough frequently
- Live in a cooler climate
- Struggle with inconsistent rises
- Want predictable fermentation timing
- Bake multiple dough types regularly
It’s less about convenience — and more about reliability.
Final Thoughts
When dough won’t rise, it’s rarely a mystery.
It’s almost always a temperature control issue.
Yeast needs stability to function efficiently, and without it, fermentation slows, stalls, or fails entirely.
Once you create consistent proofing conditions, everything changes:
- Dough becomes predictable
- Rise times stabilize
- Bread quality improves dramatically
If you want to understand exactly how controlled proofing works in real-world baking — including performance, features, and whether it’s worth the investment — you can read the full in-depth breakdown here:
Many bakers find that once fermentation conditions are controlled, rising problems disappear almost overnight.