You’ve spent 24 hours fermenting your dough. The pizza steel is preheated to a scorching 500°F. You place the dough ball on the counter, confident and ready. You go to pull it, and—snap. It shrinks back like a rubber band. You pull harder, frustratingly trying to force it into a circle. Rip. A jagged hole opens right in the center.
Before you start handling the dough, make sure you’ve followed the steps in my master sourdough discard pizza dough recipe to ensure your gluten is properly developed and ready for stretching.”
Now you’re in damage control mode, trying to pinch the hole shut, but it just keeps opening. The dream of a perfect circle is gone; you’re baking a sad, jagged amoeba.
Stop. Put the dough down.
Sourdough discard dough is not the same as the commercial yeast dough you see the guys at the local pizzeria tossing in the air. It is chemically distinct, often more fragile, and requires a totally different set of mechanics. If you treat it like a Domino’s dough ball, it will fail.
We are going to ditch the rolling pin (which ruins your crust) and the tossing (which ruins your floor). Instead, we will use The Gravity Method and thermal management to get a restaurant-quality base every time.
The Science: Why Sourdough Discard Tears
Sourdough discard dough tears because high acidity triggers protease enzymes that degrade the gluten network, while cold temperatures make the dough brittle and prone to snapping.
To stop the tearing, you have to understand the tug-of-war happening inside the gluten network. Stretching dough is a battle between two physical properties:
- Elasticity: The dough’s desire to snap back to its original shape (Strength).
- Extensibility: The dough’s ability to stretch out without breaking (Length).
You need a balance of both. But with sourdough discard, the scales are tipped.
The “Protease Effect”
Sourdough discard is acidic. As it sits in your fridge, bacteria produce acid, which lowers the pH. This acidity activates protease enzymes. Think of these enzymes as microscopic scissors. Their only job is to snip protein chains (gluten).
Because of this, discard dough is naturally more extensible (stretchy) but less strong than fresh yeast dough.
- The Risk: The “ropes” of your gluten net are already slightly frayed.
- The Result: If you handle it aggressively or try to spin it in the air, the centrifugal force will rip those weakened strands apart.
The Temperature Trap
The number one reason home cooks tear their dough isn’t the recipe; it’s the temperature.
- Cold Gluten = Tight & Brittle. It snaps and tears immediately.
- Warm Gluten = Loose & Fluid. It stretches and relaxes.
If you take your dough ball out of the fridge and try to stretch it 20 minutes later, you are trying to stretch a cold rubber band. It will break.
What Most Recipes Get Wrong
Avoid using a rolling pin or performing a long autolyse with old discard, as these methods weaken the structure and destroy the air pockets needed for a light crust.
If you’ve been following generic pizza advice, you might be sabotaging your sourdough.
1. The “Autolyse” Mistake
In bread baking, an autolyse (mixing flour and water and letting it rest) is a great trick to make dough stretchier. However, with discard pizza dough, this can backfire.
- The Science: Your discard is already acidic. Acid acts like a “super-autolyse,” breaking down gluten rapidly.
- The Fix: If you do a long autolyse plus use acidic discard, you risk turning your dough into a puddle that tears under its own weight. For discard pizza, keep the mixing process efficient to preserve strength.
2. “Just Use a Rolling Pin”
Please, hide the rolling pin. You spent 24 hours coaxing yeast to create delicate CO2 bubbles. A rolling pin is a “mechanical degassing” event. It crushes the gas pockets, destroys the cornicione (the rim), and turns your artisan pizza into a flat, dense cracker.
3. The “Flour Avalanche”
Many recipes tell you to dump raw flour on the counter to prevent sticking.
- The Problem: Raw flour doesn’t integrate into the dough. It sits on the bottom, burns in the oven, and tastes bitter.
- The Fix: Use Semolina or Rice Flour. These act like tiny ball bearings, allowing the dough to slide without absorbing into the moisture of the dough.
Step-by-Step: The “Gravity Method”
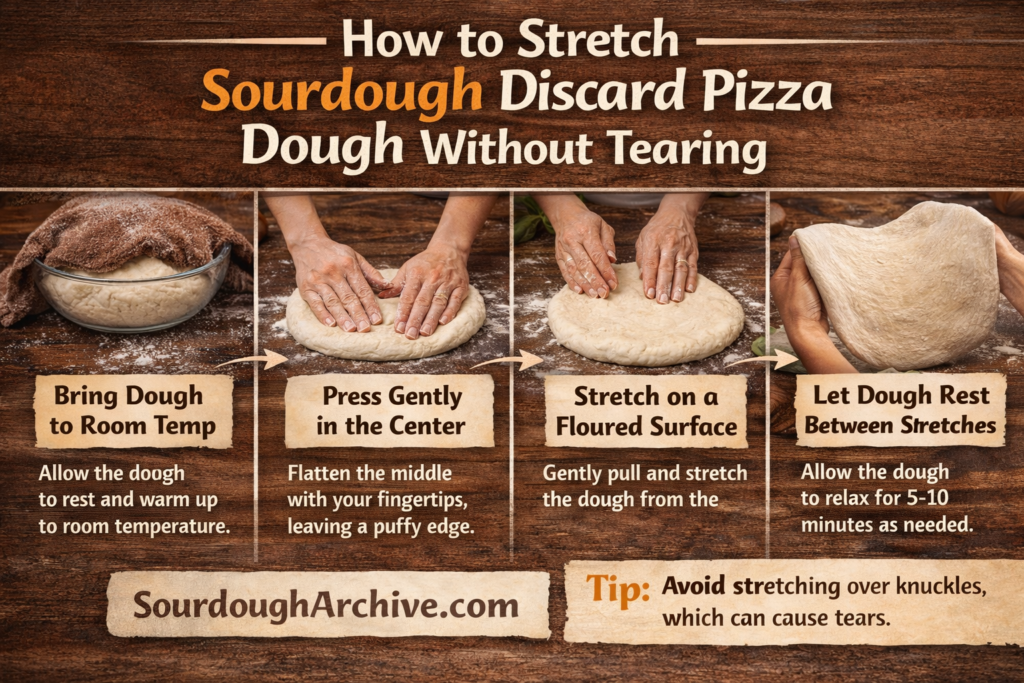
The “Gravity Method” involves letting the weight of the dough stretch itself while rotating it like a steering wheel, ensuring even thickness without mechanical force.
This technique relies on gravity to do the work for you, ensuring even thickness without the aggression of pulling.
Step 1: The Temperature Gate
Before you touch the dough, perform the Finger Dent Test. Gently poke the ball.
- Springs back immediately? It’s too cold. Wait 30 minutes.
- Indent stays? The gluten is relaxed. Proceed.
- Rule: Dough usually needs 1.5 to 2 hours at room temperature before stretching.
Step 2: The Semolina Bath
Don’t dust the counter. Instead, fill a bowl with semolina flour. Dunk the entire dough ball into the bowl, flipping it to coat both sides. This guarantees a non-stick surface without drying out the interior.
Step 3: The “Cat Paw” Press
Place the coated ball on your counter. Using the flat pads of your fingers (not the tips!), gently press from the center outwards.
- The Goal: Push the gas from the center toward the edges.
- The Golden Rule: Never, ever touch the outer 1 inch of the dough. That is your future crust. If you flatten the rim, it will never puff up.
Step 4: The “Steering Wheel”
Pick up the dough by the rim. Hold it upright in front of you like a steering wheel.
- The Motion: Rotate the dough through your hands, pinching lightly on the rim. Let gravity pull the bottom of the dough down.
- Why it works: Gravity pulls evenly across the whole sheet. Your hands pull unevenly. Keep rotating until the dough hangs roughly 8-10 inches long.
Step 5: The “Knuckle Drape” (Final Expansion)
Transition the dough onto the backs of your fists (knuckles). Do not use your fingertips, which can puncture the thin center.
- The Motion: Gently move your fists apart to stretch the center thin while rotating the dough.
- The Windowpane: You want the center thin enough that light passes through it, but not so thin it tears.
Emergency Surgery: Patching a Tear
If you rip it, do not ball it up and start over. That tightens the gluten and makes it impossible to stretch again.
- The Fix: Overlap the torn edges by roughly 1/4 inch. Pinch them together aggressively to “suture” the dough. It won’t be pretty, but the cheese will cover it, and it will bake fine.
The Flour Factor: “00” vs. Bread Flour
High-protein bread flour requires a longer rest period to relax its elasticity, while extensible “00” flour must be handled gently to prevent thinning and tearing.
Your stretching technique must change based on the flour you used. Sourdough discard reacts differently to different protein levels.
Bread Flour (The Rubber Band)
If you used high-protein Bread Flour (12-14% protein), you are working with a high-elasticity dough.
- The Struggle: It resists stretching. It wants to shrink back into a puck.
- The Strategy: This dough needs a longer “bench rest.” If it snaps back during Step 3, cover it with a bowl and walk away for 10 minutes. Force serves no purpose here; only time will relax the tension.
“00” Flour (The Silk Sheet)
If you used Italian “00” flour, you are working with a high-extensibility dough.
- The Struggle: It stretches too fast. “00” flour combined with acidic discard can become paper-thin and rip before you realize it.
- The Strategy: Handle with extreme care. Skip the “Knuckle Drape” if it feels weak. Stick to the “Steering Wheel” method and lay it down on the peel before it reaches full size.
Stretching is about more than just size—it’s about protecting the gas inside. If you press too hard on the outer rim, you’ll pop the “oven spring” potential. To understand the physics of a light, airy crust, check out my diagnostic guide on why discard pizza doesn’t bubble.
Troubleshooting: The Stretching Matrix
Use this table to diagnose why your dough is fighting you.
| The Symptom | The Likely Cause | The Immediate Fix |
| Dough snaps back like rubber | Too Cold / Too Elastic: The gluten is tight. | Cover with a damp towel or overturned bowl. Let rest for 15 mins to relax. |
| Dough tears immediately | Over-Proofed / Acidic: The enzymes have eaten the gluten structure. | Do not stretch in air. Place dough on parchment paper and gently press it out flat. Bake on the paper. |
| Hole forms in the center | Uneven Handling: You pulled the center instead of the edges. | The Patch: Overlap edges and pinch shut. Keep toppings light in that spot. |
| Dough is sticky/wet | High Hydration/Humidity: Discard was very liquid. | Use ample Rice Flour on hands and peel. Do not use regular flour (it gets gummy). |
| Shape is oblong/amoeba | Uneven Gravity: You stopped rotating during the “Steering Wheel” step. | Put it on the peel and gently pull the “short” sides to round it out before topping. |
Frequently Asked Questions
1. Can I re-ball the dough if I mess up the shape?
Technically yes, but practically no. If you ball it up, you tighten the gluten matrix instantly. You will have to let it rest for at least 1-2 hours before you can stretch it again. If you try to stretch it immediately, it will tear. It’s better to bake an ugly pizza than a re-balled tough one.
2. Why does my dough get thin in the middle but thick on the edges?
This happens when you use your fingers to pull the center. Always stretch from the outside (the rim). The weight of the rim will pull the center taut naturally during the “Steering Wheel” step.
3. My dough is tearing even though it’s warm. Why?
Your discard might be too old. If your starter hasn’t been fed in 2+ weeks, the acidity is likely destroying the gluten. Next time, use fresher discard or add a pinch of baking soda to the dough mix to neutralize the acid.
4. How do I get the dough off the counter and onto the peel?
This is the “Moment of Truth.” Do not drag it.
- Method A: Build the pizza on the peel (make sure the peel is dusted with semolina).
- Method B: Fan fold the dough gently, lift it, and unfurl it onto the peel.
- Method C: Drag the dough onto a piece of parchment paper, top it, and bake it on the paper (remove paper halfway through baking).
5. Why is my crust tough and chewy?
You likely overworked it during the stretching phase or used a rolling pin. Overworking tightens the gluten. Next time, handle it like it’s a fragile antique. The less you touch it, the more tender it will be.
Final Thoughts: Respect the Gravity
Stretching sourdough discard pizza dough is a skill that lives in your hands, not in a recipe book. It requires you to listen to the dough. If it fights back, give it time. If it feels weak, give it support.
The most important takeaway? Don’t chase the perfect circle. A jagged, oval pizza that tastes like tangy, fermented sourdough with a cloud-like crust is infinitely better than a perfectly round, dense cardboard disc.
Now that your dough is shaped and ready, you need to get it into the oven without disaster.