We’ve all been there. You spend all week saving your discard, dreaming of Friday night pizza. You picture pulling a scorching hot pie out of the oven, the crust blistered with those beautiful, charred bubbles that shatter when you bite into them. You can almost taste the airy, chewy rim.
But then the timer goes off, and reality hits. You open the oven door to find… a frisbee.
The crust is pale. It’s dense. It’s about as airy as a bagel. It’s still edible—pizza is always edible—but it’s not right. It’s heavy and flat, and you’re left wondering if your starter is dead or if you just have bad luck.
First off: take a breath. Your starter isn’t dead, and you aren’t a bad baker. The truth is, baking with sourdough discard is chemically harder than using commercial yeast or even active starter. You are fighting against biology. I wrote my master recipe to how to get better bubbles in discard pizza dough, but if you are staring at a flat pizza right now, we need to do some detective work.

Here is the science of why your bubbles went bust, and the five most common reasons your discard dough refused to rise.
The Science: “Bubble Mechanics” 101
Before we fix the problem, we have to understand what a “bubble” actually is. In the world of artisan baking, that airy crust is the result of a specific chain reaction. If one link in that chain breaks, the whole structure collapses.
To get a light, bubbly crust, you need two distinct types of expansion working together:
1. The Gas (Fermentation Bubbles)
This is the biological part. Inside your dough, yeast eats sugars and releases carbon dioxide (CO2). These little pockets of gas get trapped in the gluten network like air in a balloon.
- The Discard Problem: Your discard is “sleepy.” It has been sitting in the fridge, dormant. It has a high population of bacteria (which make acid) but a low population of active yeast. It takes a lot more time and warmth to generate enough CO2 compared to a bubbly, fed starter.
Those beautiful air bubbles are a direct result of yeast health. If your dough has been sitting in the fridge too long, the acid might be eating your bubbles before they can expand. To see if your dough is still in the “bubble prime,” read my guide on how long sourdough discard pizza dough lasts in the fridge.
2. The Steam (Oven Spring)
This is the physical part. When that trapped gas hits the intense heat of your oven, the moisture in the dough turns to steam. Water expands 1,600 times its volume when it turns to steam. This violent expansion is what we call oven spring.
- The Discard Problem: If you didn’t create the gas pockets (Type 1) during fermentation, the steam has nowhere to go. You can’t inflate a balloon that doesn’t exist.
So, why did your chain reaction fail? It usually comes down to one of these five culprits.
Reason 1: The “Acid Attack” (Your Gluten Net Dissolved)
High acidity in old discard triggers protease enzymes that break down the gluten network before gas can be trapped.
This is the most common issue with discard recipes, and almost no one talks about it. Sourdough discard is acidic. As it sits in your fridge for a week or two, the bacteria produce acetic and lactic acid, dropping the pH levels significantly. While this acid tastes great, it triggers protease enzymes.
Think of protease enzymes as microscopic scissors. Their only job is to snip protein chains. When you mix flour and water, you are building a gluten structure—a strong, elastic net designed to trap that CO2. But if your discard is too old and acidic, those enzymes will cut the net faster than you can build it.
- The Symptom: Did your dough feel great when you mixed it, but turned into a sticky, tearing puddle by the time you went to shape it? That’s the acid attack. The gluten degraded, the “net” broke, and the gas escaped.
Reason 2: The Cold Shoulder (Severe Underproofing)
Using cold discard without a warm bulk fermentation keeps yeast dormant, preventing the production of carbon dioxide bubbles.
Because we keep discard in the fridge, it is cold. Very cold. Yeast is extremely temperature sensitive. If you take cold discard, mix it with cold water, and let it sit on a cool granite countertop, the yeast will barely wake up.
If you’re finding that your dough is consistently flat, it might be how you’re storing it. Cold temperatures are the enemy of bubbles if not handled right. Check out my sourdough discard pizza dough storage guide to learn how to keep the yeast happy in the fridge or freezer.”
In a standard “straight dough” using commercial yeast, you can get away with a cool rise. But with discard, the yeast population is already low and sluggish. If the dough temperature stays below 70°F (21°C), the bacteria will continue to produce acid (making the dough sour and weak), but the yeast won’t produce enough gas to create bubbles.
- The Symptom: The crust is pale, dense, and tight. When you cut into the rim, there are no holes, just a solid mass of dough. This is a classic sign that your cold fermentation didn’t have a warm “kickstart.”
Reason 3: The Thermodynamic Failure (Oven Not Hot Enough)
A lack of conductive heat prevents the water in the dough from turning to steam before the crust sets hard.
You might have perfectly fermented dough, but if you fumble the bake, it won’t matter. Remember oven spring? It relies on speed. You need to transfer heat into the dough fast enough to turn water into steam before the crust sets hard.
If you bake on a thin metal baking sheet at 375°F (190°C), the heat transfer is too slow. The crust hardens and “sets” before the steam can expand, locking the dough into a flat shape.
- The Fix: You need conductive heat. A pizza steel or heavy stone preheated to 500°F (260°C) pumps energy into the bottom of the dough instantly. This creates that explosive “pop” in the rim.
Reason 4: Aggressive Shaping (You Popped the Balloons)
Using a rolling pin or pressing down on the rim mechanically destroys the gas pockets created during fermentation.
I see this happen all the time. You spent 24 hours gently coaxing yeast to create delicate CO2 bubbles. Then, you throw the dough on the counter and grab a rolling pin.
The rolling pin is the enemy of the bubble.
When you roll out pizza dough, you are mechanically crushing every single gas pocket you worked so hard to create. Even if you use your hands, pressing down on the outer rim (the cornicione) will fuse the top and bottom layers of the dough together. Once fused, they cannot separate and puff up in the oven.
- The Symptom: The crust is thin and cracker-like. It might be crispy, but it lacks that soft, airy interior.
Reason 5: The Hydration Mismatch
A hydration level that is too low restricts expansion, while dough that is too wet cannot hold its shape against gravity.
Finally, let’s talk about water. In baking, we use baker’s percentages to calculate hydration levels. Sourdough discard is 100% hydration (equal parts flour and water). If you are using a recipe designed for commercial yeast and just swapping in discard, you might be accidentally drowning your flour or drying it out.
- Too Dry: A stiff dough resists expansion. The steam pushes, but the dough is too tight to move.
- Too Wet: A soupy dough (often caused by the “Acid Attack” mentioned in Reason 1) can’t hold its shape and flows flat like a pancake before the oven heat can set it.
Achieving that airy structure requires a “Goldilocks” hydration—wet enough to be extensible and expand, but strong enough to hold the gas. For most bread flours, this is around 65-70% hydration.
What Most Recipes Get Wrong about Discard
If you look at generic advice online, you’ll often see tips that apply to yeast dough, not discard dough.
- “Just let it rise longer”: With discard, time is dangerous. If you let it rise too long, the acid destroys the gluten (Reason 1). You don’t need more time; you need warmer time to wake the yeast up faster than the acid can accumulate.
- “It’s the toppings’ fault”: While you shouldn’t pile a pound of cheese on a Neapolitan pizza, a well-structured dough can handle toppings. If your rim is flat, it’s rarely because of the pepperoni; it’s because of the chemistry.
Step-by-Step: The “Bubble Protocol”
If you want to guarantee bubbles next time, follow this strict protocol.
Step 1: Temperature Triage (Waking the Yeast)
Use warm water (80°F – 85°F) when mixing. This immediately raises the dough temperature into the yeast’s “happy zone.” Find a warm spot for bulk fermentation, like your oven with the light turned on. We want to favor yeast activity over bacterial acidity.
Step 2: Build Structure (Coil Folds)
Do not knead discard dough aggressively. Instead, perform 3-4 sets of Coil Folds during the first 2 hours. This gentle folding strengthens the gluten network without tearing it, ensuring it can trap the gas later.
Step 3: The “Rim-Safe” Stretch
When shaping, press from the center outwards. Treat the outer 1-inch rim as a “No Fly Zone.” Do not touch it. Do not press it. Leave those bubbles alone so they can expand in the oven.
The Flour Factor: “00” vs. Bread Flour
If you’ve ruled out the five reasons above and your crust is still flat, take a look at the bag of flour in your pantry.
In the world of Instagram pizza, “00” flour (doppio zero) is treated like gold dust. It’s the standard for authentic Neapolitan pizza. But here is the hard truth: If you are baking in a home oven with sourdough discard, “00” flour might be sabotaging your bubbles.
The “00” Trap
“00” flour is milled extremely fine and is designed for wood-fired ovens that hit 900°F (480°C) in 60 seconds.
- The Browning Issue: Most “00” flours are unmalted. In a home oven that tops out at 500°F or 550°F, “00” dough often dries out and turns into a hard cracker before it ever browns or puffs up.
- The Structure Issue: While “00” is extensible, it can be delicate. When you combine a delicate flour with the high acidity of sourdough discard, the gluten network can degrade too fast.
Why Bread Flour is the Hero
For 95% of home bakers using discard, Bread Flour (12-14% protein) is the superior choice.
- The Safety Net: The higher protein content creates a much stronger gluten network. This extra strength acts as a buffer against the acidity of your discard.
- The Chew: Bread flour gives you that distinct, chewy, artisan texture that stands up to the weight of cheese and sauce without collapsing.
Troubleshooting: The “Bubble Diagnostic” Table
If you are staring at a sad pizza right now, use this table to figure out exactly which variable failed you.
| The Symptom | The Likely Science | The Fix |
| Rim is flat and pale (White) | Low Sugar / Low Heat: The yeast ran out of food, or your oven wasn’t conductive enough. | Add 1 tsp of sugar/honey to the dough mix to fuel browning. Use a Pizza Steel preheated for 1 hour. |
| Rim is flat and dense (Hard) | Underproofed (Cold): The yeast was dormant. No gas was created before baking. | Warm Up: Use 80°F (26°C) water when mixing. Let the bulk fermentation go 1-2 hours longer in a warm spot. |
| Dough tore while shaping | Acid Degradation: The discard was too old/acidic and the protease enzymes ate the gluten. | Discard Younger: Use discard that is less than 10 days old. If older, add a pinch of baking soda to neutralize the acid. |
| Crust is gummy inside | Thermal Shock Failure: The oven was hot, but the stone/steel wasn’t saturated with heat. | Preheat Longer: Your oven air says 500°F, but your stone needs 45-60 mins to absorb that heat fully. |
| Bubbles are tiny and uniform | Commercial Yeast Style: You treated it like a rapid-rise dough. | Slow Down: Sourdough needs time. Extend the Cold Fermentation in the fridge for 24–48 hours. |
Frequently Asked Questions
1. Can I use a “cheat code” to get bubbles if my discard is dead?
Yes. If you suspect your discard is very old or inactive, add 1/4 teaspoon of instant yeast to your dry ingredients. It’s not “pure” sourdough, but it guarantees a rise.
2. Why does my dough bubble in the bowl but flatten in the oven?
This is a handling issue. You likely have great fermentation (Type 1 bubbles), but you are knocking them out during shaping. Treat the dough like a fragile water balloon. Never touch the outer 1-inch rim.
3. Is my oven hot enough? It only goes to 450°F.
450°F is on the low end for artisan pizza, but you can still get bubbles. The trick is thermal mass. You must use a thick pizza stone or steel. Place it on the top rack (heat rises) and let it preheat for a full hour.
4. How long can I keep the dough in the fridge before baking?
For discard dough, there is a sweet spot. 24 to 48 hours is the “Golden Window.”
- < 24 Hours: Flavor is mild, bubbles might be smaller.
- 24-48 Hours: Perfect flavor, relaxed gluten, great blistering.
- > 72 Hours: The acidity starts to destroy the gluten structure. The dough will become slack, sticky, and likely bake up flat.
5. Why is the bottom of my pizza pale and soft?
You are baking on a baking sheet or a cold stone. You need conductive heat to crisp the bottom. If you don’t have a stone, flip a cast-iron skillet upside down in your oven and preheat that.
Final Thoughts: Chasing the Leopard
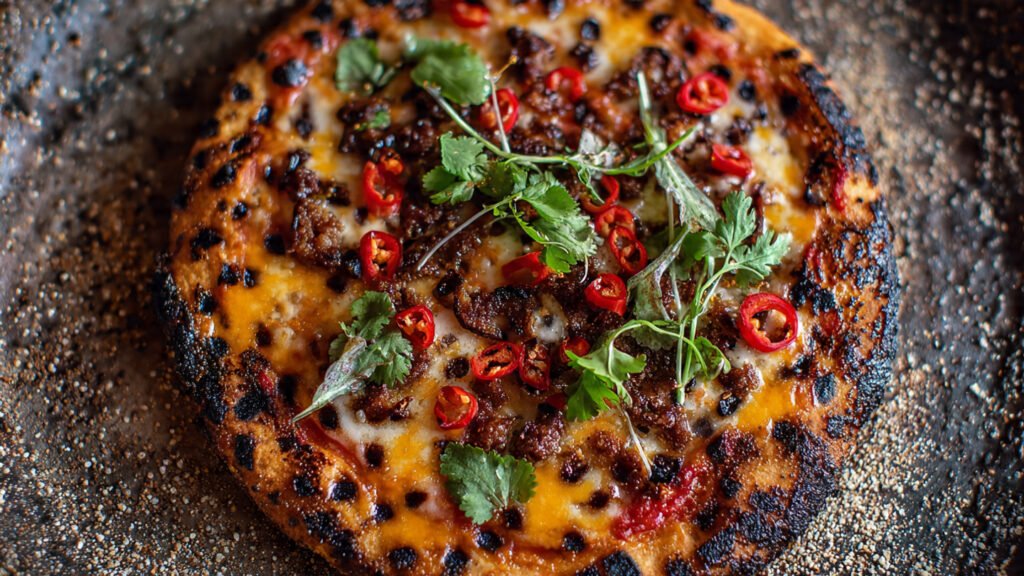
Achieving that airy, leopard-spotted crust with sourdough discard is a badge of honor. It’s harder than using a packet of yeast, but the flavor payoff is undeniable.
If your first few attempts are flat, don’t get discouraged. Remember the “Bubble Mechanics”:
- Feed the yeast (warmth and time).
- Protect the net (watch the acidity).
- Blast the heat (use a steel/stone).
Sourdough is a living thing, and every batch of discard is slightly different. Keep tweaking your variables, trust the science, and eventually, you’ll pull a pizza out of the oven that looks like it came straight from Naples.
Now, go preheat that oven—it needs time!