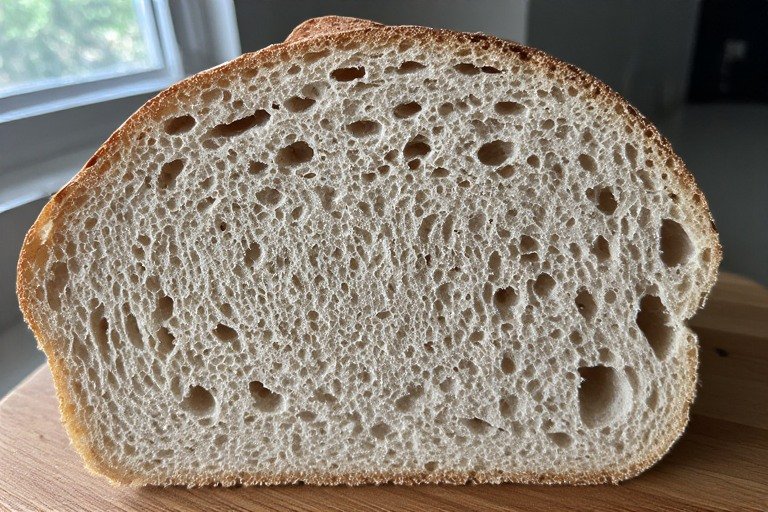
A sourdough crust that comes out too thick, tough, or leathery is almost always caused by too much moisture loss during baking. The main culprits are overbaking, too high a temperature, not enough steam in the early phase, or low dough hydration. Fix the right variable and your next loaf will have a thin, crackly crust instead of one that defeats a bread knife.
Why Sourdough Crust Gets Too Thick
Crust forms when moisture evaporates from the surface of the dough under heat. In a well-managed bake, the first phase — with the Dutch oven lid on — keeps the crust soft and extensible while the loaf springs. The second phase — lid off — dries and sets the crust. When that balance tips too far toward drying, the crust develops too much thickness and hardness.
A thick crust is not the same as a crisp crust. A good sourdough crust should be thin and crackly with some chew — not a solid wall that requires serious effort to cut through. If yours is landing in the tough and thick category, one of the six causes below is responsible.
6 Causes of a Thick Sourdough Crust — and the Fix for Each
Cause 1: Overbaking
The longer a loaf stays in the oven, the more moisture the crust loses. Many home bakers add time to be safe — especially when they are unsure about internal temperature — and end up with a crust that has dried out far beyond what is needed.
The fix: Pull the loaf when the crust is a deep, even golden brown. An internal temperature of 96–98°C (205–210°F) means the crumb is fully set. You do not need to go further than that. If the crust is already very dark before the loaf reaches temperature, tent it loosely with foil for the remaining bake time.
Cause 2: Oven Temperature Too High
Baking at very high temperatures — above 250°C (480°F) — can cause the crust to set and harden before the loaf has fully sprung. The exterior dries rapidly while the interior is still catching up, resulting in a thick, rigid shell. Contrary to what many bakers assume, hotter is not always better for sourdough.
The fix: Bake the covered phase at 230–240°C (450–460°F), then reduce to 210–220°C (410–425°F) for the uncovered phase. This gives the loaf room to spring properly before the crust locks in.
Cause 3: Not Enough Steam in the First Phase
Steam during the first 20 minutes of baking is what keeps the crust surface soft and extensible while oven spring happens. Without adequate steam, the crust begins hardening too early, sets thicker, and can trap the loaf before it fully rises. This is why a well-sealed Dutch oven is so effective — it traps the moisture from the dough and creates its own steam chamber.
The fix: Make sure your Dutch oven lid fits tightly and that the pot is fully preheated before the dough goes in. If your lid has a loose fit, add two ice cubes inside the pot with the dough before sealing — they generate extra steam during the first phase.
Cause 4: Lid Removed Too Early
Removing the Dutch oven lid before 20 minutes exposes the loaf to dry oven heat before oven spring is complete. The crust sets before the loaf has finished rising, which both restricts the rise and produces a thicker outer layer.
The fix: Keep the lid on for a full 20–25 minutes before removing. Do not peek early. The loaf needs that steam environment to spring properly.
Cause 5: Low Dough Hydration
Doughs with lower hydration — around 65% or below — contain less available moisture. Less moisture means the crust dries faster and sets thicker. If you have been following a lower hydration recipe and consistently getting thick crusts, hydration may be the root cause.
The fix: Try increasing your dough hydration by 5% on your next bake. Move from 65% to 70%, or 70% to 75%. Higher hydration doughs retain more moisture during baking and tend to produce thinner, crisper crusts. Bread flour handles higher hydration better than all-purpose if you are not already using it.
Cause 6: Too Much Flour on the Surface
Dusting the banneton heavily with rice flour helps with release, but excess flour on the surface of the dough going into the oven dehydrates the outer layer as it bakes, contributing to a tougher, thicker crust.
The fix: Brush off excess flour from the surface of the dough before baking. A light dusting for release is fine — a heavy coating is not. If you score the dough and see a thick layer of dry flour on the cut surface, you are using too much.
Quick Fix Table
| Symptom | Most Likely Cause | Fix |
|---|---|---|
| Thick and tough throughout | Overbaking | Pull at 96–98°C internal temp |
| Thick and very dark | Temperature too high | Reduce uncovered phase to 210–220°C |
| Thick with poor oven spring | Not enough steam | Seal Dutch oven properly, add ice cubes |
| Thick on top, better on sides | Lid removed too early | Keep lid on full 20–25 minutes |
| Always thick regardless of bake | Low hydration dough | Increase hydration by 5% |
| Thick and floury tasting | Too much surface flour | Brush off excess before baking |
How to Tell If Your Crust Thickness Is Actually a Problem
Some thickness is normal and desirable in sourdough. A good crust should have some structure and chew — that is part of what makes sourdough different from sandwich bread. The test is whether the crust is pleasant to eat or whether it is genuinely difficult to cut through and tough to chew.
If your crust is uniformly thick all the way around and takes real effort to slice, you have a problem worth fixing. If it is moderately thick on the bottom and thinner on top and sides, the issue is likely just excess heat from the Dutch oven base — a common and easy fix covered in the burnt bottom guide below.
What to Do Next
Work through the causes above one at a time. Most bakers find the fix by adjusting one variable — usually bake time, temperature, or steam — and seeing a noticeably thinner crust on the very next loaf.
→ Sourdough Baking Problems — Every Fix in One Place — full troubleshooting hub
→ Sourdough Crust Too Soft? 6 Fixes That Actually Work — the opposite problem
→ How to Bake Sourdough in a Dutch Oven — steam, timing, and temperature guide