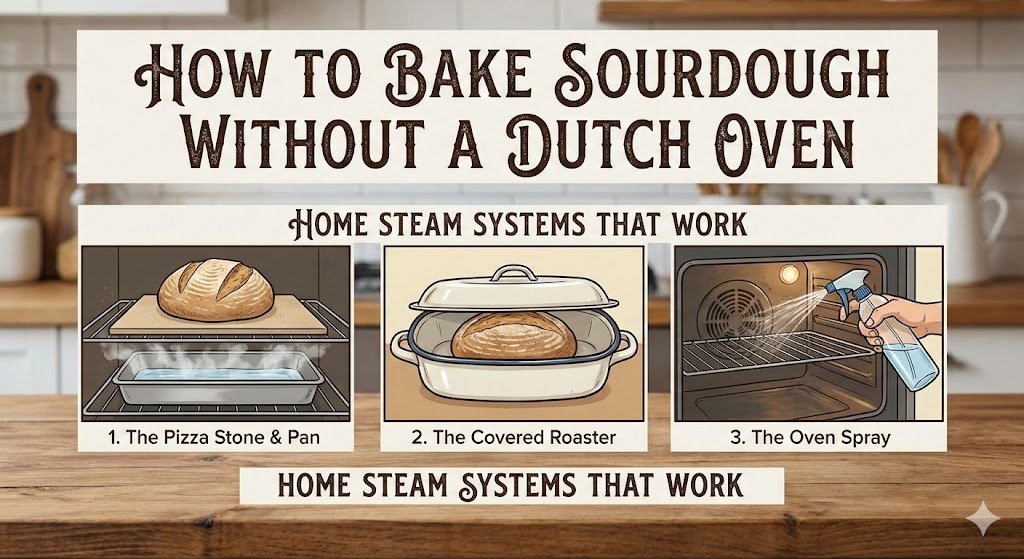
You don’t need a Dutch oven to bake great sourdough — you need steam for the first 20 minutes of baking. The most reliable no-Dutch-oven method is a preheated baking stone or steel with a large inverted stainless steel bowl or roasting pan lid placed over the loaf to trap steam. Preheat everything at 500°F / 260°C for 45–60 minutes, bake covered for 20 minutes, then uncover and finish at 450°F / 232°C for 20–25 minutes.
Quick Diagnostic Checklist
✅ Your steam setup is working correctly if:
- You hear hissing and crackling when the dough hits the hot surface
- Visible oven spring within the first 10 minutes — loaf is visibly growing
- Score opens wide and blooms during the covered phase
- Crust turns deep amber after the uncovered phase
- Internal temperature reads 205–210°F / 96–99°C at the centre
⚠️ Signs your steam setup isn’t working:
- Loaf barely rose — pale, dense, flat (steam escaped too early or surface wasn’t hot enough)
- Crust hardened before the score could open — bloom is small or absent
- Score burst on the side rather than along the intended line
- Crust is pale and chewy, not crackling and dark (insufficient browning phase)
- Bottom is pale and soft (baking surface not preheated long enough)
🎯 Ideal outcome:
- Loaf rose 30–50% taller than it went in
- Score opened with a defined ear
- Crust is deep amber to mahogany and crackles audibly as it cools
- Crumb is open, moist, and fully set through to the centre
1. Why Steam Is the Real Secret — Not the Dutch Oven Itself
A Dutch oven is popular for sourdough baking because it solves a steam problem elegantly — but it is not the only solution. Professional bakers have been producing world-class sourdough in deck ovens with steam injection systems for over a century. The Dutch oven is simply a clever home adaptation of that principle.
What your loaf actually needs for the first 20 minutes of baking is a moist, steam-rich environment that keeps the outer crust soft and extensible while oven spring happens. Once the loaf has reached its full volume and the score has bloomed, steam is removed and dry heat finishes the crust with the deep colour and crackle that defines a great sourdough.
If you can recreate that two-phase environment — steam on, steam off — without a Dutch oven, you will bake excellent sourdough. This guide gives you five proven methods to do exactly that, from improvised home setups to dedicated baking equipment.
For a deep understanding of what’s happening during the bake itself — oven spring, Maillard reaction, and why timing matters — read our companion post: How to Bake Sourdough in a Dutch Oven. The science is identical regardless of which steam method you use.
2. The Science: Why Steam Matters So Much in the First 20 Minutes
When sourdough dough enters a hot oven, several things happen simultaneously. Yeast produce a final surge of CO₂ in the heat before dying off — this is oven spring. Alcohol and water vapour in the dough also expand rapidly with heat, adding further volume. For this expansion to happen freely, the outer surface of the dough must stay soft and extensible long enough for the loaf to reach its maximum volume before the crust sets permanently.
Without steam, the crust hardens within 3–5 minutes of entering the oven. The score can’t open. The loaf can’t expand. Gas finds the weakest point and bursts through randomly. The result is a dense loaf with a pale, thick crust and a misshapen profile.
Steam prevents this by condensing on the cooler dough surface, keeping it moist and pliable. It also promotes surface starch gelatinisation — the outer starches absorb the condensed moisture and become glossy and flexible, which is what gives sourdough its characteristic sheen and allows the score ear to peel back dramatically.
After 20 minutes, the loaf has set structurally and needs dry heat for the Maillard reaction — the browning process that produces colour, crunch, and flavour complexity. Steam is removed, temperature is maintained or slightly reduced, and the crust dries and darkens over the next 20–25 minutes.
Key scientific concepts:
- Oven spring — CO₂ and steam expansion in the first 10 minutes; requires a soft, extensible crust surface
- Steam condensation — moisture from steam deposits on the cooler dough surface, keeping it pliable
- Surface starch gelatinisation — surface starches absorb condensed steam, producing gloss and flexibility
- Maillard reaction — amino acids + reducing sugars react above 285°F / 140°C to produce brown colour and complex flavour
- Thermal mass — a preheated stone, steel, or heavy pan transfers intense bottom heat instantly, driving oven spring from below
- Crust crackle — the audible snap as the loaf cools signals a well-dried, properly baked crust
3. Five Proven Steam Methods (No Dutch Oven Required)
Method 1 — Inverted Stainless Steel Bowl (Most Beginner-Friendly)
What you need: A large stainless steel mixing bowl (at least 10–12 inches / 25–30cm in diameter), a baking stone, steel, or heavy baking sheet.
How it works: Preheat your baking surface and the bowl in the oven together at 500°F / 260°C for 45–60 minutes. Score your dough on parchment, slide it onto the hot baking surface, then immediately invert the hot bowl over the loaf to create a steam dome. The moisture from the dough is trapped inside the bowl exactly like a Dutch oven lid. After 20 minutes, carefully remove the bowl (it will be extremely hot) and finish uncovered.
Why it works well: Stainless steel bowls are safe at high oven temperatures, widely available, and create an effective steam dome. The main limitation is that the bowl must be large enough to give the loaf room to spring without touching the sides.
Tip: Use oven mitts or silicone gloves rated for high heat when removing the bowl — the rim will be extremely hot. Tilt rather than lift straight up to let steam escape away from your face.
Method 2 — Roasting Pan + Baking Stone (Most Versatile)
What you need: A deep roasting pan (metal, not glass — glass can shatter under thermal shock), a baking stone or steel.
How it works: Place your baking stone or steel on the centre rack and the empty roasting pan on the rack below. Preheat both at 500°F / 260°C for 45–60 minutes. Score your dough, slide onto the stone, then immediately pour 1 cup / 240ml of boiling water into the hot roasting pan below and close the oven door quickly. The water vaporises instantly, flooding the oven with steam. Bake for 20 minutes, then remove the roasting pan (carefully — it still contains hot water) and finish uncovered.
Why it works well: This method fills the entire oven with steam rather than just a dome around the loaf, which can produce excellent results. The downside is that it is harder to control than a covered method and requires careful handling of boiling water.
Safety warning: Never pour water into a glass or ceramic dish at high temperature — thermal shock can shatter it explosively. Always use metal. Pour the water in quickly and close the door immediately to trap steam.
Method 3 — Cloche (Purpose-Built Alternative to Dutch Oven)
What you need: A ceramic or clay bread cloche (brands like Emile Henry make purpose-built versions).
How it works: A cloche is essentially a dome-shaped lid on a flat baking base, designed specifically for bread baking. It functions almost identically to a Dutch oven — preheat with the base only (or both pieces, depending on the manufacturer’s instructions), load the dough onto the base, cover with the dome, and bake covered for 20 minutes before removing the dome to finish.
Why it works well: Cloches are designed for this exact purpose and produce results comparable to a Dutch oven. Many bakers prefer them because they are easier to load — no tall pot sides to navigate — and the clay promotes beautiful, even browning. The downside is cost and the fact that they are more fragile than cast iron.
Tip: Some ceramic cloches should not be preheated empty — check manufacturer instructions. Emile Henry cloches, for example, are designed to be loaded cold and placed into a hot oven, which is a different workflow from cast iron.
Method 4 — Cast Iron Skillet + Steam Pan (Two-Skillet Method)
What you need: A large cast iron skillet (12 inch / 30cm), a second oven-safe skillet or metal pan, a baking stone or steel (optional but helpful).
How it works: Preheat the large cast iron skillet upside down on the centre rack (it becomes your baking surface), with the second pan on the rack below. Score your dough on parchment and slide it onto the inverted skillet. Immediately pour boiling water into the lower pan and close the door. After 20 minutes, remove the lower pan and finish uncovered. Alternatively, use one large skillet as the base and invert a second skillet or stainless bowl over the top as a dome.
Why it works well: Cast iron holds heat exceptionally well and most home bakers already own a large skillet. This method is highly improvised but produces reliable results when both the surface heat and steam components are addressed.
Method 5 — Covered Roasting Pan (The Budget Option)
What you need: A large metal roasting pan with a tight-fitting lid, or two roasting pans nested together.
How it works: This is effectively a makeshift Dutch oven. Use the roasting pan as your baking vessel — preheat it in the oven at 500°F / 260°C for 45 minutes. Score and load the dough into the pan on parchment, cover tightly with the lid or second pan, bake covered for 20 minutes, then remove the cover and finish. The steam generated by the dough is trapped inside exactly as it would be in a Dutch oven.
Why it works well: Most households have a roasting pan. The limitations are that roasting pan metal is thinner than cast iron (slightly less thermal mass) and the shape may not be ideal for a round boule. For a batard or oval loaf, a roasting pan is actually an excellent shape match.
4. Method Comparison Table
| Method | Difficulty | Equipment Cost | Steam Quality | Best For |
|---|---|---|---|---|
| Inverted stainless bowl | ⭐ Easy | $0 (use existing bowl) | Very good | Beginners; round boules |
| Roasting pan + steam water | ⭐⭐ Moderate | $0–$20 | Excellent | Multiple loaves at once |
| Ceramic cloche | ⭐ Easy | $80–$150 | Excellent | Bakers who bake weekly |
| Cast iron skillet setup | ⭐⭐ Moderate | $0 (use existing pans) | Good | Bakers with cast iron already |
| Covered roasting pan | ⭐ Easy | $0 (use existing pan) | Good | Budget bakers; batard shapes |
| Dutch oven (for reference) | ⭐ Easy | $40–$300+ | Excellent | Most consistent results |
5. Universal Step-by-Step Baking Method (Any Steam Setup)
Regardless of which steam method you choose, the core baking workflow is the same. Follow these steps for every bake:
- Preheat your oven and all equipment at 500°F / 260°C for 45–60 minutes. This is non-negotiable. Your baking surface must be saturated with heat before the dough goes in. Rack positioning matters: place your baking stone, steel, or pan on the middle rack and your steam water pan on the rack below — not directly underneath the loaf, which would shield it from bottom heat. If your oven only goes to 450°F / 232°C: that’s fine — preheat for an extra 15 minutes (75 minutes total) to compensate for the lower maximum temperature.
- Prepare your dough on parchment paper. Place parchment over your banneton and flip the dough out seam-side down. The parchment is your transfer tool — it lets you move the dough onto a screaming-hot surface safely.
- Score immediately before loading. Work quickly — cold dough warms fast and becomes harder to score cleanly. A single confident slash at 30–45° to the surface, ½ inch / 1.3cm deep. See our Sourdough Scoring Guide for full guidance.
- Load the dough and create your steam environment immediately. Slide the dough on parchment onto your hot baking surface, then immediately apply your steam method — bowl over the top, water in the lower pan, lid on — and close the oven door without delay. Every second counts here. Pro tip: For any dome-style method (bowl or covered pan), toss 2–3 ice cubes inside the dome alongside the dough just before sealing. The ice melts and vaporises against the hot surface, delivering a concentrated burst of localised steam right where the loaf needs it most.
- Bake covered / with steam for 20 minutes. Do not open the oven. Steam is building and oven spring is happening. Interrupting this phase compromises the loaf.
- Remove steam source and reduce to 450°F / 232°C. Carefully remove your bowl, lid, or steam pan. If using the boiling water method, use oven mitts to slide the pan out — it still contains hot water. Close the oven and reduce temperature.
- Bake uncovered for 20–25 minutes until the crust is deep amber to mahogany. Use an oven thermometer if your oven runs cool — pale crust is almost always an oven temperature problem.
- Verify doneness. Internal temperature 205–210°F / 96–99°C. Hollow sound when tapped on the bottom.
- Cool on a wire rack for at least 1 hour before cutting. The crumb is still setting as the loaf cools. Cutting early releases steam and creates a gummy interior.
6. Troubleshooting No-Dutch-Oven Bakes
Problem: Loaf has poor oven spring despite steam setup
Why: Most often a proofing issue rather than a steam issue — overproofed dough has no energy left for oven spring regardless of how perfect the steam environment is. Can also be a baking surface temperature issue if the stone or steel wasn’t preheated long enough. Fix: Check proofing using the poke test and your aliquot jar. Ensure baking surface preheated for a full 45–60 minutes. See our Underproofed vs Overproofed Guide.
Problem: Steam escaping from under my bowl / around my lid
Why: The bowl or lid isn’t sitting flush on the baking surface, allowing steam to escape. Fix: If using an inverted bowl, make sure the baking surface is flat. Wrap the rim of the bowl in a damp towel to create a better seal — the towel will dry and stiffen quickly in the heat. For roasting pan lids, crimp aluminium foil around the edges to reduce gaps.
Problem: Bottom of loaf is pale when using the boiling water method
Why: The baking surface wasn’t hot enough — either not preheated long enough, or you’re using a thin baking sheet with low thermal mass. Fix: Invest in a baking stone or steel — they hold dramatically more heat than a standard tray. Preheat for a full 60 minutes. If using a thin baking sheet, double it up (stack two sheets together) for more thermal mass.
Problem: Glass dish shattered when I added water
Why: Thermal shock — cold water poured into a very hot glass dish. Glass cannot handle the rapid temperature change. Fix: Never use glass for the steam water method. Always use metal — a cast iron skillet, metal roasting pan, or old baking sheet. Going forward, place the metal pan in the oven during preheat so it’s already hot when you add the boiling water, which reduces (though doesn’t eliminate) thermal shock.
Problem: Score didn’t bloom — crust hardened before loaf could expand
Why: Steam wasn’t reaching the loaf surface effectively — either the bowl wasn’t covering the loaf, steam escaped too quickly, or the setup didn’t trap enough moisture. Fix: Ensure your steam dome (bowl, lid, or pan) is close to the loaf but not touching it. For the water method, add the water faster and close the oven door more quickly. You can also place 3–4 ice cubes alongside the dough when loading for a burst of additional steam.
Problem: Crust is chewy and pale after full bake time
Why: Oven temperature is lower than indicated, or the uncovered browning phase was too short. Fix: Use an oven thermometer — most home ovens run 25–50°F / 14–28°C cooler than their dial. Extend the uncovered phase by 5–8 minutes. Turn on the convection fan for the last 10 minutes if your oven has one — convection accelerates browning significantly.
7. “My Steam Setup Failed Mid-Bake — What Do I Do?”
Bowl or lid fell off during steam phase: Replace it immediately if within the first 10 minutes. If past 15 minutes, leave it off — the loaf has likely finished its oven spring and you’re transitioning to the crust phase anyway. Reduce temperature to 450°F / 232°C and continue.
Ran out of steam too early — crust is hardening before 20 minutes: Add another small amount of hot water to your lower steam pan if using the water method. Alternatively, quickly spritz the oven walls (not the light or heating elements) with water using a spray bottle and close the door immediately.
Forgot to add water / create steam and noticed after 5 minutes: Open the oven, quickly pour boiling water into a lower pan or add ice cubes alongside the loaf, close the door. You’ve lost some steam time but the loaf can still recover with a partial steam phase — oven spring will be reduced but the loaf will be edible.
Loaf looks done on the outside but feels soft and underdone: Cover loosely with aluminium foil to prevent over-browning and continue baking until internal temperature reaches 205–210°F / 96–99°C. Sourdough can handle an extra 10 minutes at 450°F / 232°C without burning if the crust is protected.
8. Frequently Asked Questions
Can I bake sourdough on just a baking sheet with no steam?
You can, but results will be significantly compromised — pale crust, poor oven spring, and a thick leathery exterior. If steam is completely unavailable, lower your hydration to around 68–70%, shape a tight loaf, and score shallowly. The loaf will bake, but it won’t be the open-crumbed sourdough you’re aiming for. For any serious baking, implement at least one of the steam methods above.
Is a baking stone or steel necessary for these methods?
Not strictly necessary, but highly recommended. A baking stone or steel provides the intense bottom heat that drives oven spring from below — the same role played by the base of a Dutch oven. A heavy cast iron skillet inverted as a baking surface is an excellent alternative. A standard thin baking sheet works but delivers noticeably less oven spring due to lower thermal mass.
How much water do I add for the steam pan method?
About 1 cup / 240ml of boiling water poured into a preheated metal pan placed on the rack below your loaf. Use boiling water rather than cold — it vaporises instantly on contact with the hot pan, flooding the oven with steam immediately. Cold water takes too long to heat up and the steam arrives too late to be effective.
Can I use a covered casserole dish instead of a Dutch oven?
Yes — if it’s oven-safe to 500°F / 260°C and made of cast iron, enamelled cast iron, or thick ceramic. Avoid glass casseroles (thermal shock risk) and thin aluminium (insufficient thermal mass). A covered Le Creuset braiser, a Staub cocotte, or a heavy ceramic casserole with a lid all work well and function identically to a Dutch oven for this purpose.
Do I need to preheat the bowl / dome if I’m using the inverted bowl method?
Yes. Preheat the stainless bowl in the oven alongside your baking surface for the full 45–60 minutes. A hot bowl placed over the dough creates immediate steam as moisture hits the hot metal. A cold bowl takes several minutes to heat up and you lose the critical early steam window.
Should I consider buying a Dutch oven eventually?
If you bake sourdough regularly — even once a month — a Dutch oven is worth the investment. A basic Lodge cast iron Dutch oven costs around $40–$60 and will last decades. The convenience, consistency, and results it delivers over improvised methods make it the single most impactful piece of sourdough equipment you can own. That said, everything in this guide produces genuinely excellent bread — don’t let the absence of one hold you back.
Want printable baking setup guides, steam method checklists, and beginner-proof baking timelines?
They’re all inside the Sourdough Mastery System:
👉 sourdougharchive.com/the-bundle
Related Sourdough Guides
- 📖 How to Bake Sourdough in a Dutch Oven — the full Dutch oven method for when you’re ready to upgrade
- 📖 How to Score Sourdough — score confidently before the dough goes in
- 📖 Cold Fermentation Guide — how overnight proofing affects your bake
- 📖 Underproofed vs Overproofed Sourdough — diagnosing bake results from the crumb
- 📖 How to Get Better Oven Spring — going deeper on maximising rise
- 📖 Sourdough Mastery: The Complete Beginner’s Guide — the full roadmap