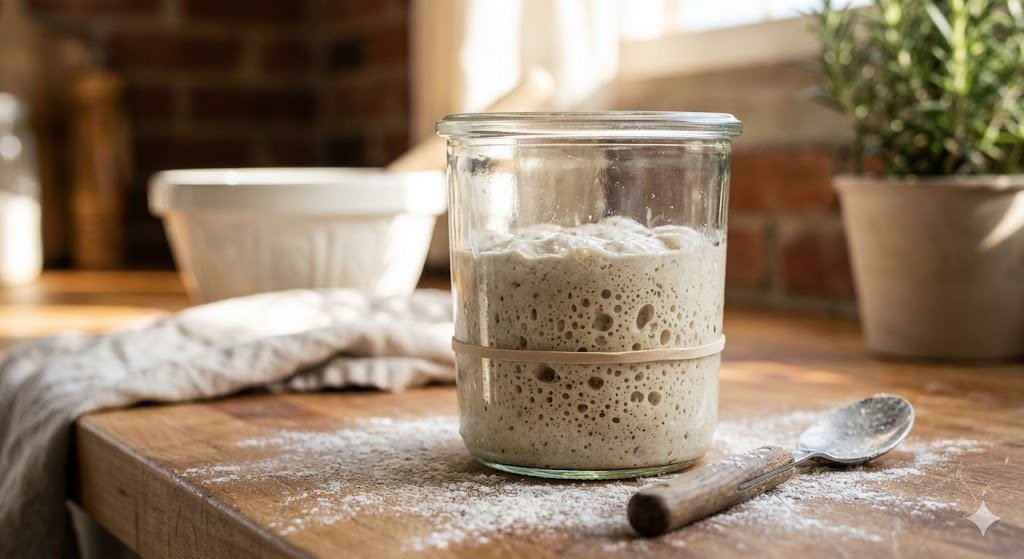
Your starter isn’t dead. It’s just having a moment.
Let’s be honest — a weak sourdough starter is one of the most demoralizing things in baking. You peek into the jar expecting a bubbly, chaotic little universe, and instead you get a sad, flat layer of paste that smells vaguely like a nail salon. Been there. Cried about it. Kept it in the fridge out of guilt. You’re not alone.
The good news: in almost every case, a weak starter isn’t dead. It’s just acidic, cold, underfed, or all three. Once you know what’s actually wrong, fixing it takes 3–5 days of easy work — no exotic ingredients, no starting over from scratch.
Here are the 7 fixes that reliably bring a sluggish starter back to life, in the order I’d try them.
How to tell if your starter is actually weak
Before we start the CPR, make sure you’re diagnosing the right problem. A weak starter usually shows at least two of these:
- Doesn’t double within 4–8 hours of feeding at room temperature
- Bubbles on the surface but no real rise (or rises and falls fast)
- Smells sharply like acetone, nail polish remover, or very strong vinegar
- A thin, grey, runny liquid on top (hooch) that keeps coming back
- Dough made with it is dense, gummy, or flat
“A weak starter that also smells sharply chemical or solvent-like has a starvation problem before a strength problem — fix the smell first using the protocols in our guide on sourdough starter smells like acetone, then return here.”
If your starter is just new (under 14 days old), it’s not weak — it’s a baby. Keep feeding consistently and give it time. For everyone else, keep reading.
👉 Related: Why isn’t my sourdough starter rising · Sourdough starter not doubling
Fix #1: Do a full acid reset (the 1:5:5 feed)
The #1 reason for a weak starter is acid buildup. Lactic acid bacteria multiply faster than yeast, and when your starter sits too long between feeds, the pH drops so low that the yeast basically goes dormant. No yeast, no rise. Simple as that.
The fix is a high-ratio feed that dilutes the acid in one shot:
- Take 5g of your old starter (discard the rest — yes, really)
- Add 25g flour + 25g water
- Stir well, cover loosely, leave at 75–80°F
That’s a 1:5:5 ratio. If your starter is really struggling, go to 1:10:10. It’ll take longer to peak than a normal feed (8–14 hours), but when it does, you’ll see real, legit rise. Repeat once a day for 2–3 days.
This single move fixes maybe 70% of weak starters. Start here.
👉 Need the full chart? Sourdough starter feeding ratio chart
Fix #2: Warm it up (74–80°F is the sweet spot)
Your starter doesn’t care about your thermostat, it cares about its own micro-climate. Below 70°F, fermentation slows to a crawl and bacteria outpace yeast (which is how you end up back at acid problem). Above 85°F, you risk killing things.
Where to park it:
- On top of the fridge (warm from the motor)
- Inside the oven with the light on
- Near — but not touching — a radiator
- In a proofing box if you have one
If your kitchen is cold and nothing is working, this is almost always the real problem. A starter fed in a 65°F kitchen is on a hunger strike.
👉 Related: How to keep sourdough starter warm · Sourdough not rising in winter
Fix #3: Switch flour for 3 days
Flour matters way more than beginners realize. If you’ve been feeding only all-purpose, your starter is basically eating cafeteria food. Upgrade it.
- Rye flour is the cheat code. Loaded with enzymes and nutrients, it’ll make your starter explode in 24–48 hours. Swap half your normal flour for rye.
- Whole wheat works similarly — more nutrients than white flour.
- Strong bread flour (12%+ protein) gives better structure once the starter is active.
Feed with 50/50 bread flour + rye for 2–3 days and watch what happens. Once it’s strong again, switch back to whatever you like.
👉 Related: Best flour for sourdough beginners
Fix #4: Feed it closer to peak
Here’s one most beginners miss: when you feed matters as much as what you feed. If you feed your starter when it’s already collapsed and sour, you’re just topping up an acidic jar. Always feed as close to peak rise as possible.
To catch the peak:
- Mark the jar with a rubber band at feeding time
- Watch for the peak (about 4–8 hours at 75°F)
- Feed within 1–2 hours of peak
If your starter is peaking while you sleep, adjust the ratio (use 1:3:3 or 1:5:5) to slow it down so it peaks when you’re awake. This is how pros keep starters strong long-term.
Fix #5: Twice-a-day feedings for 2–3 days
Think of this as starter bootcamp. Twice-daily feeds keep acid from building up and give the yeast constant fresh food to reproduce with.
- Morning: discard down to 20g, feed 20g flour + 20g water (1:1:1)
- Evening: same thing, 12 hours later
- Keep it warm the whole time
By day 3, you should have a jar that doubles reliably in 4–6 hours. If not, combine this with Fix #1 (the acid reset) and try again.
Fix #6: Thicken the hydration
Thin, soupy starters look active but often have weaker rise because bubbles can’t hold their shape. If your starter is runny and only making tiny bubbles, try thickening it.
- Instead of 1:1:1 by weight, try 1:1:0.8 (20g starter + 20g flour + 16g water)
- Or feed with flour only for 1–2 feeds
A thicker starter traps gas better, which makes the rise obvious and gives you a clearer peak to read.
Fix #7: Stir it and give it some air
Wild yeast is aerobic — it needs oxygen to reproduce quickly. If your starter jar is tightly sealed or the mixture is never stirred, yeast reproduction slows and bacteria take over.
- Use a loose-fitting lid or a cloth with a rubber band
- Stir the starter vigorously after every feed (not gently — really whip air into it)
- Give it a quick stir between feeds too
Takes 5 seconds. Makes a noticeable difference within 24 hours.
When to just start over
If you’ve done all of the above for a full week and your starter still refuses to double, it might genuinely be time to start fresh. Signs it’s truly done:
- Pink, orange, or fuzzy mold (any color except white/cream)
- A smell that’s rotten rather than vinegary
- Zero activity after 7 days of consistent warmth and feeding
Otherwise, keep going. Starters are way harder to kill than to revive.
👉 Related: When to start over with sourdough starter · Revive dried sourdough starter
FAQs
How long does it take to strengthen a weak sourdough starter? Usually 3–5 days of consistent warmth and twice-daily feeds. Severely neglected starters can take up to 2 weeks.
Can I add sugar, honey, or yeast to speed it up? Don’t. Sugar feeds bacteria more than yeast, which makes the acid problem worse. Commercial yeast won’t strengthen your wild yeast — it just masks the issue.
My starter bubbles but doesn’t rise. Is it weak? Probably yes. Bubbles without rise usually mean bacterial activity is outpacing yeast. Try the 1:5:5 acid reset in Fix #1.
Can I strengthen a starter in the fridge? No. Cold temperatures dramatically slow yeast reproduction. Always strengthen at room temp (74–80°F), then move back to the fridge once it’s doubling consistently.
Should I use tap water? Only if it’s not heavily chlorinated. If your tap water smells like a pool, use filtered or leave tap water out overnight to let the chlorine dissipate.
Still troubleshooting?
- Starter smells like vinegar? → Sourdough starter smells like acetone fix
- Liquid on top? → Why sourdough discard has liquid (hooch)
- Full starter rescue plan: Starter SOS Guide
A weak starter is fixable. Almost always. Give it warmth, a high-ratio feed, and 48 hours — you’ll be back to bubbling in no time.