Quick Navigation — Find Your Problem
- No bubbles at all — Zero fermentation signs
- Used to work, now dead — Previously active, now sluggish or stopped
- Very slow rise — Takes 12+ hours to show any movement
- Mold or contamination — Pink, orange, or fuzzy growth
- Bad smell (not acetone) — Rotten or off odors
- Cold kitchen in winter — Temperature below 70°F
- Recently changed routine — Different flour, water, or schedule
- Starter is brand new — Less than 7 days old
- Liquid on top (hooch) — Gray or dark liquid pooling on your starter
- Just came out of the fridge — Cold-stored starter revival timeline
What “Not Rising” Actually Means

Before we diagnose, let’s define what we’re looking for:
A healthy starter should:
- Show visible bubbles within 12-24 hours of feeding
- Rise noticeably (50-100%) within 4-8 hours at 75-80°F
- Double in size within 6-12 hours at room temperature
- Smell pleasantly tangy (like beer or yogurt), not rotten
If your starter shows NONE of these signs, it’s not rising.
Section 1: No Bubbles at All — Zero Activity
The Problem
You feed your starter and nothing happens. No bubbles, no rise, no smell change. It sits in the jar looking exactly the same after 24 hours.
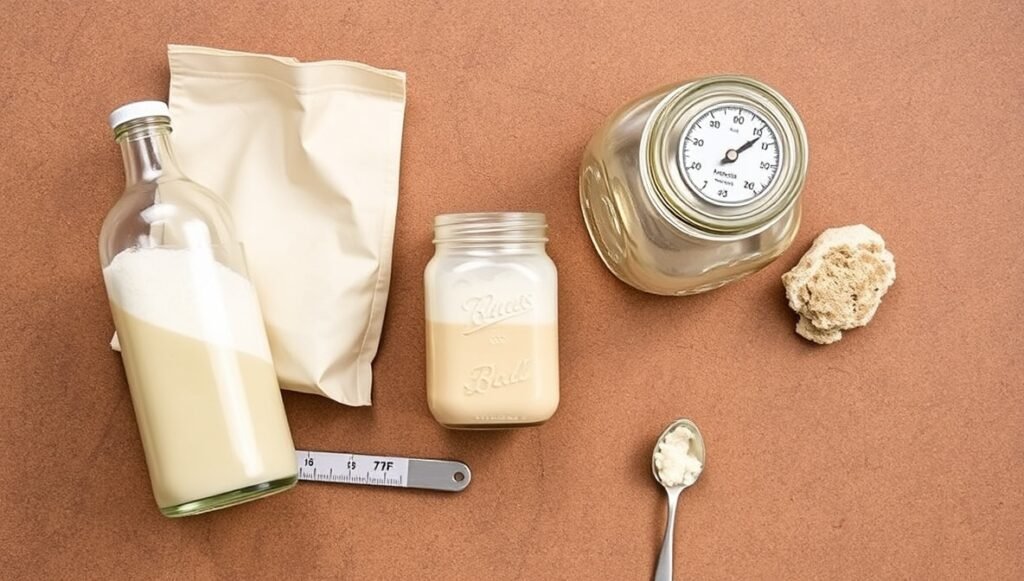
Root Causes
A. The starter is dead (or nearly dead) If your starter has been sitting unfed for weeks or months, the yeast and bacteria may have starved completely. However, most starters recover with consistent feeding.
B. Water is the culprit Chlorinated or chloraminated tap water can kill wild yeast. If you’re using heavily treated municipal water, the yeast can’t survive fermentation. Let tap water sit uncovered for 24 hours to allow chlorine to evaporate (this doesn’t remove chloramine, only chlorine), or use filtered water. One clarification worth knowing: hard water itself isn’t the problem — the minerals in hard water actually feed bacteria and can help fermentation along. Chlorine and chloramine are what suppress yeast, not water hardness, so there’s no need to soften your water on top of filtering it.
C. Temperature is too low Below 60°F, wild yeast enters dormancy and shows no visible activity. Even room-temperature kitchens (68-70°F) are too cold for strong fermentation. Yeast needs 75-80°F to show obvious signs of life.
D. Flour is the problem Bleached flour contains chemicals (benzoyl peroxide, chlorine dioxide) that suppress yeast activity. Low-protein flour (under 10%) can’t trap gas effectively, so even if fermentation happens, you won’t see bubbles.
E. You’re using instant yeast by accident If you’re using store-bought instant yeast instead of wild yeast from your starter, it won’t activate properly in a sourdough culture. Make sure you’re feeding your starter, not adding commercial yeast.
Fixes (In Order of Effectiveness)
Fix 1: Switch to filtered water
- Use filtered, spring, or bottled water for 3 feedings
- Or let tap water sit uncovered 24 hours before using
- Most common cause of zero activity
Fix 2: Warm it up to 75-80°F
- Move to warmest spot in your kitchen
- Use an oven with light on, top of fridge, or DIY proofing box
- Also feed with warm water (80-90°F) instead of room-temperature water — this gives fermentation an immediate head start on top of a warm environment
- Temperature boost = visible activity within 12-24 hours in most cases
Fix 3: Switch to unbleached bread flour
- Stop using bleached all-purpose flour
- Use unbleached bread flour (12-14% protein) or add 20% whole rye
- Rye is especially good for dormant starters — it has extra nutrients
Fix 4: Feed more frequently
- If currently feeding once daily, switch to twice daily (every 12 hours)
- More frequent feedings keep the culture active
- Takes 3-5 days to see results
Fix 5: Check for contamination
- Look closely for any pink, orange, or fuzzy growth
- If you see mold → discard and start over
- If you see only white/tan discoloration → likely safe, just discard top layer and feed
Fix 6: Be patient (but check water first)
- Brand new starters take 7-14 days to establish activity
- If your starter is less than 3 days old, zero activity is normal
- See 72-hour sourdough starter guide for day-by-day expectations
If your starter is showing some activity but simply won’t reach double its size, the issue is usually temperature, feeding ratio, or starter age — and each has a specific fix. See the full breakdown: Sourdough Starter Not Doubling? Here’s Why (And How to Fix It)
When It’s Really Dead
Your starter is likely dead if:
- You see pink, orange, or fuzzy mold (contamination)
- It’s been in the fridge unfed for 6+ months AND shows zero response to 3 days of consistent warm feeding + good water + good flour
If it’s truly dead: See our how to revive a dried sourdough starter guide for starting fresh.
Section 2: Used to Work, Now It’s Dead — Previously Active Starter
The Problem
Your starter was strong and doubling reliably. Then something changed. Now it shows little to no activity, even with feeding.
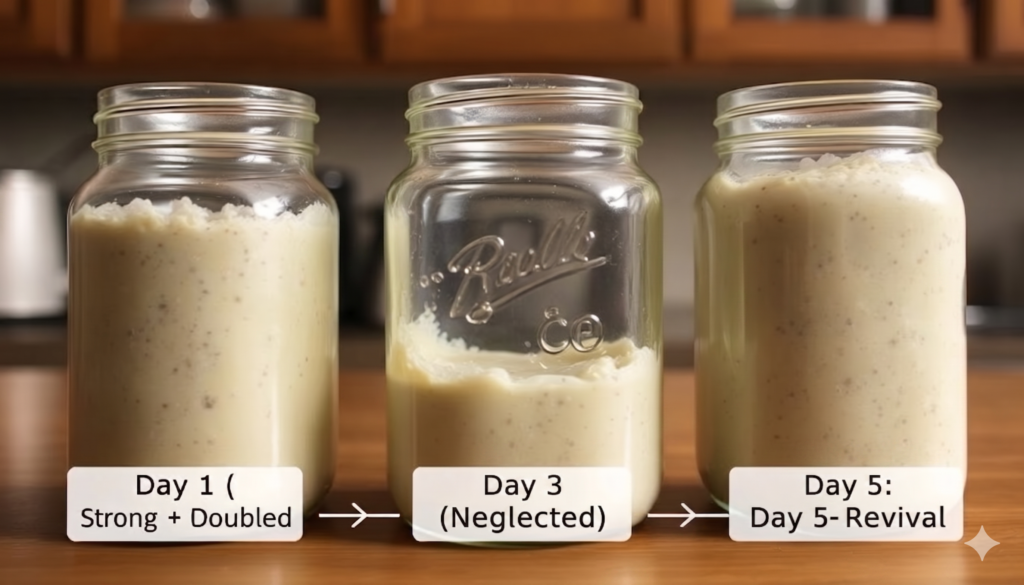
Root Causes
A. Neglect (most common) If your starter sat unfed in the fridge for 2+ weeks, the yeast starved and the bacteria took over. The culture becomes overly acidic, which suppresses yeast activity.
B. Temperature dropped (winter) Cold kitchens slow fermentation dramatically. What was doubling in 6 hours now takes 20+ hours, or stalls completely. This is especially common in winter or in homes without heat in certain rooms.
C. You changed the flour Switched to a new brand or type? Some flours are bleached, low-protein, or have additives that weaken the culture. Starter is picky about flour once established.
D. Water source changed New house, new filter, or started using tap water directly? Water quality is more important than most bakers realize.
E. You changed the feeding routine
- Increased ratio dramatically (e.g., 1:3:3 instead of 1:1:1)
- Decreased feeding frequency
- Inconsistent feeding times
- Starter needs a rhythm to stay strong
F. Contamination or wild yeasts Rare, but possible: Your starter got contaminated with a different culture or the environment shifted. Signs: unusual smell, unusual color, separation of liquid.
Fixes (In Order)
Fix 1: Go back to basics
- Use the flour that originally worked (if you remember it)
- Use filtered or bottled water
- Feed every 12 hours at consistent times
- Keep at 75-80°F
- Do this for 5 days
Fix 2: Warm feeding strategy
- Feed in a warm spot (75-80°F)
- Wait 4-6 hours
- Observe if ANY bubbles form
- If yes → still alive, just weak. Continue consistent feeding.
- If no → move to Fix 3
Fix 3: The 5-day revival protocol This is aggressive but works for most neglected starters:
Day 1:
- Discard all but 50g of starter
- Feed with 100g flour + 100g filtered water (1:2:2 ratio)
- Warm to 75-80°F
- Wait 24 hours
Day 2:
- Repeat: Discard all but 50g, feed 1:2:2, keep warm
- Look for ANY bubbles
- Should see some activity
Day 3-5:
- Repeat daily
- By day 5, should see consistent doubling in 8-12 hours
- If still nothing → likely truly dead, start fresh
Fix 4: Add rye flour boost
- Mix 50% unbleached bread flour + 50% whole rye
- Feed at 1:2:2 ratio
- Rye has extra nutrients that wake up dormant cultures
- Do this for 3 feedings
Fix 5: Check for mold
- If you see pink, orange, or fuzzy → discard everything
- Start fresh with 72-hour starter guide
- If white/tan layer on top → normal, just discard and feed normally
Signs It’s Recovering
- Day 2-3: Tiny bubbles form (may only last 30 mins)
- Day 4: More consistent bubbling
- Day 5: Clear rise visible within 6-8 hours
- Day 7: Doubling reliably in 6-8 hours
Section 3: Very Slow Rise — Takes 12+ Hours to Show Any Movement
The Problem
Your starter is alive (you see some bubbles eventually) but it’s painfully slow. It takes 12-24 hours to double instead of 6-8.
If your starter is rising but never gets vigorous — slow to peak, weak bubbles, collapses quickly after feeding — the culture itself needs rebuilding, not just more time. A targeted strengthening protocol gets most starters back on track within 5–7 days. See: How to Strengthen a Weak Sourdough Starter
Root Causes
A. Cold kitchen (most common)
- Room temperature below 70°F = slow fermentation
- 68°F takes 2x longer than 75°F
- Winter kitchens can be 60-65°F
B. Weak yeast population
- Young starters (under 2 weeks old) are naturally slow
- Starters that have been neglected lose yeast strength over time
- Takes 5-7 days of consistent feeding to build population back up
C. Wrong feeding ratio
- Too much starter relative to fresh flour = weak fermentation
- 1:1:1 ratio (equal parts) is standard, but weak starters need 1:2:2 or 1:3:3
- More food = longer fermentation window = stronger rise
D. Wrong flour
- Bleached flour suppresses yeast
- Low-protein flour (under 11%) can’t trap gas
- All-purpose flour is weaker than bread flour
E. Old starter (over 1 year old)
- Very old starters sometimes lose vigor
- Dormant bacteria can dominate over yeast
- May need a refresh or restart
F. Unclean container
- Oil residue or soap residue on jar walls inhibits fermentation
- Clean jar with hot water only (no soap) and let air dry
Fixes
Fix 1: Warm it up (biggest impact) Move to 75-80°F and you’ll cut rise time in half immediately. Feeding with warm water (80-90°F) instead of room-temperature water adds an extra boost on top of a warm environment.
Options:
- Oven with light on (check temp first — some ovens run 85-90°F with light only)
- Top of refrigerator
- DIY proofing box
- Near a heater or sunny windowsill
Fix 2: Increase feeding ratio If currently 1:1:1, switch to 1:2:2.
- Keep 25g starter
- Add 50g flour + 50g water
- More food = longer fermentation window = better rise
Fix 3: Use rye flour (temporary boost) Add 20-50% whole rye to feedings.
- Rye has extra nutrients yeast loves
- Noticeably speeds up fermentation
- Can transition back to all bread flour once strong
Fix 4: Feed twice daily
- Feed every 12 hours instead of every 24
- More frequent feedings build yeast population faster
- Takes 3-5 days to see improvement
Fix 5: Use filtered water
- Chlorine can slow fermentation
- Filtered or bottled water = slightly faster activity
Fix 6: Be patient (it’s not broken)
- Young starters (under 14 days old) are inherently slow
- This is normal
- Consistency matters more than speed at this stage
- See 72-hour starter guide for day-by-day timeline
Section 4: Mold or Contamination — Pink, Orange, or Fuzzy Growth
The Problem
You see visible mold or contamination. Color might be pink, orange, red, green, or fuzzy.
The Decision
Pink, orange, green, or fuzzy = DISCARD EVERYTHING. Start fresh.
This is contamination from environmental mold, not your sourdough culture. It won’t recover and can be harmful if you try to eat it.
White/tan fuzzy layer on top = Usually safe, just discard it This is often harmless mold or kahm yeast. Discard the top layer and feed normally. If the smell is pleasant (yeasty/tangy), you’re fine.
How to Avoid Contamination
- Use a clean jar (hot water only, no soap)
- Don’t cover with airtight lid (starter needs airflow)
- Use paper towel or loose cloth cover
- Keep away from other fermented foods
- Wash hands before handling
How to Start Fresh
See 72-hour sourdough starter guide for step-by-step instructions to build a new culture from scratch in 3 days.
Section 5: Bad Smell (Not Acetone) — Rotten or Off Odors
For a complete breakdown of every starter smell — what’s causing it, whether it’s normal, and exactly what to do — see the Sourdough Starter Smell Guide
The Problem
Your starter smells bad: rotten, vinegary, alcohol-like, or just “off.” But it’s not the chemical/nail-polish acetone smell (that’s a different issue).
What Different Smells Mean
Rotten eggs or sulfur smell
- Often appears days 2-4 of a brand new starter
- Caused by anaerobic bacteria
- Is it dangerous? No, it’s normal
- Fix: Keep feeding, it usually goes away by day 5-7
- Speed it up: Feed more frequently (every 12 hours instead of 24)
Vinegary/sour smell
- Means lactic acid bacteria are active (good sign!)
- Starter is just acidic, not damaged
- Is it bad? No, it’s healthy
- Normal stage: Days 3-7 of a new starter
Alcohol smell (not acetone)
- Sourdough loaf smells like alcohol — similar issue
- Usually from yeast fermentation
- Is it bad? No, yeast is producing ethanol (normal)
- Normal in: Starters with high activity or starters left unfed too long
Weird fruity or chemical smell (not acetone)
- Could be contamination
- Or could be wild yeasts producing esters (good)
- Test: Do you see bubbles? If yes, probably fine.
When to Worry
- Rotten smell + no bubbles + fuzzy mold = Discard, start fresh
- Rotten smell + lots of bubbles + no mold = Probably fine, keep feeding
- Smell improves after 3 days of consistent feeding = Definitely fine
Normal Smell Timeline for New Starters
- Days 1-2: Flour smell, neutral
- Days 2-4: Rotten eggs or sulfur (normal!)
- Days 5-7: Sour/vinegary (good sign)
- Days 7+: Pleasant yeasty/beer smell (ready to use)
For detailed smell guide, see sourdough starter smell guide.
Section 6: Cold Kitchen in Winter — Temperature Below 70°F
The Problem
It’s winter (or you live in a cold climate) and your starter has slowed to a crawl. It used to double in 6 hours; now it takes 18+ hours or doesn’t rise at all. Many sourdough bakers struggle in winter even when their starter looks active. Dough that rises in summer suddenly takes 10–14 hours or barely expands at all.
The recipe did not change — the temperature did.
Why Cold Stops Fermentation
Wild yeast is temperature-sensitive:
- Below 50°F: Dormant, almost no activity
- 50-65°F: Very slow (24+ hours to double)
- 65-70°F: Slow (12-18 hours to double)
- 70-75°F: Moderate (8-12 hours to double)
- 75-80°F: Ideal (4-8 hours to double)
- Above 85°F: Too fast, can overshoot
A 10°F difference can cut fermentation time in half. Sourdough microbes are happiest in what some bakers call the “Goldilocks Zone” — roughly 75-82°F — warm enough for vigorous activity but not so warm that the culture overshoots and turns overly acidic.
What cold temperature does to sourdough: Yeast produces gas slowly in cold environments while bacteria continue producing acid. This imbalance weakens gluten before the dough has enough internal pressure to expand. The result is dough that feels heavy and dense even after long fermentation.
Signs Your Kitchen Is Too Cold
- Dough unchanged after 4 hours
- Few bubbles during bulk fermentation
- Long fermentation but dense crumb
- Starter active but dough inactive
- Starter took 2x longer than summer to double
How to Fix Winter Fermentation Problems
Step 1: Confirm dough temperature (not room temperature) Dough often sits 5–8°F colder than the air. Use a thermometer inside the dough to measure accurately.
See the bulk fermentation temperature chart for exact timing by dough temp.
Step 2: Create a warmer fermentation environment Rather than increasing starter percentage (which speeds acid faster than gas), maintain a stable fermentation environment around 75°F.
Why? Adding more starter accelerates acid production faster than gas production. You end up with sour, dense bread instead of properly risen bread. Maintaining a stable fermentation environment around 75°F produces predictable results, which is why many bakers use a temperature-controlled proofing box during winter baking.
For full temperature ranges and timing charts, read the sourdough proofing temperature guide.
Winter-Specific Fixes
Fix 1: Warm the kitchen (if possible)
- Keep starter in warmest room
- Away from drafty windows/doors
- Near a heat source (but not directly on it)
Fix 2: DIY Proofing Box (BEST) The easiest solution. See DIY proofing box cooler method for step-by-step.
- Cost: $15-30
- Keeps starter at 75-80°F year-round
- Takes 10 minutes to set up
- Most reliable winter solution
Fix 3: Oven with Light On
- Put starter in oven
- Turn on light only (not heat)
- Check temperature first — some ovens run 85-90°F with light (too hot)
- Should be 75-80°F
- Don’t forget to remove before preheating oven!
Fix 4: Heating Pad
- Set on low (not high)
- Place oven-safe jar on top
- Monitor temperature (place thermometer inside)
- Risk: Can overheat if you’re not careful
Fix 5: Slow Feeding Schedule If you can’t warm it up, adjust your expectations:
- Feed once per day instead of twice
- Expect 12-18 hour rise times instead of 6-8
- This is fine for baking (just takes longer)
- Starter is still healthy
Fix 6: Preheat Oven Before Feeding
- Turn oven to lowest setting (150-200°F) for 2 minutes
- Turn off
- Place starter inside for 12 hours
- This creates a warm pocket for fermentation
- Repeat each feeding
Winter Sourdough Timeline
See winter sourdough guide for comprehensive strategies for cold-climate baking and dough fermentation adjustments.
Section 7: Recently Changed Routine — You Modified Something
The Problem
You made a change (new flour, new water, new schedule, new temperature) and now your starter isn’t rising.
Common Changes That Break Starters
Changed flour brand or type:
- Switched from bread flour to all-purpose
- Switched to bleached flour
- Switched to a new brand
- Added whole wheat or rye for first time
- Fix: Go back to original flour for 3 feedings, then gradually reintroduce new flour
Changed water source:
- Switched to tap water (especially if heavily chlorinated)
- Moved to new house with different water
- Fix: Use filtered water or let tap water sit 24 hours before using
Changed feeding schedule:
- Started feeding once daily instead of twice
- Started feeding at wildly different times each day
- Changed ratio dramatically
- Fix: Return to consistent schedule (same time each day), wait 5 days
Changed ratio:
- Went from 1:1:1 to 1:5:5 (overfeeding)
- Went from 1:1:1 to 1:0.5:0.5 (underfeeding)
- Fix: Use 1:2:2 ratio (middle ground) for 3 feedings, then adjust from there
Changed temperature:
- Moved starter to colder spot
- Stopped using warm place
- Fix: Return to warm spot or create warm environment
Discard pattern changed:
- Started discarding less (too much old starter remains)
- Started discarding more (not enough fresh culture remains)
- Fix: Keep 50g starter, discard rest, feed with 100g flour + 100g water
How to Recover from a Change
- Identify what you changed
- Revert that ONE change back to original
- Keep everything else the same
- Wait 3-5 days
- If still slow, go back to another original setting
- Make changes one at a time (not all at once)
Section 8: Brand New Starter — Less Than 7 Days Old
The Problem
You just created your starter. It’s been 2-3 days and you don’t see any activity.
This Is Normal
Brand new starters go through phases:
Days 1-2: Nothing
- You might see no bubbles, no smell change
- This is completely normal
- Yeast population is still establishing
Days 2-4: Rotten smell + maybe some bubbles
- Smells like rotten eggs or sulfur
- Don’t panic, this is normal
- Bad smell = sulfurous anaerobic bacteria (harmless)
- Bubbles = yeast beginning to colonize
Days 5-7: More consistent activity
- Smell improves
- More visible bubbles
- Some rise (maybe 50% in 24 hours)
Days 7-14: Strong yeast activity
- Doubles in 6-12 hours
- Smells pleasant (yeasty, beer-like)
- Ready for baking
Why New Starters Are Slow
- Yeast population is tiny (needs to grow)
- Bacteria is establishing a balance
- Takes 5-7 days for yeast to outcompete bacteria
One more thing worth knowing: 5-7 days gets you a starter that can reliably rise bread, but full flavor and rising strength continues developing well beyond that. It’s common for a starter to keep strengthening for 30 days, and some bakers say it takes a full year to reach its peak flavor and rising power. Don’t expect day-10 performance to match what the same starter can do six months from now — that’s normal maturation, not a problem to fix.
How to Speed Up a New Starter
- Use rye flour: Add 20% whole rye to your feedings. Rye has more wild yeast.
- Warm it: Keep at 75-80°F. Temperature drastically speeds up yeast growth.
- Feed twice daily: Every 12 hours. More food = more yeast growth.
- Use filtered water: Chlorine can slow yeast establishment.
- Be patient: You can’t rush yeast biology. 7-10 days is normal.
Don’t Give Up Too Soon
The critical mistake: Throwing out a starter at day 3-4 because it “isn’t working.” Most starters show signs of life by day 7-10. Give it 10 days before deciding it’s dead.
See 72-hour sourdough starter guide for detailed day-by-day expectations.
The Float Test — How to Know When It’s Ready
Once your starter is showing activity, use the float test to gauge if it’s strong enough for baking:
What to do:
- Feed your starter
- Wait 4-8 hours (until it peaks/looks bubbly on top)
- Fill a small bowl with water
- Drop a spoonful of starter into the water
- Observe:
- Floats = Ready to use (strong yeast)
- Sinks = Not ready yet (weak yeast, need more feedings)
Repeat the float test daily until it consistently floats. Once it floats 3 days in a row, you’re ready to bake.
See sourdough poke test visual guide for more tests.
What NOT to Do
❌ Don’t use a tight lid Starter needs airflow. Use cloth, paper towel, or loose cover only.
❌ Don’t refrigerate a weak starter Cold slows activity more. Wait until it’s reliably doubling.
❌ Don’t add yeast or yogurt This isn’t “sourdough” anymore and won’t have the same health benefits.
❌ Don’t boil water then cool it Boiling can create impurities. Just use filtered or bottled water.
❌ Don’t expect fast results in a cold kitchen Biology takes time. Consistency + warmth = success.
What Is the Liquid on Top of My Starter? (Hooch Explained)
If you see a gray, dark, or slightly brown liquid pooling on top of your starter, that is hooch — not a sign of death, and not dangerous. Hooch is ethyl alcohol, a natural byproduct of yeast fermentation. It forms when your starter has consumed all its available food and the yeast begins producing alcohol instead.
Hooch is your starter telling you it’s hungry, not dying. Here’s what to do:
- Pour off the hooch (or stir it back in — both are fine, though stirring it in makes the starter more sour).
- Discard down to 25–30g of starter.
- Feed at a 1:2:2 ratio — 25g starter, 50g flour, 50g warm water.
- Keep it warm (75–78°F / 24–26°C) and watch for activity over the next 4–8 hours.
A starter with hooch on top is almost always recoverable with 1–2 fresh feedings. The only time to be concerned is if the liquid is pink or reddish — that indicates contamination rather than hooch, and the starter should be discarded.
Hooch vs. water separation: A clear, watery liquid on top of an unfed starter is usually just water separation — completely harmless and not the same as hooch. Hooch only forms after the starter has risen and fully fallen back down. If your starter never rose, the liquid is likely water separating from the flour paste, not alcohol.
My Starter Was in the Fridge and Won’t Rise — How to Revive It
A refrigerated starter is not dead — it’s dormant. Cold temperatures slow yeast activity to almost zero, which is exactly the point of fridge storage. But a starter that’s been cold for weeks needs several feedings at room temperature before it returns to full strength. Here is the revival protocol:
| Day | Action | What to expect |
|---|---|---|
| Day 1 (morning) | Remove from fridge. Pour off any hooch. Discard to 25g. Feed 1:1:1 (25g flour + 25g warm water). Leave at 75°F. | Likely little or no activity. That’s normal. |
| Day 1 (evening) | If any rise occurred, discard and feed again 1:1:1. If no rise, just feed without discarding. | Possibly some small bubbles beginning. |
| Day 2 | Feed twice, 1:1:1, 12 hours apart. Use warm water each time. | Should see some rise — 25–50% is a good sign. |
| Day 3 | Feed twice, 1:2:2. Starter should be approaching full activity. | Should be doubling or close to it within 4–8 hours of feeding. |
| Day 4 | If doubling reliably within 6–8 hours, it’s ready to bake with. | Full activity restored. |
A starter stored in the fridge for a very long time (months) may need an extra day or two. As long as there is no pink or orange contamination and no true mould, it can almost always be revived. The gray liquid on top is hooch — see the section above. Simply pour it off and begin feeding.
Frequently Asked Questions
Q: How long until a starter is truly “dead”?
A: Very long. Even a starter neglected for 6 months in the fridge usually revives with 5-7 days of consistent feeding at room temperature. Only truly dead if: (1) you see mold, or (2) after 10 days of warm feeding + good water + good flour, you see absolutely zero activity.
Q: Can I use a slow starter for baking?
A: Yes, it just takes longer. If it takes 12 hours to peak instead of 6, you’ll need to adjust your baking schedule, but the bread will work fine.
Q: My starter rose overnight but fell by morning. Is it dead?
A: No, it peaked and collapsed from over-fermentation. It ate all its food. This means it’s actually strong. Feed it more frequently (every 8 hours) so it doesn’t starve.
Q: Should I throw away my starter and start over?
A: Almost never. Only if: Pink/orange/fuzzy mold, or after 14 days of optimal care (warm, good water, good flour, consistent feeding) you see absolutely no activity.
Q: Why is my starter in the fridge not rising?
A: Cold temperatures (around 40°F) slow fermentation dramatically. Starters in the fridge should be fed weekly, not daily. They’ll show activity when warmed to room temperature.
Related Starter Problem Guides
Specific starter issues:
- Sourdough Starter Not Doubling — Takes forever to double
- How to Strengthen a Weak Sourdough Starter — Already doubling but weak
- Sourdough Starter Smells Like Acetone Fix — Chemical smell = starvation
- Sourdough Starter Smell Guide — What different smells mean
- Why Sourdough Discard Has Liquid (Hooch) — Dark liquid on top
Building a strong starter:
- 72-Hour Sourdough Starter — How to create one from scratch
- How to Feed and Maintain Sourdough Starter — Complete feeding guide
- Sourdough Starter Feeding Ratio Chart — All ratios at a glance
- How to Keep Sourdough Starter Warm — Winter care guide
- Winter Sourdough Guide — Cold climate strategies
Reviving old starters:
- Revive Dried Sourdough Starter — Dried or neglected starters
- How to Strengthen Weak Sourdough Starter — Detailed revival protocol
Equipment and setup:
- DIY Proofing Box Cooler Method — Keep starter warm year-round
- Best Proofing Boxes for Sourdough — If you want to buy one
Get Expert Help
Still can’t figure out what’s wrong?
Download the free Sourdough Troubleshooting Guide — 38-page PDF with visual diagnostics, photo references for every starter stage, and a complete revival protocol.