🌡️ Jump to Your Temperature
This guide covers bulk fermentation at all temperatures. For a deep dive specific to your kitchen temperature, see:
- Bulk Fermentation at 70°F — Cool kitchen, overnight bulk, maximum flavor development
- Bulk Fermentation at 75°F — Ideal temperature, 4–6 hours, most reliable timing
- Bulk Fermentation at 80°F — Warm kitchen, fast fermentation, watch closely
- Bulk Fermentation with Whole Wheat — 20–40% faster than white flour
- Bulk Fermentation with High Hydration — 75–80%+ water content adjustments
- Bulk Fermentation for Beginners — Simplified timing, visual cues only
Not sure which page to use? Start with the temperature closest to your kitchen, or use the master chart below for all temperatures at a glance.
Quick Answer:
At 75°F (24°C), bulk fermentation takes 4–6 hours at a 30–50% rise. At 65°F allow 8–12 hours and 75–100% rise. At 80°F shape at 25–30% rise after 3–4 hours. Jump to Full Chart ↓
🛑 The 10-Second Decision Guide
- If your dough is at 78°F+: Shape it now if it has risen even 25%. Don’t wait for a double.
- If your dough is at 68°F or below: Leave it alone. It likely needs 2–3 more hours than you think.
- If it’s jiggly but hasn’t risen much: It’s building strength, not gas. Check your starter’s health.
- If it’s sticky and smells like vinegar: You’ve missed the window. See our Rescue Section.
For a full breakdown of timing by temperature, see our dedicated guide on how long bulk fermentation takes.
Key Takeaways
- ✓ Bulk fermentation ends at 30–100% rise depending on dough temperature — not when it doubles.
- ✓ At 75°F with 20% starter, expect 4–6 hours.
- ✓ Every 10°F temperature drop roughly doubles fermentation time.
- ✓ The windowpane test measures gluten strength only — it does not confirm fermentation is done.
- ✓ Warmer dough needs a lower rise target because protease enzyme accelerates gluten breakdown above 80°F.
Knowing when bulk fermentation is actually done is a skill in itself — and it has nothing to do with the clock. Your dough gives you 6 clear signals when it’s ready to shape.
📋 Read the Dough: Learn to spot the jiggle, the dome, the bubbles, and the pull test. Full visual breakdown here: 7 Signs Bulk Fermentation Is Done →
What Is Bulk Fermentation?
Bulk fermentation — also called the bulk rise or first rise — is the stage that begins the moment you add your starter to the flour and water. It ends when you tip the dough out to pre-shape. Everything that happens in between is bulk fermentation.
During this period three things happen simultaneously:
- Wild yeast produces CO₂, inflating the dough and creating an open, airy crumb
- Lactic acid bacteria produce acids that develop the complex sour flavor and strengthen gluten
- Enzymes break down starches into sugars that the yeast and bacteria feed on
This is the most important stage in sourdough baking. Get it right and the rest follows. Get it wrong and no amount of good shaping or baking technique can rescue the loaf. Dense bread, gummy crumb, flat loaves, and poor oven spring are almost always caused by bulk fermentation that went too short or too long.
Cold bulk fermentation is one of the most misunderstood techniques in sourdough — and it’s completely different from cold proofing. If you’ve ever put unshaped dough in the fridge overnight and wondered what to do next, this is for you.
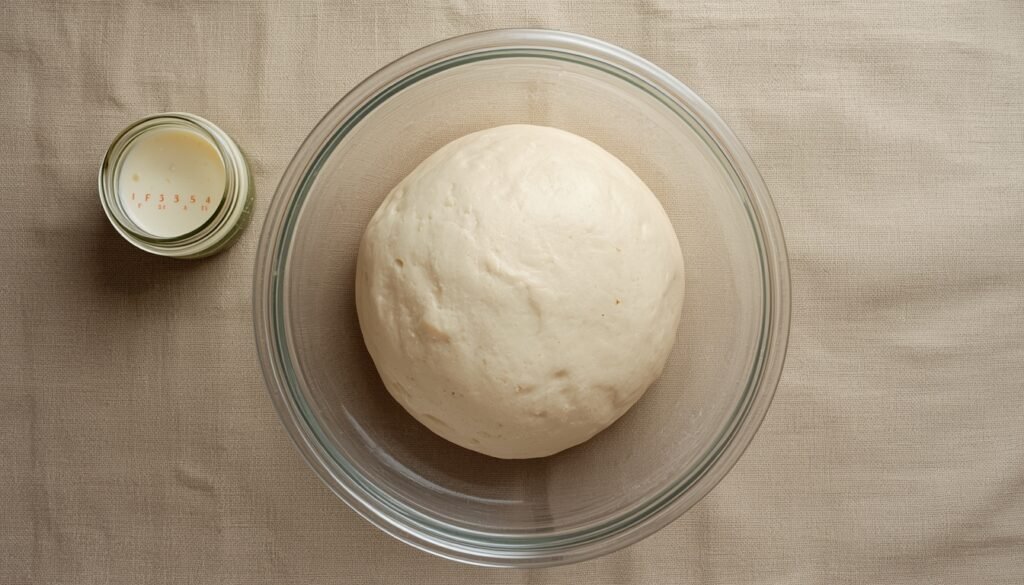
🧊 Baking Tomorrow? Learn how cold bulk works, how much rise to target before refrigerating, and how to shape cold dough: Cold Bulk Fermentation Guide →
Dough temperature vs. kitchen air temperature: These are not the same number. Your dough temperature after mixing depends on flour temperature, water temperature, and friction from mixing — not the air in your kitchen. Two kitchens both at 70°F can produce dough at 68°F and 78°F depending on water temperature. Always measure dough temperature with an instant-read thermometer inserted into the center of the mass right after mixing. That number — not the room thermometer — is what drives the chart below.
Sourdough Bulk Fermentation Temperature Chart
This is the core bulk fermentation chart every sourdough baker needs. It maps dough temperature to fermentation time and target rise percentage so you know the ideal moment to shape.
| Dough Temp | Est. Bulk Time | Target Rise Before Shaping | What to Look For |
|---|---|---|---|
| 65°F (18°C) | 8–12 Hours | 75% – 100% Rise | Doubled in size, domed surface, bubbles throughout |
| 70°F (21°C) | 6–9 Hours | 50% – 75% Rise | Significant growth, jiggly when moved, bubbles on sides |
| 75°F (24°C) | 4–6 Hours | 30% – 50% Rise | Puffy and domed, passes windowpane test |
| 80°F (27°C) | 3–4 Hours | 25% – 30% Rise | Slight growth, many bubbles visible, dough feels airy |
| 85°F (29°C) | 2–3 Hours | 20% – 25% Rise | Move fast — fermentation is aggressive at this temp |
Sourdough Archive — Free to save & share
📊 Bulk Fermentation Quick-Reference Chart
18°C
21°C
24°C
27°C
29°C
Assumes 20% starter at peak. Times shift with flour type & starter strength. © sourdougharchive.com
🌡️ The “Thermal Momentum” Rule
Remember: Dough does not stop fermenting the moment you put it in the fridge.
- 80°F Dough: Takes ~3 hours to reach fridge temp (40°F). It will continue to expand by another 15-20% inside the fridge.
- 65°F Dough: Takes ~1 hour to reach fridge temp. It will only expand by another 5%.
The Loophole: This is why we stop the bulk fermentation of warm dough so much earlier. We are accounting for the “carry-over” fermentation that happens while the dough is cooling down.
Why Warmer Dough Needs Less Rise
One of the biggest mistakes beginners make is focusing only on time instead of temperature and percentage rise. The reason is Thermal Momentum.
Warm dough ferments faster and retains heat longer. Even after shaping and placing the dough into the refrigerator for cold proofing, fermentation continues aggressively for several hours while the core of the dough cools down.
- Cool dough (65°F): Must rise more (75–100%) to build enough gas and structure because it stops fermenting almost immediately once it hits the cold air of the fridge.
- Moderate dough (70–75°F): Usually needs a 40–60% rise before shaping to achieve a balanced crumb.
- Warm dough (80°F): Only needs a 25–30% rise because it will continue to expand significantly as it slowly cools in the refrigerator.
Why your dough feels “Sticky” vs. “Hydrated”: Many bakers confuse high hydration with over-fermentation. If your dough was easy to handle during stretch and folds but became a sticky, unmanageable mess by the end of bulk, you didn’t add too much water—you waited too long. The Protease enzyme has begun eating your gluten. If this happens, reduce your rise target by 10% on your next bake.
Stopping bulk fermentation earlier at higher temperatures prevents overproofing and gluten breakdown, which causes loaves to bake flat.
Bulk Fermentation Chart by Starter Percentage
The amount of starter in your recipe directly controls how fast bulk fermentation moves. This chart assumes a dough temperature of 75°F (24°C). Adjust time up or down based on the temperature chart above.
| Starter % | Est. Bulk Time at 75°F | Notes |
|---|---|---|
| 5% | 8–12 hours | Very slow — used for overnight room temp bulk fermentation |
| 10% | 6–8 hours | Standard for most long fermentation recipes |
| 20% | 4–6 hours | Most common ratio — reliable and predictable |
| 25% | 3–5 hours | Faster — good for same-day bakes |
| 30%+ | 2–4 hours | Very fast — monitor closely to avoid overfermentation |
If your bulk fermentation is consistently taking longer than these ranges, the problem is likely your starter rather than your technique. A starter that isn’t rising properly won’t drive bulk fermentation efficiently regardless of temperature.
Bulk Fermentation Chart by Flour Type
Different flours ferment at dramatically different speeds due to their mineral content and enzyme activity. This chart shows how flour type modifies your bulk fermentation timing at 75°F with 20% starter.
| Flour Type | Speed vs. White Flour | Adjusted Bulk Time | Notes |
|---|---|---|---|
| White bread flour | Baseline | 4–6 hours | Predictable, forgiving, most recipes are calibrated to this |
| All-purpose flour | Slightly slower | 5–7 hours | Lower protein = slightly slower fermentation |
| Whole wheat (10–20%) | 20–30% faster | 3–5 hours | Bran feeds bacteria; watch carefully after 3 hours |
| Whole wheat (50%+) | 40–50% faster | 2–4 hours | Aggressive fermentation — use cooler water or less starter |
| Rye (10–20%) | 30–40% faster | 2.5–4 hours | Even small amounts of rye accelerate fermentation significantly |
| Spelt | Slightly faster | 3.5–5 hours | More extensible gluten — don’t over-ferment or it collapses |
| Einkorn | Faster + fragile | 2–3.5 hours | Very weak gluten — stop bulk earlier than you think |
Seasonal Bulk Fermentation Adjustment Chart
Your kitchen temperature changes with the seasons, which means your bulk fermentation timing changes too — even if you follow the same recipe exactly. This chart gives you a quick seasonal reference.
| Season / Kitchen Condition | Typical Dough Temp | Bulk Time Adjustment | Key Strategy |
|---|---|---|---|
| Summer (hot kitchen, 80°F+) | 78–85°F | 30–50% shorter | Use cold water; shape at 20–25% rise; bake sooner |
| Spring / Fall (ideal, 68–72°F) | 72–76°F | Standard chart times | Follow the temperature chart above directly |
| Winter (cool kitchen, 62–68°F) | 65–70°F | 30–50% longer | Use warm water; proof in oven with light on; allow full rise |
| Very cold kitchen (below 62°F) | Below 65°F | Up to 2x longer | Consider overnight bulk at room temp with reduced starter (5–10%) |
If your sourdough consistently fails in winter, the issue is almost always bulk fermentation being cut short because the kitchen is too cold. Our guide on sourdough not rising in winter covers this in detail.
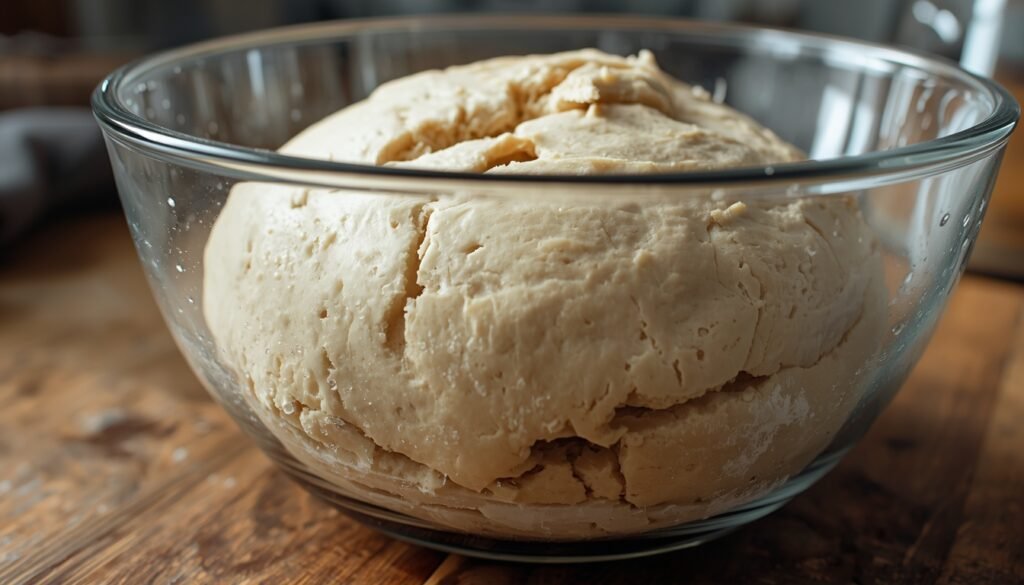
Desired Dough Temperature (DDT): How to Hit Your Target Every Time
The charts above tell you what to do once you have a dough temperature — but how do you control that temperature before mixing? That is what Desired Dough Temperature (DDT) is for. DDT is the professional baker’s method for calculating the exact water temperature needed to hit your target dough temperature every single bake, regardless of your flour temperature or room temperature.
The DDT Formula:
Water Temp = (Target Dough Temp × 3) − Flour Temp − Room Temp − Friction Factor
The friction factor accounts for heat generated during mixing: 0°F for hand mixing, 2–4°F for a stand mixer on low, 4–6°F for a stand mixer on high.
Example: You want a 75°F dough. Your flour is 68°F, your kitchen is 70°F, and you’re hand mixing (friction = 0).
Water Temp = (75 × 3) − 68 − 70 − 0 = 87°F
Using DDT before every bake means you arrive at bulk fermentation already knowing exactly where on the temperature chart you are — rather than measuring your dough and hoping it landed in a useful range. For a deeper dive into how dough temperature affects every stage of fermentation, see our guide on how dough temperature affects fermentation.
Stretch and Folds During Bulk Fermentation
Stretch and folds happen during bulk fermentation — they are not a separate step. The moment you add your starter to the dough, bulk fermentation begins, and stretch and fold sets strengthen the gluten network while fermentation is actively progressing.
A standard schedule at 75°F with 20% starter looks like this:
| Time Into Bulk | Action | Notes |
|---|---|---|
| 0 min | Mix starter in, begin bulk fermentation | Cover and rest |
| 30 min | Set 1: 4 stretch and folds | Rotate bowl 90° between each fold |
| 60 min | Set 2: 4 stretch and folds | Dough should feel more elastic |
| 90 min | Set 3: 4 stretch and folds | Dough tightening noticeably |
| 120 min | Set 4 (optional): 4 stretch and folds | Skip if dough is already taut and smooth |
| 120–360 min | Rest undisturbed | Monitor rise percentage until target is reached |
After the folding sets are complete, do not disturb the dough. Touching or folding it again can deflate the gas bubbles that have been building. At warmer temperatures (80°F+), reduce to 2–3 sets and shorten rest intervals to 20 minutes to avoid over-developing in the early stage. For a deeper breakdown of technique, see our stretch and fold schedule for beginners.
The Windowpane Test: What It Does (and Doesn’t) Tell You
The windowpane test is widely misunderstood as a way to confirm bulk fermentation is done. It is not. It measures one thing only: gluten development.
To perform the test, take a small piece of dough and stretch it slowly between your fingers. If it stretches thin enough to let light through without tearing, gluten development is sufficient. If it tears immediately, the gluten network needs more time or more folds.
| What the Windowpane Test Tells You | What It Does NOT Tell You |
|---|---|
| Gluten is strong enough to trap gas | Whether fermentation is complete |
| Dough is ready for shaping (structurally) | Whether rise % target has been reached |
| Folding sets have been effective | Whether dough is underproofed or overproofed |
A dough can pass the windowpane test perfectly at hour two and still need another three or four hours of bulk fermentation. These are independent measurements. Always use the temperature chart and rise percentage as your primary guide — the windowpane test is a secondary confirmation of gluten strength, not a signal to stop.
Best Container for Bulk Fermentation (And How to Size It)
The right container makes measuring percentage rise accurate — and that accuracy is what the chart above depends on. The two most important qualities are straight walls and milliliter markings.
The container you use during bulk fermentation matters more than most bakers realize. You need to be able to see the rise, measure it accurately, and hold a consistent temperature throughout the process. A clear, straight-sided container with volume markings does all three. A ceramic bowl does none.
For a full breakdown of which containers actually work — glass vs. plastic, which sizes to use, and the exact picks serious home bakers rely on — see our guide: Best Bulk Fermentation Container for Sourdough
Bowls and irregular containers make it nearly impossible to visually track rise percentage accurately. A straight-walled container with markings lets you track the exact rise at a glance without disturbing the dough.
| Container Type | Accuracy | Notes |
|---|---|---|
| Straight-walled tub with ml markings | Best | Cambro or similar deli containers are ideal |
| Straight-walled tub without markings | Good | Add your own rubber band at start, another at target % |
| Wide ceramic or glass bowl | Poor | Volume hard to judge accurately due to curved walls |
| Mixing bowl (no markings) | Unreliable | Eyeballing % rise in a bowl is nearly impossible |
How to size your container: Multiply your recipe’s total flour weight in grams by 1.5 — this gives the approximate starting volume in milliliters of your mixed dough. Then choose a container with at least double that capacity to allow room for the full rise without overflow. For example, a 1,000g flour recipe starts at roughly 1,500ml, so you need a container that holds at least 3,000ml.
If you don’t have a straight-walled container with markings, use the aliquot jar method in a small straight-sided jar alongside your main dough. It gives the same precision without needing to upgrade your primary vessel.
The Aliquot Jar Method (Tracking Bulk Fermentation)
Many experienced bakers use an aliquot jar to track the exact percentage rise of sourdough dough during bulk fermentation without disturbing the main batch. See our full aliquot jar guide for a step-by-step walkthrough with photos.
- Take a Sample: Immediately after mixing, place a small 20g piece of dough into a small, straight-sided jar.
- Mark the Start: Use a rubber band or marker to indicate the starting level of the dough.
- Watch the Rise: Because the sample ferments at the same rate as the main dough, it acts as a “gas gauge.” When the aliquot jar shows the Target Rise % from the chart above, your main batch is ready to shape.
Using an aliquot jar helps bakers avoid both underproofed and overproofed sourdough by providing a clear visual indicator of fermentation progress that doesn’t require guessing from the main dough.
How to Know When Bulk Fermentation Is Done: 6 Signs
Beyond the chart, your dough will tell you when it’s ready. Check for all of these signs together — one sign alone is not reliable enough to call it done.
| Sign | What It Looks Like | What It Means |
|---|---|---|
| Volume increase | Dough has risen 30–100% depending on temp (see chart) | Yeast has produced enough CO₂ gas |
| Domed surface | Top of dough is rounded, not flat or sunken | Active fermentation still present — good timing |
| Bubbles on sides | Small bubbles visible through the bowl sides | Fermentation is active throughout the dough mass |
| Jiggle test | Dough wobbles like set jello when you shake the bowl | Gluten is developed and gas is trapped — not stiff, not sloshing |
| Passes windowpane test | Small piece stretches thin without tearing | Gluten development is sufficient for shaping |
| Smooth surface | Dough top looks smooth, not shaggy or wet | Gluten network has organized properly |
For a complete visual walkthrough of every sign to look for — including what over-fermented and under-fermented dough looks like — see our dedicated guide on signs bulk fermentation is done.
The jiggle test explained: Gently shake the bowl side to side. Properly fermented dough wobbles as one cohesive mass — like set jello. Underfermented dough feels stiff and barely moves. Overfermented dough sloshes and feels liquid, with the surface rippling independently of the mass underneath. The jiggle test is one of the fastest and most reliable checks you can do without disturbing the dough.
How long is too long for bulk fermentation?
Bulk fermentation is “too long” when the dough begins to lose its ability to hold tension. Visually, this looks like the surface going from domed and taut to flat or pitted. If the dough smells sharply of alcohol or tears when you try to pre-shape it, you have exceeded the bulk fermentation window. At 75°F (24°C), this usually happens after the 7-hour mark. Signs bulk fermentation has gone too far:
- Dough surface looks flat or has started to collapse inward
- Large, irregular bubbles on the surface (not small, even ones)
- Dough feels slack, sticky, and won’t hold tension when you try to shape it
- Strong alcohol or acetone smell — a sign the yeast has exhausted available sugars
How to Stop Overproofing Before It Happens: A Pre-Bake Checklist
Overproofing during bulk fermentation is the most common — and most damaging — mistake in sourdough. The good news is that it’s almost entirely preventable with a few habits in place before you even start mixing.
- Measure your dough temperature immediately after mixing. Don’t rely on room temperature. Use an instant-read thermometer and find the correct target rise % from the chart above before bulk even starts.
- Set up your aliquot jar at the beginning. Don’t try to assess rise percentage from the main bowl by eye — it’s too easy to misjudge. The aliquot jar gives you an objective read.
- Set a timer for 30-minute check-ins. During the second half of bulk, fermentation accelerates. Dough that was 20% risen can reach 50% in under an hour at 78°F. Don’t leave it unattended.
- Stop before the dough looks “obviously ready.” If the dough looks exactly as done as you expect, you may already be 20–30 minutes past the ideal window. Especially at warmer temperatures, shape slightly earlier than feels natural.
- Know all 7 readiness signs. Volume rise is the most objective measure, but the dome, jiggle, bubbles, and surface texture all matter too. See our full guide on signs bulk fermentation is done for the complete checklist.
- Never use the oven proof setting. Most oven proof settings run at 100–110°F — far too hot. Use the oven with just the light on (typically 75–80°F) or a dedicated proofing box.
- Use cooler water in summer. If your kitchen is above 75°F, use cold or ice water when mixing to bring your initial dough temperature down to the 72–75°F range.
Same-Day vs. Overnight Bulk Fermentation
Bulk fermentation can be done either at room temperature (same-day) or overnight in the refrigerator. Each approach produces different results and suits different schedules.
| Same-Day Bulk (Room Temp) | Overnight Bulk (Fridge) | |
|---|---|---|
| Temperature | 68–80°F | 38–40°F |
| Time | 3–8 hours | 8–16 hours |
| Starter % | 15–25% | 5–10% |
| Flavor | Milder, less sour | More complex, tangier |
| Schedule | Mix in morning, bake same evening | Mix at night, shape and bake next day |
| Risk | Easy to over-ferment if kitchen is warm | Less forgiving if under-developed before fridge |
Important note on overnight bulk fermentation: If you choose to bulk ferment in the fridge overnight, use a significantly lower starter percentage (5–10%) and make sure your dough has at least 20–30 minutes of active fermentation at room temperature before going into the cold. Putting dough straight into the fridge with 20% starter will result in very little fermentation activity overnight.
Factors That Influence the Chart
While temperature is the primary driver of bulk fermentation timing, other variables can shift your results significantly:
- Starter Strength: If your sourdough starter smells like acetone, the yeast may be weakened, and fermentation will take much longer than the chart predicts.
- Flour Type: Whole wheat and rye flours contain more minerals and ferment significantly faster than white bread flour (see flour chart above).
- Inclusions: Adding sugar or fats (brioche) slows fermentation, while honey or fruit can accelerate it.
- Starter Ratio: A recipe using 20% starter will move faster than one using only 10% starter (see starter percentage chart above).
- Hydration: Higher hydration doughs (80%+) ferment slightly faster than stiffer doughs because water acts as a medium for yeast and bacterial activity. See our sourdough hydration guide for how to adjust water levels to control fermentation speed.
- Salt: Salt slows fermentation. Make sure salt is properly incorporated — pockets of salt against the starter can kill yeast locally and cause uneven fermentation.
- Autolyse: If you use an autolyse step before adding your starter, the dough begins enzymatic activity earlier — factor this into your total bulk time.
Bulk Fermentation vs. Proofing: What’s the Difference?
Bulk fermentation and proofing are two separate fermentation stages and they serve different purposes. Confusing them is one of the most common reasons sourdough fails.
| Bulk Fermentation | Final Proof (Cold Proof) | |
|---|---|---|
| When | After mixing, before shaping | After shaping, before baking |
| Purpose | Build flavor, develop gluten, create gas | Final rise, improve flavor, firm up for scoring |
| Temperature | Room temperature (65–80°F) | Refrigerator (37–40°F) |
| Duration | 3–12 hours depending on temp | 12–48 hours |
| Can you skip it? | No — bulk fermentation is essential | Optional, but highly recommended |
For a complete guide to the cold proofing stage that follows bulk fermentation, see our guide on how long you can cold proof sourdough.
Frequently Asked Questions
Without a thermometer, look for three signs together: a domed surface, small uniform bubbles on the container sides, and dough that wobbles as one cohesive mass when you shake the bowl. If all three are present, your dough is likely ready or very close. This multi-sign method is less precise than using a thermometer and chart, but it gives you a reliable read when tools aren’t available. If the dough feels stiff, hasn’t changed much in volume, or won’t jiggle at all, it needs more time.
Yes — stretch and folds happen during bulk fermentation, not after it. Bulk fermentation starts the moment the starter is added and ends when you begin final shaping. Stretch and fold sets strengthen the gluten network while fermentation is actively progressing. See our stretch and fold schedule for beginners for timing guidance.
Generally, no — bulk fermentation requires active yeast activity that slows dramatically in the refrigerator. The fridge is best reserved for the final cold proofing stage after shaping. If you must slow bulk fermentation, a very reduced starter (5%) and a brief 30-minute room temperature start before refrigerating can work, but it is not standard practice.
Slow bulk fermentation is almost always caused by a weak starter, dough temperature below 68°F, or too little starter in the recipe. Check that your starter doubles reliably within 4–6 hours of feeding before using it. If your starter is sluggish, no chart can compensate — the yeast colony simply isn’t strong enough to ferment the dough efficiently.
Use ice water when mixing to bring dough temperature down to the 75°F range before bulk fermentation begins. Alternatively, reduce your starter to 10–15% and shape at a low rise percentage (20–25%) to avoid over-fermentation. Monitor the dough every 30–45 minutes rather than relying on time estimates. Baking in summer? See our guide to bulk fermentation in a hot kitchen — including starter adjustments, water temperature, and when to move to the fridge.
Bulk fermentation is done when the dough has risen 30–100% (depending on temperature), shows a domed surface, has bubbles visible on the container sides, and jiggles slightly when the bowl is moved. The windowpane test — stretching a small piece thin without tearing — confirms gluten development is sufficient for shaping.
At 75°F (24°C), aim for a 30–50% rise. At 65°F (18°C), allow 75–100%. At 80°F (27°C), shape at just 25–30%. The rise target decreases as temperature increases because warmer dough carries more fermentation momentum into the cold proof and continues expanding in the fridge after shaping.
No — enriched doughs with butter, eggs, sugar, or milk ferment 30–50% more slowly than lean sourdough because fats and sugars inhibit yeast activity. For enriched doughs like sourdough brioche, use visual signs rather than the time or rise percentage targets in this chart.
No — sourdough does not need to double during bulk fermentation, and waiting for it to do so is the most common cause of overproofed dough. At 75°F, shape at 30–50% rise. At 80°F, shape at just 25–30%. Only at 65°F is a full double (100% rise) appropriate.
No — most oven proof settings reach 100–110°F, which is far too hot for bulk fermentation. Never let dough temperature exceed 90°F or protease enzyme will destroy the gluten network within 30–60 minutes. Instead, use the oven with just the light on (no heat), which typically holds 75–80°F.
Use a straight-walled container with milliliter markings and note the starting volume immediately after mixing. The formula is: (Current Volume − Starting Volume) ÷ Starting Volume × 100 = % Rise. Dough starting at 1,500ml that rises to 2,250ml has risen exactly 50%. Eyeballing rise in a bowl is unreliable — a straight-walled container is essential.
A straight-walled plastic tub with milliliter markings — such as a Cambro deli container — is the best container for bulk fermentation. Straight walls make rise percentage easy to track and clear sides let you see bubbles forming. Size it by multiplying your flour weight in grams by 1.5 to get your starting volume in ml, then choose a container with at least double that capacity.
The Protease Rule: Why Overproofing Destroys Dough
The charts above tell you when to stop bulk fermentation. This section tells you why the timing matters so much — and what actually goes wrong when you push too far.
During bulk fermentation, lactic acid bacteria produce organic acids that build flavor. But those same acids gradually stimulate a naturally occurring enzyme called protease. Protease literally eats gluten — it breaks down the protein network responsible for trapping gas and holding the dough’s structure.
At normal fermentation temperatures (65–78°F), protease activity is slow and manageable. But as dough temperature approaches 90°F (32°C), protease becomes hyperactive. Gluten degrades rapidly. The dough goes from perfect to unsalvageable in a matter of 30–60 minutes — and no amount of shaping technique will fix it.
This is the real reason the chart says to shape warmer dough at a lower percentage rise. It’s not just about thermal momentum — it’s about getting the dough into the fridge before protease has time to destroy the gluten structure you’ve spent hours building.
The practical rule: Never let dough temperature exceed 85°F during bulk fermentation. Above that, check every 20 minutes. Above 90°F, shape immediately regardless of rise percentage.
Does Sourdough Need to Double During Bulk Fermentation?
No — and this is one of the most damaging myths in sourdough baking.
Many beginner recipes say “wait for your dough to double.” This is the single most common reason people over-ferment and end up with flat, sticky, unshapeable dough. The target rise depends entirely on dough temperature — and at warmer temperatures, waiting for a full double will always produce an overproofed loaf.
- At 65°F: Doubling (100% rise) is appropriate and expected.
- At 75°F: Shape at 30–50% rise — well before doubling.
- At 80°F: Shape at 25–30% rise. Waiting to double will almost certainly destroy the loaf.
Use the temperature chart at the top of this guide as your reference, not the “did it double?” visual check. The aliquot jar method makes this exact measurement simple without disturbing your main dough.
High Altitude Bulk Fermentation Adjustments
If you bake above 3,000 feet, the charts above will consistently produce overfermented dough — and you may not understand why until you know about altitude’s effect on fermentation.
At high altitude, lower atmospheric pressure allows the gases produced by yeast to expand faster than they do at sea level. The yeast activity itself isn’t faster, but the physical expansion of CO2 in the dough is accelerated. The result: your dough appears more risen than it actually is fermented — and if you’re using rise percentage as your guide, you’ll overshoot.
| Altitude | Bulk Time Adjustment | Key Strategies |
|---|---|---|
| Sea level – 2,000 ft | Use chart as written | Standard chart applies |
| 2,000 – 4,000 ft | 10–15% shorter bulk | Watch dough closely after 75% of estimated time |
| 4,000 – 6,000 ft | 20–30% shorter bulk | Reduce starter to 15%; shape earlier than you think |
| Above 6,000 ft | 30–40% shorter bulk | Use cooler water; reduce starter to 10%; monitor every 30 min |
Additional high altitude adjustments: Reduce hydration slightly (lower air pressure causes flour to absorb water faster, making high-hydration doughs harder to handle). Use a lower starter percentage to slow fermentation enough to control it. And always use the aliquot jar — visual assessment of the main dough mass is even less reliable at altitude because gas expansion is uneven.
If your bulk fermentation is consistently running long, see our troubleshooting guide: why is my bulk fermentation so slow?
What to Do If You’ve Over-Fermented Your Dough
If your bulk fermentation has gone too far, your options depend on how overproofed the dough is. See our full guide on how to fix overproofed sourdough for step-by-step recovery options, but here is the quick triage:
- Slightly over-fermented (dough is soft but still holds some shape): Shape immediately and cold proof for the minimum time (8–12 hours). Bake straight from the fridge. The loaf will be denser than ideal but still edible.
- Moderately over-fermented (dough is slack and sticky, holds shape poorly): Shape into a loaf pan rather than a freestanding boule. The sides of the pan will support the structure the gluten can no longer provide. Bake immediately without a cold proof.
- Severely over-fermented (dough collapses and won’t hold any shape): Don’t try to bake it as bread. Spread it on an oiled sheet pan, dimple it all over, add flaky salt and olive oil, and bake as focaccia at 450°F for 20–25 minutes. See our guide on overproofed sourdough focaccia for the full rescue method.
- Went past your window? See our guide on what happens if bulk fermentation goes too long — including how to tell how bad it is and what you can still do.
The most important rule: once dough is over-fermented, more time will only make it worse. Act immediately.
Related Sourdough Guides
Understanding bulk fermentation works best alongside these related guides:
- Bulk fermentation vs proofing — understand the difference between these two essential stages
- How long does bulk fermentation take — exact time guide by dough temperature so you never guess again
- How long can you cold proof sourdough — what happens after bulk fermentation is complete
- Underproofed vs overproofed sourdough — how to diagnose and fix fermentation problems
- How to use an aliquot jar — the most accurate way to track bulk fermentation rise
- Stretch and fold schedule for beginners — timing and technique during bulk
- Sourdough proofing time chart — the companion chart for the cold proofing stage
- How to fix overproofed sourdough — rescue methods when bulk goes too far
- Sourdough not rising in winter — seasonal adjustments when your kitchen is cold
- Best final proof temperature for sourdough — temperature guide for the proofing stage after shaping
- How dough temperature affects fermentation — deep dive into desired dough temperature
- Cold ferment sourdough — how to bulk ferment overnight in the fridge
- Fermentation guide — complete overview of sourdough fermentation
- Signs bulk fermentation is done — 7 visual cues to look for before you shape
Final Thoughts
A sourdough bulk fermentation chart is only as useful as your ability to read your dough alongside it. Temperature and percentage rise are your two primary guides — time is just a rough estimate that changes with every variable in your kitchen.
For bakers who want to fit sourdough into a busy schedule, see our complete guide to overnight bulk fermentation — including the right starter percentage and whether to use the counter or fridge.
Use the charts above as your starting framework, track your dough with an aliquot jar, and pay attention to the visual signs. After a few bakes, you will stop needing the chart entirely because you will know what your dough looks and feels like when it is ready.
After bulk fermentation, the dough usually enters the refrigerator for the final rise. See our full guide on how long you can cold proof sourdough to understand how cold fermentation affects flavor and structure.