
Most sourdough failures happen during bulk fermentation — and a surprising number of those failures come down to one overlooked variable: the container you ferment in.
If you can’t see your dough rising, or can’t accurately measure how much it has risen, you’re guessing. And guessing during bulk is the fastest route to dense, gummy, or overproofed bread.
This guide covers exactly what to look for in a bulk fermentation container, which materials and shapes work best, and the specific options serious home bakers rely on. For a full timing reference by temperature, see our Sourdough Bulk Fermentation Chart.
🧮 Calculate Your Bulk Fermentation Time
Calculate your bulk fermentation time so you know how long to monitor your container:
Accounts for temperature, starter %, hydration, and flour type
Why Your Container Choice Actually Matters
Bulk fermentation is the stage where your dough makes its largest transformation. Gluten tightens, gas builds, and flavor develops. Knowing when to stop is everything — but you can only know that if you can read the dough clearly.
The right container does three jobs:
- Shows you the rise — transparency matters
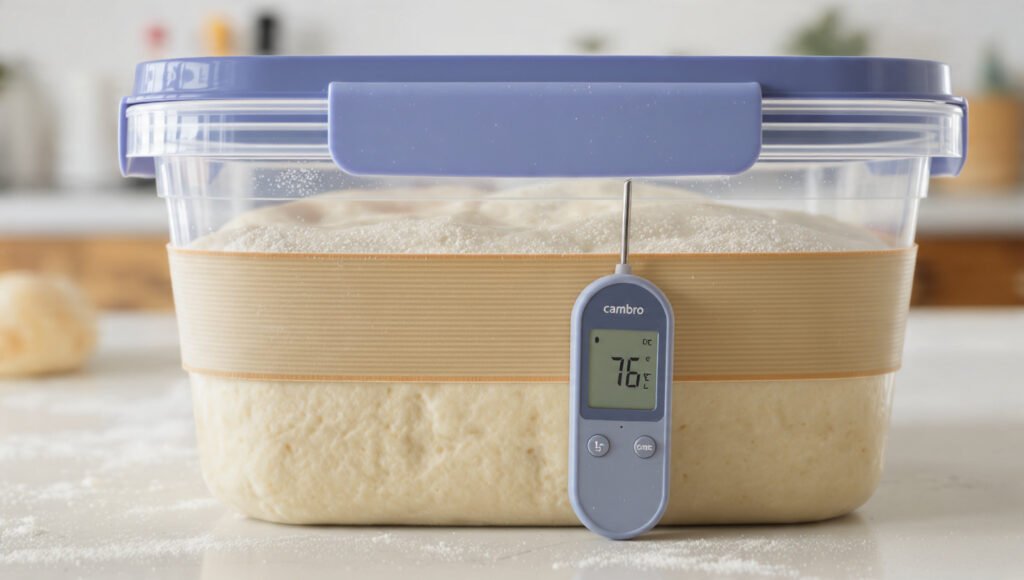
- Lets you measure the rise accurately — straight sides and volume markers matter
- Keeps dough at a consistent temperature — material and thickness matter
A ceramic bowl checks none of these boxes. A clear, straight-sided container with milliliter markings checks all three.
The #1 Rule: Straight Sides
Before material, before brand, before size — the most important feature of a bulk fermentation container is straight, vertical sides.
Why? Because rise is measured in volume, not height. A bowl with sloping sides will show dough spreading outward as it rises, making it look like it hasn’t risen as much as it has. A straight-sided vessel gives you an honest, accurate read.
If your container flares outward at the top, you’re measuring height and calling it volume. These are not the same thing.
Glass vs. Plastic: Which Is Better?
| Container Type | See Rise? | Volume Marks? | Best For | Rating |
|---|---|---|---|---|
| Cambro 6qt Clear | ✅ Yes | ✅ Yes | Most bakers | ⭐⭐⭐⭐⭐ |
| Weck 742 Jar | ✅ Yes | ✅ Yes | Single loaf | ⭐⭐⭐⭐⭐ |
| Glass Mixing Bowl | ✅ Yes | ❌ No | Beginners | ⭐⭐⭐ |
| Ceramic Bowl | ❌ No | ❌ No | Not ideal | ⭐⭐ |
| Metal Bowl | ❌ No | ❌ No | Not ideal | ⭐ |
| Opaque Plastic Tub | ❌ No | Tape only | Large batches | ⭐⭐ |
Clear Plastic — Best Overall
Clear food-grade plastic — specifically the Cambro 6-quart square container — is the community standard for good reason. It’s lightweight, durable, has perfectly straight sides, and the volume markings printed on the side mean you never need to estimate. It survives drops, goes in the fridge for cold bulk or cold proof, and is easy to clean.
Best for: Most home bakers, bakers making 1–2 loaves at a time, cold bulk fermentation.
Clear Glass — Great for Single Loaves
A tall, straight-sided glass jar — the Weck 742 or similar — works beautifully for a single loaf. The transparency is excellent, the glass walls mean temperature changes more slowly (an advantage in warm kitchens), and they’re easy to read. The downside is fragility and weight.
Best for: Single loaves, bakers who want clear visual feedback, aliquot tracking alongside a larger batch. See our aliquot jar guide for how to use a small jar as a rise tracker alongside your main dough.
Standard Mixing Bowls — Beginner Workaround
If you’re just starting out, a large glass mixing bowl works as a temporary option. Add a rubber band to mark the starting level and watch the rise through the sides. The problem is the sloped sides — your percentage rise measurement will be less accurate. Upgrade to a straight-sided container when you can.
Ceramic and Metal — Avoid for Bulk
Opaque materials are a genuine problem during bulk fermentation. You can’t see bubbles forming along the sides, you can’t read the rise without removing the lid every time, and you can’t mark or measure volume accurately. These containers are fine for mixing — they’re poor bulk fermentation vessels.
What Size Container Do You Need?
Size is often overlooked. Too small and your dough will overflow before bulk is done. Too large and the dough spreads rather than rises, making the percentage rise hard to read accurately.
A general rule: your container should be 2–3 times the starting volume of your mixed dough. For a standard single-loaf recipe (500g flour), a 6-quart Cambro is ideal. For a double batch, go larger — an 8 or 12-quart container.
The dough should be able to double in volume and still have room. If it’s already near the top when you start, the container is too small.
How to Mark Your Starting Volume
This step is non-negotiable. Before bulk fermentation begins:
- Finish mixing your dough and transfer it to the container.
- Level the surface as best you can.
- Place a rubber band, tape, or dry-erase mark at the top of the dough.
- Note the milliliter volume at that starting point.
- Calculate your target volume: starting mL × (1 + target rise %). For a 50% rise on 1,000mL of dough, your target is 1,500mL.
This is the method that turns bulk fermentation from a guessing game into a repeatable, consistent process. The Bulk Fermentation Chart gives you the target percentage rise based on your dough temperature — your container makes it measurable.
Container Picks at a Glance
- Cambro 6-quart clear square — best all-around for 1–2 loaves
- Weck 742 jar — best for single loaf, excellent visual feedback
- Rubbermaid 12-cup clear container — solid budget-friendly option
- Large glass measuring bowl — beginner workaround, upgrade when ready
The Bottom Line
Your bulk fermentation container isn’t a passive vessel — it’s a measuring tool. Choose one that is clear, straight-sided, and sized correctly for your batch. Add a starting mark before bulk begins. Target your percentage rise using your dough temperature as the guide.
With the right container, bulk fermentation stops being intimidating and starts being predictable. That predictability is what separates consistently great loaves from hit-or-miss baking.
Use the Sourdough Archive Bulk Fermentation Chart to find your exact target rise for today’s dough temperature — then let your container do the measuring.