.
You fed your starter, marked the jar, walked away, and came back to… nothing. No dome, no rise, nowhere near double. It’s one of the most frustrating sourdough problems because it’s so hard to pinpoint the cause without knowing where to look.
The good news: a starter that isn’t doubling is almost always fixable. It’s usually one of a handful of common issues — and once you identify the right one, you can have it back on track within a few feedings.
Not doubling AND showing no bubbles at all? That’s a different (more serious) problem. See the complete Why Your Sourdough Starter Isn’t Rising: Complete Diagnostic Guide for step-by-step help across every symptom.
🍞 Free Download: Sourdough Starter Troubleshooting Guide Diagnosing starter problems is faster with a checklist. Get the free guide that walks you through every symptom — including why your starter won’t double — with exact fixes for each. Download the Free Troubleshooting Guide →
What “Doubling” Actually Means
Before troubleshooting, it helps to define what we’re looking for. A healthy, active sourdough starter should:
Double in size within 4–8 hours of feeding at room temperature (68–75°F / 20–24°C)
Show a domed top at peak rise
Be full of bubbles throughout — not just on the surface
Fall back down after peak, leaving a ring on the jar (the “high water mark”)
If your starter rises some but doesn’t reach double, or rises very slowly past the 8-hour mark, you’re dealing with a weak or sluggish starter — not necessarily a dead one. That distinction matters for how you fix it.
7 Reasons Your Sourdough Starter Isn’t Doubling
1. The Temperature Is Too Cold
This is the single most common reason starters fail to double — and the easiest to fix.
Yeast activity slows dramatically below 70°F (21°C). At 65°F, your starter might take 12+ hours to show any significant rise. Below 60°F, it may barely move at all.
How to tell: Your kitchen feels cool, especially in winter or with air conditioning. The starter has small bubbles but just isn’t rising.
Fix it:
Move starter to a warmer spot — top of the refrigerator, inside the oven with just the light on, or near (not on) a heat source
Target 75–78°F (24–26°C) for fastest, most reliable doubling
Use a thermometer to check your actual ambient temperature — kitchens vary more than you think
For more on managing temperature, see How to Keep Your Sourdough Starter Warm and Winter Sourdough Guide.
2. You’re Using the Wrong Flour Ratio
The hydration and flour type in your feeding directly affects how fast and how high your starter rises.
Whole wheat and rye flour ferment faster than all-purpose because they contain more wild yeast food (bran, germ). If you recently switched to all-purpose only, you may notice slower doubling.
Hydration matters too: A stiffer starter (lower hydration) rises more slowly and less dramatically than a wetter one. A 100% hydration starter (equal weights flour and water) shows the clearest doubling.
SURGICAL ADD — Hydration’s Hidden Role: The reason hydration affects doubling is structural, not just fermentation. A runny, high-hydration starter (120%+) may be fermenting just fine, but gas bubbles escape through the thin consistency before the mixture can hold a visible rise. Conversely, a stiffer starter (70–80% hydration) traps gas better and appears to rise more dramatically — even if fermentation rate is identical. The sweet spot for visible doubling is 90–100% hydration: thick enough to hold structure, wet enough to show clear rise.
Fix it:
Add 5–10% whole wheat or rye flour to your feeding mix to boost activity
Ensure your hydration is at 90–100% for visible doubling (adjust by increasing or decreasing water in your feeding ratio)
Be consistent — changing flour types mid-troubleshooting makes it hard to identify the real issue
3. Your Starter Is Hungry (Wrong Feeding Ratio)
If you’re feeding a large amount of flour and water to a tiny bit of starter, it takes longer to double because there’s more food than yeast to consume it. The opposite problem — too little flour for too much starter — causes the starter to exhaust its food supply before doubling.
The standard starting point: 1:1:1 ratio (1 part starter : 1 part flour : 1 part water by weight)
SURGICAL ADD — Jar Shape Changes Feeding Ratios: Here’s a detail competitors miss: your jar shape determines which feeding ratio actually works for doubling. A narrow, tall jar requires a different ratio than a wide, shallow jar — even with identical starter quantities. A narrow jar (like a mason jar) needs a higher starter ratio (1:5:5 or 1:8:8) to reach visible double because the narrow diameter amplifies rise. A wide, shallow container peaks faster and needs a lower ratio (1:2:2 or 1:3:3) to avoid collapsing before you catch it at peak. If you switched jars recently and your doubling pattern changed, this is likely why.
Fix it:
Weigh your feedings using a kitchen scale — volume measurements are unreliable for sourdough
Start with 1:1:1 if you’re unsure, but be prepared to adjust based on your jar shape
If your starter peaks very quickly (within 2–3 hours) and then collapses, try 1:2:2 or 1:5:5 to slow it down — and match your jar choice to your feeding ratio
For starters that feel weak overall, see How to Strengthen a Weak Sourdough Starter for a step-by-step rehab protocol.
4. Your Starter Is Too Young
A brand new starter — less than 7–14 days old — often doesn’t double reliably, and that’s completely normal. In the first week, you’re building a microbial community from scratch. Activity is unpredictable: you might see a burst of rise on day 2–3 (false rise from leuconostoc bacteria), then nothing for two days, then a slow buildup.
How to tell: Your starter is less than 2 weeks old and has never consistently doubled.
Fix it:
Keep feeding daily and be patient — most starters don’t reliably double until day 10–14
Use a consistent feeding schedule (same time each day)
Add a tablespoon of whole wheat or rye flour to each feeding to speed up colonization
If you’re building a starter from scratch, see 72-Hour Sourdough Starter for a day-by-day breakdown of what to expect.
5. You’re Feeding Too Frequently (Or Not Frequently Enough)
Feeding schedule has a huge effect on doubling behavior.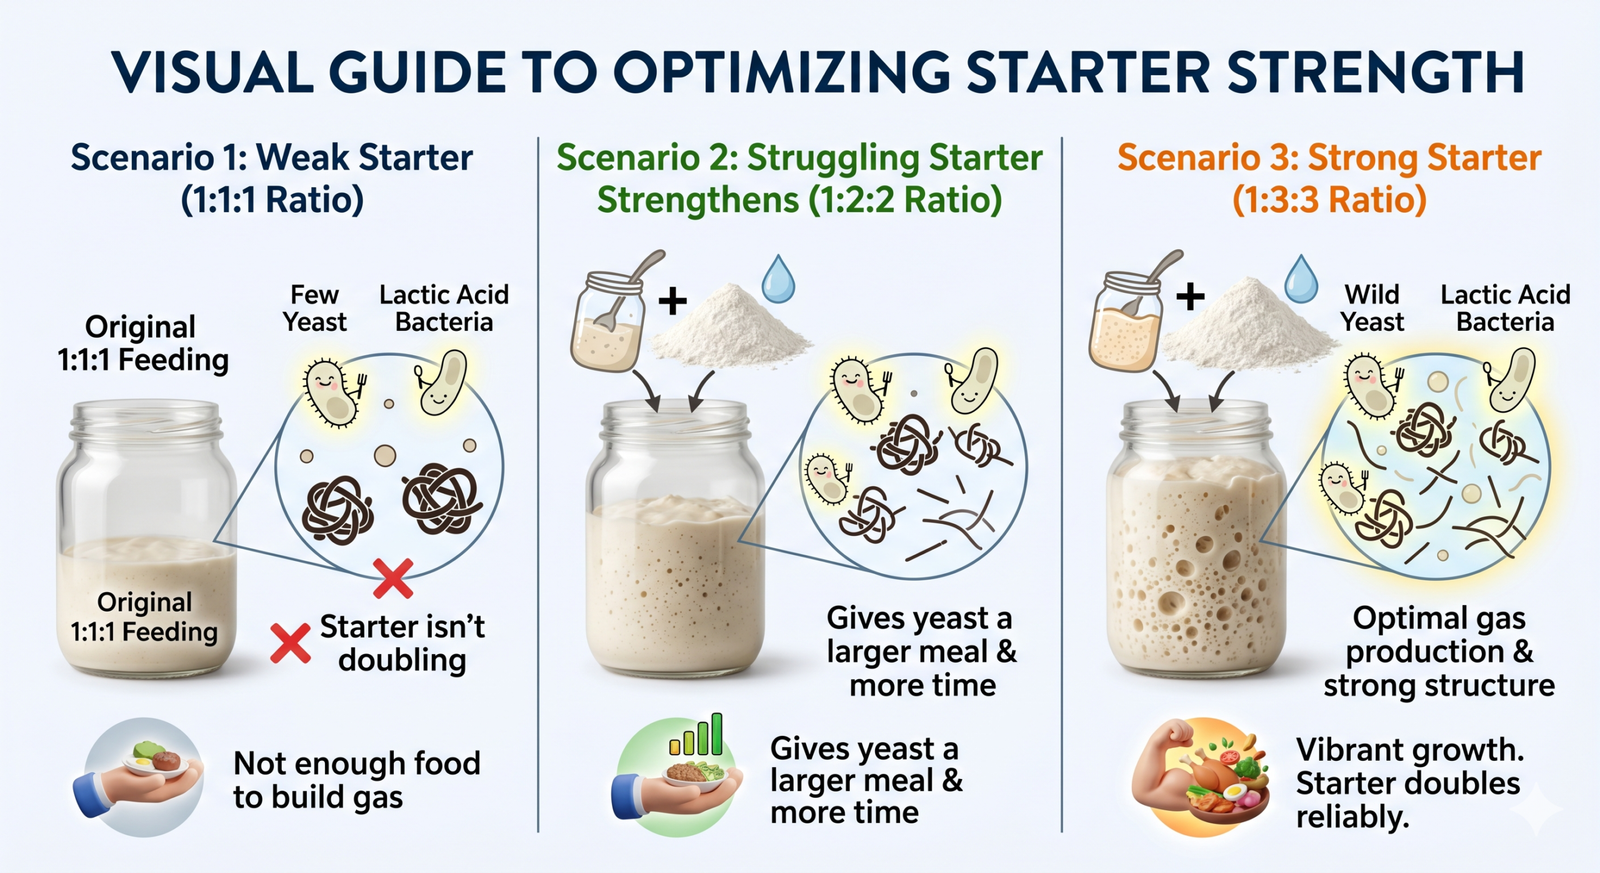
Too frequent: If you feed before your starter has peaked and started to fall, you’re diluting an already weak culture. The starter never builds enough yeast population to double reliably.
Not frequent enough: If you’re only feeding every 48–72 hours at room temperature, your starter may be starving between feedings — the yeast and bacteria exhaust all available food, weakening over time.
Fix it:
At room temperature, feed every 12–24 hours
Feed only when your starter shows signs of activity — bubbles, some rise, tangy smell — not on a rigid clock if your kitchen temperature varies
If you feed in the morning, check at 4, 6, and 8 hours to find when it peaks — this is the ideal time to measure “double” before it collapses
6. Chlorinated Water Is Inhibiting Yeast
Tap water in many municipalities contains chlorine or chloramine, which can inhibit wild yeast growth over time. This is a subtler cause that often goes unnoticed — your starter seems okay but never quite gets vigorous.
How to tell: You’ve tried other fixes and nothing has worked. You’re using unfiltered tap water.
Fix it:
Switch to filtered water or bottled spring water for 1–2 weeks and observe
If using tap water, let it sit uncovered for 1 hour to off-gas chlorine (note: this doesn’t remove chloramine, only chlorine)
Many bakers use filtered water exclusively as a best practice
7. Your Starter Has Contamination
Pink, orange, or fuzzy growth is a sign of contamination that will prevent normal doubling — and requires a different fix entirely. A contaminated starter needs to be discarded and restarted.
See the Why Your Sourdough Starter Isn’t Rising guide — Section 4 covers mold and contamination in detail, including how to confirm it and when to start over vs. save what you have.
How to Know Your Starter Is Actually Doubling
Use the rubber band method: after each feeding, place a rubber band or piece of tape at the surface level of your starter. When the starter reaches double that height, it’s doubled. Simple, visual, no guessing.
SURGICAL ADD — Peak Timing Window: The moment you measure “doubling” matters enormously. Your starter reaches its peak rise — the absolute maximum height — within a narrow window, typically 6–8 hours after feeding at 75°F (24°C). After that peak, it starts to collapse as it consumes its food and becomes more acidic. If you check too early (at 4 hours), you’ll see 50–70% rise and think it’s not ready. If you check too late (at 10+ hours), you’ll find it collapsed back down and assume it failed. The fix: Check at 6-hour mark as your baseline. Mark when it peaks. If you consistently miss the peak window, adjust your feeding time (feed earlier so peak happens during your available hours) or your feeding ratio (use 1:2:2 or 1:5:5 to slow fermentation if your schedule doesn’t align).
A ripe starter that has doubled will also:
Have a noticeably domed top (not flat)
Be airy and webby when you stir it
Smell pleasantly sour and yeasty — not acetone or alcohol
Pass the float test (a spoonful dropped in water will float) — this is the gold standard readiness indicator, regardless of whether it doubled
SURGICAL ADD — Float Test as Alternative Readiness Metric: Here’s what competitors don’t emphasize: you can have a starter that doesn’t double but still passes the float test and bakes perfectly fine. The float test checks if your starter has enough gas production to leaven bread — which is the real goal, not the arbitrary 100% volume increase. If your starter hasn’t doubled but floats consistently, and you’re seeing bubble activity and smell, it’s likely ready to bake. Your bread may need longer fermentation times, but it will rise. See Sourdough Starter Float Test for complete guidance on using this method as your primary readiness check.
The 7-Day Doubling Rescue Protocol
If your starter has been sluggish for more than a week, follow this protocol:
Days 1–3: Rebuild
Discard all but 25g of starter
Feed 1:2:2 (25g starter : 50g flour : 50g water) every 12 hours
Keep at 75–78°F
Use a mix of 80% all-purpose + 20% whole wheat flour
Days 4–5: Observe
Mark the jar at feeding time
Note when (if) starter peaks — check at 6-hour mark
Look for consistent doubling pattern
Days 6–7: Confirm
Starter should be doubling within 4–8 hours
Passes float test
Smells tangy and pleasant
Ready to use for baking
If after 7 days your starter still isn’t doubling, the issue may be environmental (persistent cold or contamination) — revisit the Why Your Sourdough Starter Isn’t Rising diagnostic guide to rule out other causes.
🍞 Still Not Sure What’s Wrong? The free Sourdough Starter Troubleshooting Guide covers every doubling problem with a step-by-step diagnosis checklist — so you stop guessing and start fixing. Get the Free Guide →
What NOT to Do When Your Starter Isn’t Doubling
Don’t add sugar or honey — Wild yeast doesn’t need added sugar and it can disrupt the microbial balance.
Don’t feed more often than every 12 hours — More feedings don’t equal faster doubling; they just dilute your culture.
Don’t keep it in the refrigerator while troubleshooting — Fridge storage slows everything down. Keep it at room temperature until it’s reliably doubling.
Don’t discard too early — Many bakers give up at day 7–10 when their starter is actually on the verge of becoming active. Give it the full 14 days before restarting.
Don’t ignore the smell — A starter that smells strongly of acetone or nail polish remover needs a different fix. See Sourdough Starter Smells Like Acetone Fix for that specific problem.
Don’t judge by doubling alone — A starter that passes the float test and shows consistent bubble activity is ready to bake, even if it only rises 60–70%. Doubling is one metric; fermentation activity + float test are more reliable indicators.
FAQ: Sourdough Starter Not Doubling
Q: My starter bubbles but doesn’t double — is it ready to bake with?
A: Not necessarily. Bubbles indicate fermentation activity, but doubling (or passing the float test) indicates enough yeast to leaven bread. A bubbly but non-doubling starter will likely produce denser loaves with longer fermentation times. The float test is your best guide here — if it floats, you can bake with it; if it sinks, wait longer.
Q: My starter doubled once and now it won’t again — what happened?
A: This is very common. Early rises (especially on days 2–4) can be caused by leuconostoc bacteria rather than yeast — these bacteria are active early on and then die off as the starter becomes more acidic. Real, yeast-driven doubling comes later. Keep feeding consistently and watch for the float test to pass.
Q: How long should I wait for my starter to double?
A: At 75°F (24°C), a healthy, active starter should double within 4–8 hours of feeding. At 68°F (20°C), expect 8–12 hours. Anything beyond 12 hours suggests a temperature or strength issue. For all the reasons starters take longer than expected, see Why Your Sourdough Starter Isn’t Rising for complete diagnostics.
Q: Can I use my starter even if it doesn’t double?
A: For some recipes (discard recipes, flatbreads, pancakes) yes. For leavened loaves, check the float test first. If it floats and shows consistent bubbles, you can bake with it — you’ll just need longer fermentation times.
Q: My starter doubles but my bread still doesn’t rise — what’s wrong?
A: Starter health is one factor in bread rising, but not the only one. Bulk fermentation timing, dough temperature, shaping, and scoring all play a role. If your starter is doubling consistently and your bread still isn’t rising, the issue is likely in the dough process, not the starter.
Q: Does jar shape really affect my measurements?
A: Yes. A narrow jar amplifies rise (the same volume looks like more height), while a wide jar spreads the same volume across more area. This means identical fermentation can look like different levels of doubling in different jars. Keep the same jar for consistent measurements, or account for jar shape when interpreting results.
Related Starter Troubleshooting Guides
🍞 Before You Go — Grab the Free Guide Get the complete Sourdough Starter Troubleshooting Guide free — a printable checklist covering every starter problem including doubling issues, bad smells, contamination, and cold kitchen fixes. Download Free →
Having trouble with something else? These guides cover the most common starter problems:
Why Your Sourdough Starter Isn’t Rising: Complete Diagnostic Guide — Start here for any rising problem
How to Strengthen a Weak Sourdough Starter
Sourdough Starter Float Test: The Readiness Benchmark — Learn why float test beats doubling as the real readiness indicator
Sourdough Starter Smell Guide
How to Keep Your Sourdough Starter Warm
72-Hour Sourdough Starter
Revive a Dried Sourdough Starter
Winter Sourdough Guide
Aliquot Method for Sourdough — Track Bulk Fermentation Precisely — Once your starter is ready, use this to master timing your bread
Still stuck? Drop your question in the comments with your feeding ratio, temperature, jar shape, and starter age — those details solve 90% of doubling problems.