Your sourdough starter represents weeks or months of careful cultivation. It’s a living culture you’ve fed, babied, and learned to read. Losing it — to a forgotten trip, a power outage, an accidental contamination — would mean starting that process over from scratch.
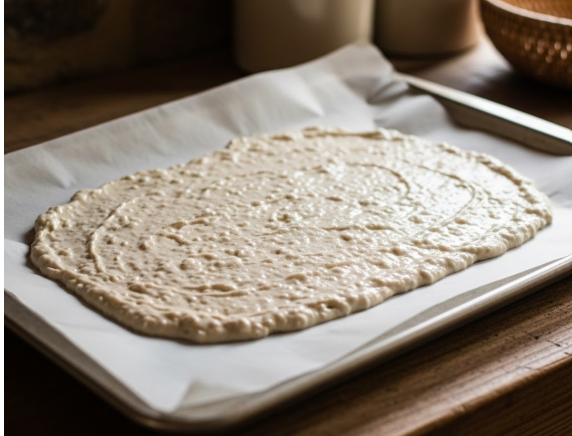
Drying your sourdough starter is the simplest insurance policy you can take out against that happening.
A dried starter takes up almost no space, requires no feeding, lasts for years when stored properly, and can be revived whenever you need it. It’s also the easiest way to share your starter with friends, mail it across the country, or bring it with you when you travel.
The process takes about five minutes of active work. The rest is just waiting. Here’s exactly how to do it.
Can You Dry Sourdough Starter?
Yes — and it works remarkably well.
Wild yeast and lactic acid bacteria are extraordinarily resilient organisms. When exposed to low-moisture conditions, they don’t die — they go dormant. Their metabolic activity slows to near zero, which is what allows them to survive dehydration without losing viability. The same mechanism that lets wild yeast survive on grain husks in nature is what makes dried sourdough starter a practical, reliable storage method.
When you rehydrate the dried starter and give it fresh flour and water, the organisms wake up, reestablish their community, and resume normal fermentation activity. With proper drying and storage, a dried starter can remain viable for years — sometimes decades.
This is why many experienced bakers keep at least one dried backup of their starter at all times, no matter how actively they’re baking with a live culture.
Why You Might Want to Dry Your Sourdough Starter
There are several practical reasons to have dried starter on hand:
Long-term backup. Accidents happen — mold contamination, forgotten feedings, a jar knocked off the counter. A dried backup means you never have to start over from scratch. Store a portion in a different location than your active starter for maximum security.
Once your dried starter is safely stored away, keep your active one happy with my tips on feeding your sourdough starter on a regular schedule.
Give it a good feed using the right ratios before you start — this sourdough starter feeding ratio chart makes it easy.
Travel. Going away for more than a week or two? You can either leave your starter with someone to babysit, put it in the fridge on a slow schedule, or dry a portion before you leave and rehydrate when you return. Dried starter travels easily and doesn’t need any maintenance.
Gifting and mailing. Dried starter ships beautifully. A small envelope of dried flakes can travel across the country or internationally without any refrigeration, feeding requirements, or concern about it dying in transit. It’s one of the best ways to share a beloved starter with friends and family. For those interested in the details of how to revive a dried sourdough starter once it’s received, that guide covers the full rehydration process.
Preserving a specific culture. If your starter has a flavor profile or fermentation character you love, drying it locks in that culture exactly as it is. Even if your active starter shifts over time — which can happen as your environment, flour, or feeding routine changes — you’ll always have a snapshot of the original to return to.
Peace of mind. Some bakers dry their starter simply because knowing a backup exists makes them bake more confidently. There’s no anxiety about killing it if you’re not worried about losing it.
What You Need to Dry Sourdough Starter
The equipment list is minimal:
- Active, healthy sourdough starter — at or near peak activity after a recent feeding
- Parchment paper or silicone baking mat — for spreading the starter on
- Offset spatula or the back of a spoon — to spread a thin, even layer
- Baking sheet — to keep the parchment flat and easy to move
- Room temperature space — somewhere clean, dry, and with reasonable airflow. Avoid humid environments.
- Airtight container — for storing the finished flakes (glass jar, zip-lock bag, or vacuum-sealed container)
- Optional: a food dehydrator — speeds up the process significantly, especially in humid climates
No special equipment, no oven required. The process is genuinely simple.
How to Dry Sourdough Starter (Step by Step)
Step 1: Feed Your Starter
Begin with a healthy, established starter that you know is active and performing well. Give it a regular feeding — your standard flour and water ratio — and let it ferment at room temperature.
Don’t use starter that’s been neglected, smells off, or hasn’t been rising reliably. Whatever’s in your starter when you dry it is what you’ll get when you rehydrate it. Dry your best starter, not your problem starter.
Step 2: Wait Until Peak Activity
Let the starter ferment until it reaches peak — the point at which it has fully risen and is just beginning to dome at the top, before it starts to fall. This is when the wild yeast population is at its most active and robust.
For most starters at room temperature (70–75°F / 21–24°C), peak activity is reached 4–8 hours after feeding. You’ll know it’s at peak when it has doubled or more, looks airy and bubbly throughout, and passes the float test (a small spoonful dropped in water floats to the surface).
Drying at peak activity captures the strongest possible culture.
Step 3: Spread a Thin, Even Layer
Line a baking sheet with parchment paper. Spoon a few tablespoons of starter onto the parchment, then use an offset spatula or the back of a spoon to spread it into a thin, even layer.
Thickness guidance: Aim for approximately 1–2mm thick — roughly the thickness of a credit card. Thinner layers dry faster and more evenly. Thicker layers take longer and increase the risk of the outside drying while the inside stays moist, which can lead to mold during storage.
You can dry as much or as little starter as you want across one or more sheets of parchment.
Step 4: Let It Dry Completely
Leave the spread starter at room temperature in a clean, dry location with reasonable airflow. Avoid covering it — airflow is what allows moisture to escape.
Drying time estimates:
- Dry climate, warm kitchen: 12–24 hours
- Moderate humidity: 24–36 hours
- Humid climate or cool kitchen: 36–48 hours or longer
- Food dehydrator at 95°F / 35°C: 4–8 hours
Do not rush this step. Insufficient drying is the most common cause of mold developing in stored dried starter.
Signs it’s fully dry:
- The starter has changed from glossy and wet to completely matte
- It has pulled away from the edges of the parchment and may have curled or cracked slightly
- It snaps cleanly when you bend it — like a thin cracker
- There are no soft, tacky, or flexible spots anywhere on the sheet
- When peeled from the parchment, the underside feels dry, not moist
If there’s any doubt, leave it for another 12 hours. Fully dry is fully dry — you can’t over-dry it.
Step 5: Break Into Flakes
Once you’ve confirmed the starter is completely dry, peel it from the parchment and break it into small flakes or pieces with your hands. Some bakers prefer to crumble it into a coarse powder; others keep it in larger chip-sized pieces. Either works fine.
You can also pulse the pieces in a clean, dry food processor or blender to make a fine powder, which rehydrates slightly faster.
Step 6: Store Properly
Transfer the dried flakes into an airtight container. Label it with the date and the starter name if you maintain multiple cultures.
Storage details are covered in the next section.
How to Store Dried Sourdough Starter
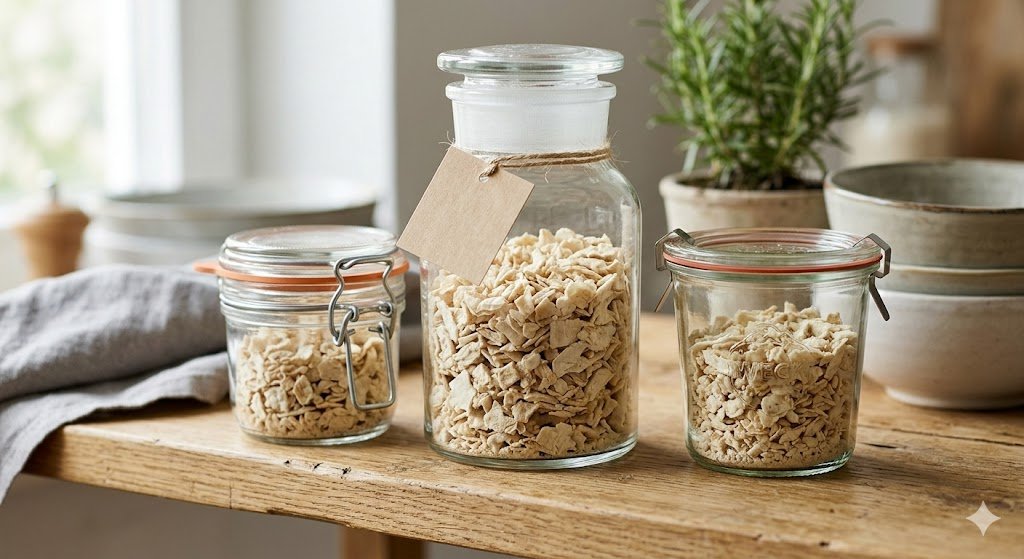
Container: Use an airtight container — a small glass jar with a tight lid, a zip-lock freezer bag with the air pressed out, or a vacuum-sealed bag for maximum longevity. The goal is to keep moisture out.
Location: Store in a cool, dry place away from direct sunlight and heat. A pantry shelf, a drawer, or a kitchen cupboard works well. Avoid storing near the stove or any appliance that generates heat.
How long it lasts: Properly dried and stored sourdough starter remains viable for:
- Pantry storage: 1–2 years reliably, often longer
- Refrigerator: 2–3 years
- Freezer: Indefinitely — many bakers report successfully rehydrating frozen dried starter after 5+ years
Freezer option: For maximum longevity, store dried starter in a freezer-safe airtight container or vacuum-sealed bag in the freezer. The frozen dried starter doesn’t need to be thawed before rehydrating — just measure out what you need and proceed with the rehydration process directly.
One recommendation: Store at least two separate portions in two different locations. One in your pantry, one in the freezer. This way, if one is lost or compromised, you still have the other.
How to Rehydrate Dried Sourdough Starter
Rehydrating dried starter is straightforward, but it requires patience. Don’t expect it to behave like an active, established starter on day one. Give it 3–7 days of consistent feeding before using it to bake.
Step-by-Step Rehydration
Day 1 — Initial Rehydration:
Measure out 20–30g of dried starter flakes and place them in a clean jar.
Add 40–60g of room temperature filtered water. Stir to combine. The dried starter will begin to dissolve and soften within a few minutes.
Once the flakes have fully dissolved into a paste, add 40–60g of unbleached all-purpose or bread flour and stir well until no dry flour remains.
Cover loosely and leave at room temperature (ideally 75–80°F / 24–27°C).
Days 2–3 — First Feedings:
Within 24 hours you should see some bubbling activity — possibly light, possibly more vigorous. Either is fine.
Discard all but 25–50g of the starter. Add 50g flour and 50g room temperature water. Stir well, cover, and leave at room temperature.
Got a lot of discard piling up while you maintain your starter? These sourdough discard crackers with rosemary and sea salt are one of the easiest ways to use it up.
Repeat this feeding every 12–24 hours for the next few days.
Days 4–7 — Stabilization:
Activity should become progressively more reliable and vigorous. By days 5–7, most rehydrated starters are doubling within 4–8 hours of feeding and showing the bubble structure, dome, and pleasant sour smell of a healthy, established culture.
When It’s Ready to Bake With
The rehydrated starter is ready to use in bread when it:
- Reliably doubles within 4–8 hours of feeding
- Has a pleasant, tangy-yeasty smell
- Looks bubbly and aerated throughout
- Passes the float test
Don’t rush this. Using an immature rehydrated starter will produce flat, dense bread. Give it the full 5–7 days of feeding before your first bake.
What If It Doesn’t Bubble Right Away?
Don’t panic. Dried starter that’s been in storage for a long time may take 2–3 days to show any visible activity. The organisms are waking up from a long dormancy.
Keep feeding consistently once daily at 75–80°F / 24–27°C. Add a tablespoon of whole rye flour to one or two feedings to accelerate activity. Be patient.
If there’s no activity after 7 days of consistent feeding in warm conditions, the dried starter may have been compromised — stored with residual moisture, exposed to excessive heat, or simply too old. This is rare with properly dried and stored starter, but it does occasionally happen. If you have a second backup portion stored separately, try rehydrating that one instead.
Common Mistakes When Drying Sourdough Starter
Spreading too thick. A layer thicker than 2–3mm takes too long to dry, especially in the center, and creates a situation where the outside appears dry while moisture is still trapped inside. That trapped moisture is where mold develops during storage. Spread thin.
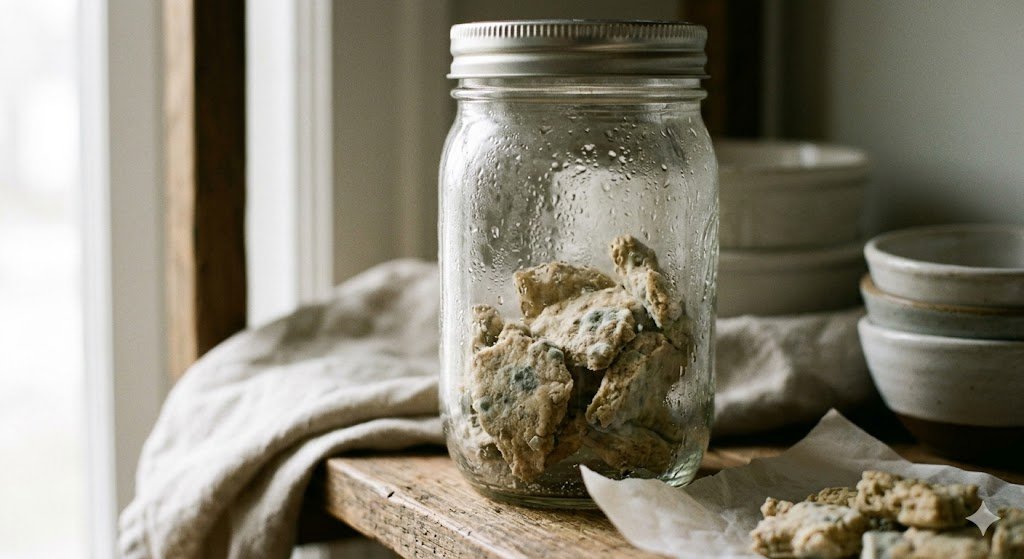
Storing before fully dry. This is the most common mistake. The starter looks dry on the surface, feels okay-ish to the touch, and gets sealed in a jar — where the remaining moisture condenses and mold grows. Test thoroughly. Snap it, peel it, check the back. If there’s any doubt, give it another 12 hours.
If drying feels like too much work right now, another option is just storing it in the fridge — here’s my full post on how to feed and maintain your sourdough starter including fridge storage tips.
Using a weak or inactive starter. The quality of what you dry is the quality of what you get back. If your starter isn’t reliably doubling before you dry it, the dried version won’t perform well either. Feed and strengthen your starter for a few days before drying if it’s been sluggish.
Drying in a humid environment. High ambient humidity dramatically extends drying time and increases mold risk. If you live in a humid climate, use a food dehydrator set to around 95°F / 35°C rather than air drying. The gentle heat speeds evaporation without damaging the culture. Don’t exceed 115°F / 46°C, which can begin to kill the organisms.
Not labeling the storage container. Dried starter looks similar regardless of age or source. Label with the date dried and the starter name. This matters more when you have multiple cultures or after the container has been in storage for a while.
Using too much heat to speed drying. It’s tempting to put the parchment in a warm oven to speed things up. Keep any heat below 115°F / 46°C. Above that temperature, you begin to kill the wild yeast and bacteria you’re trying to preserve. At 120°F / 49°C+, viability drops rapidly.
Frequently Asked Questions
How long does dried sourdough starter last?
Properly dried and stored sourdough starter remains viable for at least 1–2 years at room temperature, 2–3 years in the refrigerator, and potentially indefinitely in the freezer. The key variables are how thoroughly it was dried before storage, how airtight the container is, and whether it’s been exposed to heat or moisture during storage. Many bakers have successfully rehydrated dried starters that were 5, 10, or even more years old. The drier and cooler the storage conditions, the longer the viability.
Can you freeze dried sourdough starter?
Yes — freezing is the best option for long-term storage. Store dried flakes in a freezer-safe airtight container or vacuum-sealed bag. The frozen starter doesn’t need to be thawed before rehydrating; simply take out the amount you need and proceed directly with the rehydration steps. Freezing halts virtually all degradation and keeps the culture in excellent condition for years. If you want to preserve a particular starter for the long term, the freezer is your best option.
Is dried starter as strong as fresh starter?
Once fully rehydrated and given 5–7 days of regular feedings to stabilize, a properly dried and stored starter performs essentially identically to a fresh active starter. The wild yeast and bacteria populations re-establish themselves fully during the rehydration period. There may be a brief adjustment period where the starter is slightly less vigorous than it was at peak before drying, but with consistent feeding in warm conditions, it returns to full strength within a week. The key is patience — don’t skip the rehydration feeding period.
Can I mail dried sourdough starter?
Yes — this is one of the best uses for dried starter. Dried starter flakes are stable at room temperature, don’t require refrigeration, and aren’t affected by the temperature swings of shipping. Pack the dried flakes in a small zip-lock bag, include rehydration instructions, and mail it in a standard envelope or small padded mailer. Many sourdough communities trade dried starters this way, including cultures that originated in San Francisco, Europe, or other regions with distinct wild yeast and bacteria populations. Include instructions for how to revive a dried sourdough starter so the recipient knows what to expect.
Does drying kill the yeast?
No — not when done at room temperature or with gentle heat below 115°F / 46°C. Dehydration causes the wild yeast and bacteria to enter a dormant state where their metabolic processes slow to near zero. They aren’t dead — they’re waiting. This is the same mechanism wild yeast uses to survive on grain in nature. When rehydrated and given fresh food, they wake up and resume normal activity. The only way drying kills yeast is if excessive heat is used — oven temperatures, direct sunlight in very hot climates, or dehydrator temperatures above 115°F / 46°C. At room temperature air drying, the culture survives intact.
Final Thoughts
Drying your sourdough starter is one of the simplest, highest-value things you can do as a sourdough baker. Five minutes of active work, a day or two of drying, and you have an insurance policy that lasts for years.
Think of it as a backup culture mindset — the same way a photographer backs up their files or a gardener saves seeds. Your starter is something you’ve built. It deserves a backup.
Set aside a portion the next time your starter is at peak. Spread it thin on parchment, let it dry completely, and tuck a small jar of flakes in the back of a cupboard. Then bake with the peace of mind that even if something goes wrong with your active culture, you’re never starting from zero.
If you’re newer to sourdough and still building your starter and baking skills, the sourdough mastery beginner’s guide is a good next step — it covers everything from maintaining a healthy starter to baking your first successful loaf. And when you’re ready to go deeper, the Sourdough Archive Bundle Course walks you through the full process with video guidance and troubleshooting support at every stage.
Your starter took time to build. A few minutes is all it takes to make sure you never lose it.