
Learning how to feed sourdough starter is the single most important skill in sourdough baking. Every great loaf starts with a strong, active starter—and every failed loaf can usually be traced back to a weak one.
If you haven’t made your starter yet, go back to my sourdough starter recipe first — then come back here once it’s going.
The good news? Feeding a sourdough starter is simple once you understand the routine. Your starter is a living colony of wild yeast and lactic acid bacteria, and all it needs is flour, water, and a consistent schedule. This guide covers everything: the exact ratios, timing, flour choices, storage methods, and what to do when things go wrong.
Not sure how much flour and water to use? This sourdough starter feeding ratio chart makes it really simple.
If you don’t have a starter yet, read our guide on how to create a sourdough starter in 72 hours first, then come back here.
What Happens When You Feed a Sourdough Starter?
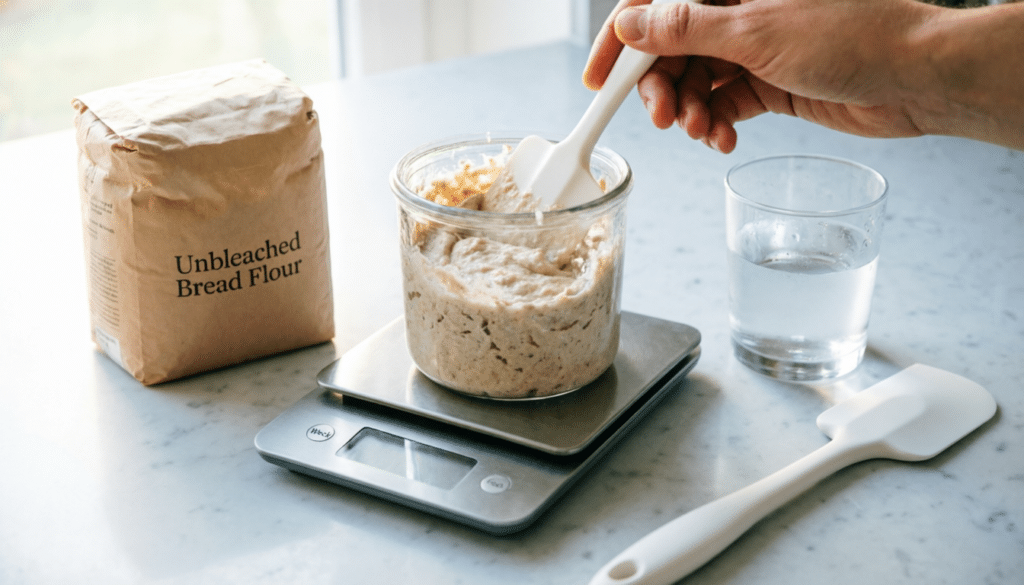
Think of your starter as a pet. When you add fresh flour and water, you’re giving the yeast and bacteria a meal. Here’s what happens next:
- The yeast eats the carbohydrates in the flour, producing carbon dioxide (the bubbles that make your bread rise) and ethanol.
- The bacteria produce organic acids, which give sourdough its signature tang and preserve the culture by lowering the pH.
- The starter rises, peaks, then falls as the food runs out—that cycle is your signal for when to use it and when to feed it again.
If you skip feedings, the acidity climbs too high, the yeast runs out of fuel, and the culture goes dormant. Regular feeding keeps the colony strong enough to leaven heavy bread dough. If your starter isn’t showing signs of life after feeding, our guide on why your sourdough starter isn’t rising will help you diagnose the problem.
Equipment You Need
Before you start, ditch the measuring cups. Volume measurements are unreliable for sourdough because flour can be packed or aerated, leading to inconsistent ratios. Here’s what you actually need:
- Digital kitchen scale — Measuring in grams is the only way to get accurate, repeatable results.
- Clear, straight-sided glass jar — A Weck or Mason jar lets you see the rise clearly. Choose one large enough for your starter to double or triple without overflowing.
- Loose-fitting lid or cloth cover — Gases need to escape, but you want to keep fruit flies and debris out. A Mason jar lid set loosely (not screwed tight) works perfectly.
- Rubber band — This is your most important tracking tool. Mark the level after each feeding to measure how much your starter has risen.
Feeding Ratios Explained
The feeding “ratio” refers to the weight proportions of Starter : Flour : Water. Changing this ratio is how you control your baking schedule and your starter’s strength. For a printable reference, see our sourdough starter feeding ratio chart.
1:1:1 — The Standard Maintenance Feed
Equal parts starter, flour, and water by weight. If you keep 50g of starter, add 50g flour and 50g water. This is the best ratio for daily maintenance and typically peaks in 4–6 hours at room temperature (around 75°F). Start here if you’re a beginner.
1:2:2 or 1:3:3 — The Strengthening Feed
Use this when your starter peaks too fast (under 3 hours), smells overly acidic like vinegar, or seems sluggish and weak. Example: 25g starter, 50g flour, 50g water. The larger meal slows fermentation and gives the yeast more food to build strength. If your starter isn’t doubling, a few days of 1:2:2 feedings often fixes the problem.
“The most alarming smell a starter can produce is a sharp acetone or nail polish remover odor — if you’re experiencing this, the step-by-step recovery protocols are in our dedicated guide on sourdough starter smells like acetone.”
1:5:5 or 1:10:10 — The Long-Fermentation Feed
Ideal when you won’t be able to feed for 24–48 hours but want to keep your starter on the counter. The massive food supply ensures the yeast stays active longer. This is also useful for overnight levain builds when you want a slow, controlled rise.
Step-by-Step: How to Feed Your Sourdough Starter
This is the core routine. Once it becomes muscle memory, the whole process takes under five minutes.
- Discard. Place your jar on the scale and tare it to zero. Remove most of your starter, leaving only the amount you need for your ratio (usually 20–50g). Don’t throw the extra away—save it for sourdough discard pancakes, rosemary sea salt crackers, or sourdough tortillas.
- Add water. Pour in the required amount of filtered water at 75–80°F. Stir it into the remaining starter until you get a smooth, milky liquid. This ensures the yeast is evenly distributed before you add the flour.
- Add flour. Add your flour and mix thoroughly. No dry clumps should remain. The consistency should be like a thick, sticky paste—not pourable like a batter.
- Scrape and mark. Use a spatula to scrape down the inside walls of the jar. Dried bits of dough left on the glass can harbor mold. Place a rubber band at the current level of the mixture.
- Rest and observe. Set the jar at room temperature (70–80°F) with a loose lid. Watch for the starter to double in size. The rubber band tells you exactly how far it has risen.
How to Know When Your Starter Is Ready to Use
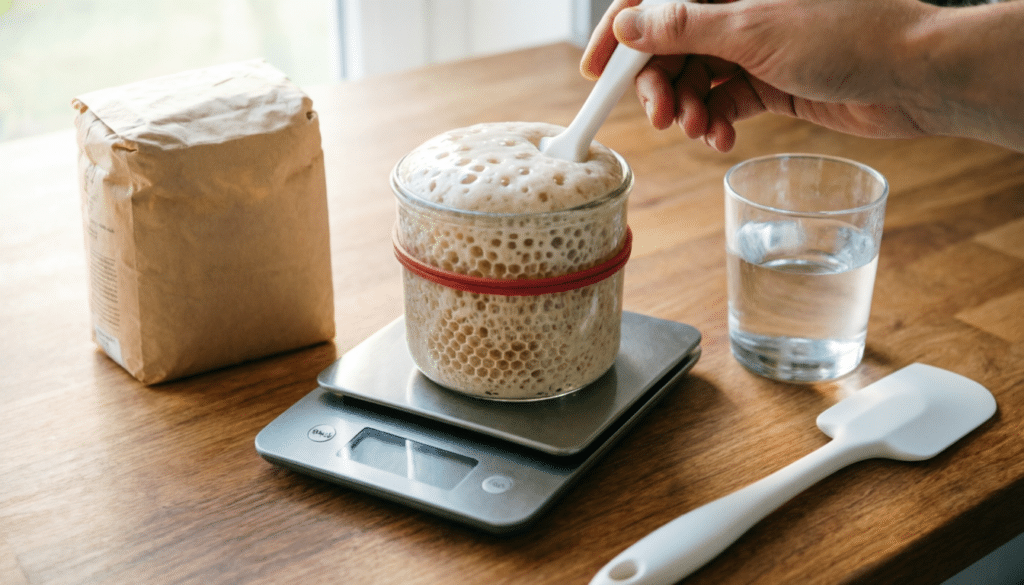
This is one of the most common questions beginners have, and getting it right makes a huge difference in your bread. Your starter is at “peak” when:
- It has doubled (or more) in size from the rubber band mark.
- The surface is domed and full of visible bubbles.
- It smells pleasantly yeasty and mildly tangy—not sharp or like acetone.
- The texture is light, airy, and spongy when you stir it.
The Float Test
Drop a small spoonful of starter into a glass of room-temperature water. If it floats, your yeast is producing enough carbon dioxide and the starter is ready to leaven bread. If it sinks, it needs more time or another feeding.
Using your starter at peak is critical. If you mix it into dough after it has already collapsed, your bread will be dense and flat. For more on timing, see our sourdough proofing time chart.
Choosing Your Flour
The type of flour you feed your starter affects its strength, flavor, and fermentation speed.
- Unbleached all-purpose or bread flour — The most common choice for a reliable, predictable starter. Bread flour’s higher protein content gives slightly more structure. Avoid bleached flour—the chemical treatment can weaken your culture.
- Whole wheat or whole rye flour — These act like “superfoods” for your starter. They contain more nutrients, minerals, and wild yeast than white flour, which accelerates fermentation. Many bakers use a 50/50 blend of rye and bread flour for feedings to boost activity.
- Switching flours? Do it gradually. A sudden change from one flour type to another can temporarily slow your starter. Mix the new flour in over 3–4 feedings. For a deeper look at flour options, visit our guide to the best flour for sourdough.
Water Matters More Than You Think
Chlorine is designed to kill bacteria—and it doesn’t distinguish between harmful bacteria and the beneficial cultures in your starter. Use filtered water if your tap water has a noticeable chlorine smell. If your water is very cold, warm it to 75–80°F before adding it. Cold water slows fermentation significantly, which is a common reason starters seem sluggish in winter. Our sourdough not rising in winter guide covers temperature-related issues in detail.
Feeding Schedules: Counter vs. Fridge
How often you feed depends on where you store your starter and how frequently you bake.
Not sure how much flour and water to use? This sourdough starter feeding ratio chart makes it really simple.
Counter Storage (For Frequent Bakers)
If you bake three or more times per week, keep your starter on the counter at 70–80°F. Feed it every 12–24 hours using a 1:1:1 ratio. This keeps the yeast at peak activity and produces the best oven spring. The trade-off is that you’ll go through more flour.
Refrigerator Storage (For Weekend Bakers)
If you only bake once a week or less, the fridge is your best option. Cold temperatures slow fermentation to a near halt, so your starter needs far less attention.
- Feed your starter using a 1:1:1 ratio.
- Let it sit on the counter for 1–2 hours to begin fermenting.
- Place it in the fridge with a loosely fitted lid.
- Feed once a week to keep it healthy.
To prepare for baking: Take it out 24 hours before you need it and give it two room-temperature feedings spaced 8–12 hours apart. By the second feeding, your starter should be doubling reliably and ready to use.
For more on how refrigeration affects your dough and timing, see our cold proof fridge guide.
The Role of Temperature
Temperature is the hidden variable that controls everything. A starter kept at 80°F will peak in half the time of one kept at 65°F. Understanding this relationship is key to fitting sourdough into your schedule.
- 65–70°F: Slow fermentation. Peaks in 8–12 hours. More sour flavor.
- 75–80°F: The sweet spot. Peaks in 4–6 hours. Balanced flavor.
- 85°F+: Fast fermentation. Can peak in 2–3 hours. Risk of over-fermenting.
If your kitchen runs cold, you can keep your starter warm using a proofing box, an oven with the light on, or a DIY cooler proofing setup. For detailed temperature strategies, check our dough temperature and fermentation guide.
Troubleshooting: Common Problems and Fixes
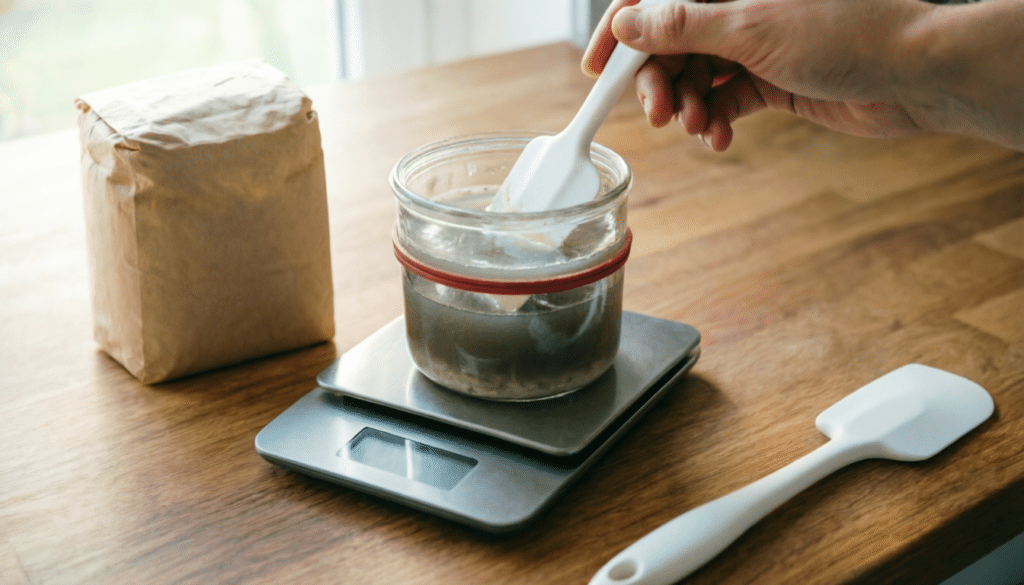
Liquid on Top (Hooch)
That dark liquid is called hooch—a byproduct of fermentation and a clear signal that your starter is starving. You can pour it off or stir it back in (stirring it in produces a more sour flavor).
Either way, feed immediately and consider increasing your ratio to 1:2:2 for a few feeds. For more context, read our explainer on why sourdough discard has liquid hooch.
Smells Like Acetone or Nail Polish Remover
This indicates extreme hunger. The acidity has moved out of balance. Don’t panic—this is almost always recoverable. Discard heavily (leave just 10–20g), give a large 1:3:3 or 1:5:5 feeding, and repeat for 2–3 days. The pleasant, yeasty smell should return. See our detailed fix for starter that smells like acetone.
If your starter smells like nail polish remover, don’t panic — here’s exactly how to fix a starter that smells like acetone.
Bubbles but Not Doubling
If your starter shows bubbles but won’t rise to double its volume, the issue is usually temperature (too cold), flour (too weak), or insufficient feeding frequency. Try moving it somewhere warmer, switching to bread flour or adding 10–20% whole rye, and feeding twice a day for 3–5 days. Our guide on sourdough starter not doubling walks through every cause.
Starter Rising Then Collapsing Quickly
If your starter doubles and collapses within 2–3 hours, it’s running through its food too fast. This often happens in warm kitchens or with very active starters. Switch to a 1:3:3 or 1:5:5 ratio to give it a longer fermentation window. You can also use cooler water (around 68°F) to slow things down.
Pink, Orange, or Fuzzy Mold
This is the one situation where you start over. If you see any pink, orange, or fuzzy mold growth, discard the entire starter and sanitize the jar thoroughly. These colors indicate harmful bacteria or mold that cannot be recovered from. Begin fresh with our 72-hour sourdough starter guide.
Why Do I Have to Discard?
This is the question every beginner asks, and the answer is simple math. If you never discarded and always doubled your starter with each feeding, you’d have gallons of starter within a week and would be burning through entire bags of flour daily. Discarding keeps the food-to-yeast ratio in balance so your starter stays healthy without spiraling out of control.
The key mindset shift: discard isn’t waste. Unfed starter is a versatile ingredient. Use it to make fluffy pancakes, baker-style muffins, rosemary crackers, flatbread, or even same-day discard pizza. You can also freeze your discard and accumulate it for bigger bakes later. For storage questions, see how long sourdough discard lasts.
Long-Term Storage: Drying and Freezing
Going on vacation? Not baking for a month? You don’t have to keep feeding. There are two reliable methods for long-term backup:
- Drying: Spread a thin layer of active starter on parchment paper. Let it dry completely (8–24 hours depending on humidity), then break it into flakes and store in an airtight container indefinitely. To revive, rehydrate the flakes with water and resume feeding. Full instructions in our how to dry sourdough starter guide.
- Freezing: Scoop active starter into an ice cube tray or freezer bag. It will keep indefinitely. Thaw at room temperature and give it 2–3 feedings to restore activity. See how to revive dried sourdough starter for step-by-step instructions.
Beginner Tips for Consistency
- Feed at the same time every day. Consistency is more important than perfection. Pick a time (morning works well) and stick with it.
- Use filtered water if your tap water smells like chlorine.
- Keep the jar clean. Scrape down the walls after every feeding to prevent dried bits from harboring mold.
- Track everything. Note the time you feed, the temperature, and when your starter peaks. Within a week, you’ll know its patterns and can plan your baking around them.
- Don’t obsess. A sourdough starter is incredibly resilient. It’s much harder to kill than most beginners think. Even neglected starters can usually be revived with a few consistent feedings.
Frequently Asked Questions
Can I use my starter straight from the fridge?
You can, but your bread will likely be dense with poor oven spring. For the best results, always give your refrigerated starter at least one (ideally two) room-temperature feedings before using it in a recipe. You want it actively doubled and bubbly.
My starter smells like gym socks. Is it dead?
Almost certainly not. Strong, unpleasant smells usually mean the acidity has shifted out of balance from hunger. A few days of consistent 1:2:2 feedings at room temperature typically restores the pleasant, yeasty aroma.
Can I switch flour types?
Yes, but do it gradually. Mixing the new flour in over 3–4 feedings avoids shocking the culture. A sudden switch can cause a temporary slowdown that looks like your starter is dying—it isn’t, it’s just adjusting.
How long can I leave my starter unfed in the fridge?
A healthy, mature starter can survive 1–2 weeks in the fridge without feeding. Some bakers push it to 3–4 weeks, though you may need extra feedings to bring it back to full strength. For anything longer, consider drying or freezing as a backup.
What to Do Next
Mastering the feeding routine is 90% of becoming a successful sourdough baker. Once your starter is reliably doubling on schedule, you’re ready to bake. Here’s the natural progression:
- Bake your first loaf — Follow our complete step-by-step sourdough bread guide for a beginner-friendly recipe.
- Understand bulk fermentation — This is where most beginners go wrong. Our bulk fermentation for beginners guide explains timing and visual cues.
- Learn shaping — The difference between flat bread and tall bread often comes down to shaping technique. See how to shape a sourdough boule and batard.
- Master scoring — Create beautiful patterns and control how your bread expands in the oven with our sourdough scoring guide.
Once your starter is healthy and active, here’s how to use your sourdough starter to actually bake a loaf.
Still Struggling With Your Starter?
The Sourdough Mastery Beginner Guide includes a printable feeding schedule, a “rescue your starter” decision flowchart, the exact daily routine used by experienced bakers, and a troubleshooting guide that covers every failure mode—so you never have to guess again.Get the Complete Guide →
3 Responses
Looking forward to learning sourdough starters and how to keep them alive.
My starter had the false rise on day 3. Now it is not doubling at all. There are bubbles in the dough and when I weigh it in the morning, there is obvious growth. I discovered, through reading this article, that I might have been making a mistake by virtue of the following “mistakes”: not stirring my starter before feeding it; adding the flour, then the water, then stirring; not changing to a clean jar after every feed.
I have had success with a previous starter (which I then inadvertently seemed to have killed) but I am struggling this time. What am I doing wrong? I have stored the starter jar on a wooden cutting board under the light on my stove and had luck. I am open to any suggestions or advice!
Hey! Thanks so much for sharing this—I’m really glad the article resonated and helped you identify those feeding mistakes. Honestly, the fact that you’re seeing *bubbles* and *measurable growth* means your starter is alive and working. That’s the foundation. The false rise on day 3 and the slow doubling now suggest your starter is still building strength—not that it’s dying.
Here’s what I’d focus on:
**The mix-order issue is real.** Adding flour then water then stirring can create dry pockets that don’t ferment as actively. Stir first, *then* feed—it makes a measurable difference in how consistently your starter peaks.
**On jar-switching:** Not mandatory, but it does help. A clean jar prevents old crusty bits from interfering with fermentation signals. If you’re not switching jars, at least wipe down the sides before you feed.
**Temperature is your biggest lever right now.** You mentioned the wooden cutting board under your stove light—that’s actually solid. But starter activity *really* depends on consistent warmth (70–76°F is the sweet spot). On day 3, it might have been warmer, which gave you that false rise. Now it’s cooling down? That would explain the plateau. A consistent temperature (even at 68°F) beats fluctuating warmth.
**One more thing:** How many feeds have you done since day 3? Starters sometimes take 7–10 feeds to build momentum, especially if they were cooler earlier. If you’re only at day 5 or 6, keep going. You’re not doing anything wrong—it’s just ahead of schedule.
Keep me posted! Once you hit that consistent double in 4–6 hours at your ambient temperature, you’ll know it’s ready to bake with.