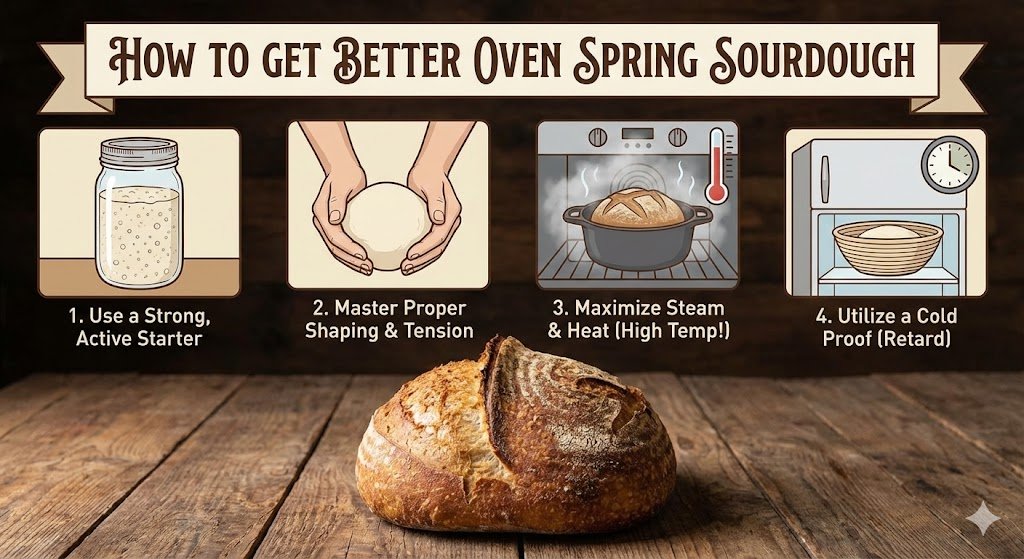
Poor oven spring is almost always caused by one of four things — overproofed dough (most common), insufficient surface tension from weak shaping, inadequate steam in the first 20 minutes of baking, or an oven that isn’t hot enough. Fix the proofing first by using an aliquot jar, then check your shaping, scoring, and steam setup in that order. Each one compounds the others.
Quick Diagnostic Checklist
✅ Signs your oven spring is healthy:
- Loaf visibly rises 30–50% taller in the oven than it went in
- Score opens wide with a defined ear within the first 10 minutes
- Crust is taut and domed — not flat or sunken
- Loud crackling and hissing when the dough hits the hot surface
- Loaf sounds hollow when tapped on the bottom after baking
⚠️ Signs oven spring is failing:
- Loaf barely rises — comes out almost the same height it went in
- Score didn’t open — or burst on the side instead of along the cut
- Loaf spread wide and flat rather than rising upward
- Dense, gummy crumb with no open structure inside
- Pale, thick crust that didn’t crackle as it cooled
🎯 What great oven spring requires:
- Dough proofed to the right level — not under, not over
- Strong surface tension built through confident shaping
- A sharp, angled score that gives gas a clear exit path
- Steam for the first 20 minutes to keep the crust extensible
- A screaming-hot baking surface preheated for 45–60 minutes
1. Why Oven Spring Matters — and Why It Fails
Oven spring is the dramatic final rise your sourdough experiences in the first 10–15 minutes of baking. It’s the moment everything comes together — or doesn’t. A loaf with great oven spring emerges tall, open, and proud with a blooming score. A loaf with poor oven spring comes out flat, dense, and disappointing, no matter how carefully you mixed and folded.
The frustrating thing about poor oven spring is that it has multiple possible causes, and they often look identical from the outside. A flat loaf could mean overproofed dough, weak shaping, no steam, a cold oven, or a shallow score — or a combination of all five. This guide walks through every cause systematically so you can diagnose your specific problem and fix it permanently.
Oven spring is the payoff for everything that came before it — bulk fermentation, folding, shaping, and proofing. If any of those earlier steps went wrong, oven spring suffers. That’s why troubleshooting always starts at the beginning of the process, not at the oven.
For context on the baking environment itself, see our guides on How to Bake in a Dutch Oven and How to Bake Without a Dutch Oven — both cover the steam and heat setup that directly drives oven spring.
2. The Science: What Actually Causes Oven Spring
Oven spring is driven by three simultaneous forces the moment dough enters a hot oven. First, the rapid heat causes yeast to produce one final surge of CO₂ before the temperature kills them off — typically around 140°F / 60°C. Second, the alcohol and water vapour already present in the dough expand dramatically as temperature rises. Third, CO₂ gas already trapped in the gluten network expands with the heat, inflating the loaf like a balloon.
For all of this expansion to translate into upward rise rather than sideways spread, three structural conditions must be in place. The gluten network must be strong enough to hold the expanding gases rather than letting them escape. The dough surface must be soft enough (thanks to steam) to stretch and expand without cracking prematurely. And the score must provide a deliberate weak point that directs expansion upward through the cut rather than randomly through the sides.
When any of these conditions fail, oven spring collapses. This is why oven spring is the ultimate diagnostic — it reveals the quality of every step that came before it.
Key scientific concepts:
- CO₂ expansion — heat causes trapped gas to expand rapidly; requires a strong gluten network to hold it
- Yeast heat burst — yeast activity spikes between 95–140°F / 35–60°C before dying; this is the engine of oven spring
- Steam gelatinisation — surface steam keeps the crust pliable so the score can open and the loaf can expand freely
- Surface tension — tight, even shaping creates a taut outer skin that directs expansion upward rather than outward
- Gluten network integrity — overproofed or under-developed gluten cannot hold expanding CO₂, causing collapse rather than rise
- Thermal mass — a preheated baking surface delivers instant bottom heat that drives oven spring from below
- Dough acidity — excessive acidity from overproofing weakens gluten bonds, reducing the network’s ability to trap and hold gas
3. The 5 Root Causes of Poor Oven Spring (In Order of Likelihood)
Cause 1 — Overproofed Dough (Most Common)
Overproofing is the single most common cause of poor oven spring, and it’s the one beginners hit most often. When dough proofs too long, the yeast have already consumed most of the available sugars and produced most of their CO₂ before the loaf even enters the oven. There’s simply no energy left for oven spring. Additionally, the rising acidity from extended fermentation degrades the gluten network — the very structure needed to hold gas and spring upward.
How to identify it: Overproofed dough feels very soft, almost liquid, when you remove it from the banneton. It may spread flat immediately on the parchment. The poke test returns very slowly or not at all — the indentation stays. When baked, the loaf is flat and wide with a dense, gummy crumb. The score may not have opened at all, or may have torn rather than bloomed.
How to fix it: Use an aliquot jar religiously to track bulk fermentation rise percentage. Target 50–75% rise for most standard white loaves and stop bulk there. See our Aliquot Jar Guide for exact targets by dough type. For final proof, use the poke test — press a floured finger ½ inch into the dough surface. It should spring back slowly and incompletely. If it barely springs back at all, you’ve gone too far.
Note on young starters: If your starter is less than 4–6 weeks old, it may simply lack the microbial density to drive a powerful oven spring — even if it passes the float test and appears active. A young starter has fewer established yeast colonies and less developed bacterial culture, meaning it produces less CO₂ overall. If your starter is brand new, give it another 2–4 weeks of consistent daily feeding before expecting bakery-level spring. The float test tells you a starter is alive — it doesn’t tell you it’s mature enough for maximum performance.
Cause 2 — Weak Shaping and Poor Surface Tension
Even perfectly proofed dough produces poor oven spring if it was shaped loosely. Shaping builds the surface tension — the taut outer skin — that directs all the expansion energy upward through the score rather than outward in all directions. A loosely shaped loaf spreads wide in the oven like a pancake because there’s nothing directing the gas upward.
How to identify it: The loaf spread noticeably wider during proofing than expected. When you flipped it out of the banneton, it felt soft and floppy rather than holding a firm dome shape. In the oven, it spread sideways rather than rising upward, and the score may have opened but the loaf didn’t rise around it.
How to fix it: Focus on building tension during preshaping and final shaping. The dough should feel noticeably tighter and more resistant after shaping than before. Work on a lightly floured surface — too much flour prevents the friction needed to build tension. For a boule, use the “letter fold then round” method. For a batard, use the “stitch and roll” method. See our Shaping Guide for full technique breakdowns.
Cause 3 — Insufficient Steam in the First 20 Minutes
Steam is what keeps the crust soft and extensible during oven spring. Without steam, the crust hardens within 3–5 minutes of entering the oven, locking the loaf in place before it has had a chance to rise fully. The score may crack rather than bloom, and oven spring is dramatically reduced even in a perfectly proofed, well-shaped loaf.
How to identify it: The loaf has some rise but less than expected. The score cracked roughly rather than opening smoothly with a defined ear. The crust is thick and hard rather than thin and crackling. This problem is more common when using improvised steam methods than a Dutch oven.
How to fix it: Ensure your Dutch oven or steam dome is preheated for the full 45–60 minutes. Never open the lid or oven during the first 20 minutes of baking. For improvised setups, add 2–3 ice cubes inside the dome alongside the dough for an extra burst of localised steam. See our No Dutch Oven Guide for full steam method options.
Cause 4 — Oven Not Hot Enough
Most home ovens run significantly cooler than their dial indicates — often 25–75°F / 14–42°C below the set temperature. A cooler oven means slower heat transfer to the dough, which means the yeast heat burst happens more slowly and less dramatically, and oven spring suffers. It also means the baking surface isn’t delivering the intense bottom heat needed to drive upward rise.
How to identify it: The loaf has modest oven spring but not the dramatic bloom you’re aiming for. Bake times consistently need to be extended. Crust colour is pale even after the full baking time. The loaf doesn’t hiss and crackle audibly when it hits the baking surface.
How to fix it: Buy an oven thermometer — they cost under $15 and are the single most impactful piece of equipment a sourdough baker can own. If your oven runs cool, increase your set temperature by 25°F / 14°C to compensate. Preheat for the full 60 minutes, not 30. Place your rack in the centre or lower-centre position for maximum bottom heat transfer.
Cause 5 — Shallow or Incorrect Scoring
Scoring gives the expanding gas a deliberate, directed exit point. A score that’s too shallow, cut straight down instead of at an angle, or placed in the wrong position on the loaf forces gas to find its own exit — usually through a weak spot on the side of the loaf. This produces the characteristic “blowout” — a ragged tear on the side — and dramatically reduces upward rise.
How to identify it: The score line is present but barely opened. The loaf burst on the side — a ragged, uncontrolled tear. The top of the loaf is domed but no ear formed along the score. The score looks shallow and didn’t penetrate deeply enough to see a visible gap.
How to fix it: Score at 30–45° to the surface (not straight down). Aim for at least ½ inch / 1.3cm depth. Use a razor-sharp lame — a dull blade drags and deflates the dough rather than cutting cleanly. Dust the surface lightly with rice flour before scoring to reduce drag. Work quickly and confidently — hesitant scoring produces ragged cuts. See our Sourdough Scoring Guide for full technique.
4. Oven Spring Diagnosis Table
| What You See | Most Likely Cause | Secondary Check |
|---|---|---|
| Loaf flat, spread wide, dense crumb | Overproofed dough | Check aliquot jar rise % next bake |
| Loaf spread wide, score opened but no upward rise | Weak shaping / no surface tension | Practice preshaping and final shaping |
| Score cracked roughly, no ear formed | Insufficient steam OR shallow score | Check Dutch oven preheat time and score angle |
| Blowout on the side of the loaf | Score too shallow or wrong angle | Check for overproofing too — both cause blowouts |
| Some rise but less than expected, pale crust | Oven running cool | Use oven thermometer; extend preheat |
| Loaf deflated when scored before baking | Severely overproofed | Bake immediately; reduce proofing time next bake |
| Good spring first 5 min then collapsed | Underproofed — gluten couldn’t hold the gas | Extend bulk fermentation next bake |
| Great spring but dense gummy crumb | Underbaked — cut too soon | Wait 2 hours before cutting; use thermometer |
5. Step-by-Step Oven Spring Optimisation Checklist
Run through this checklist before every bake until great oven spring becomes automatic:
- Check your starter. Did it pass the float test? Did it peak within 4–6 hours of its last feed? A sluggish starter means sluggish fermentation and weak oven spring from the start.
- Track bulk with your aliquot jar. Target 50–75% rise for standard white loaves. Stop bulk when the jar shows a domed top and the dough passes the poke test.
- Preshape with intention. Build a tight, smooth ball before the bench rest. The dough should feel noticeably more resistant after preshaping than before.
- Shape firmly and confidently. Build surface tension in the final shape — the outer skin should feel taut like a drum. A loose, floppy shape going into the banneton equals a flat loaf coming out of the oven.
- Cold proof overnight if possible. A cold final proof (8–16 hours in the fridge) firms the dough, making it easier to score cleanly and giving the loaf extra structural integrity going into the oven.
- Preheat your Dutch oven or baking setup for 60 minutes at 500°F / 260°C. Set a timer when you turn the oven on. Do not rush this step.
- Score with a sharp lame at 30–45° to the surface. Deep, confident, angled. Rice flour on the surface reduces drag.
- Load quickly and seal immediately. Every second the dough sits on the hot surface without a lid is steam escaping. Get the lid on fast.
- Do not open the oven for the first 20 minutes. Steam is building and oven spring is happening. Opening the door destroys both.
- Finish uncovered until deeply coloured. Pale crust = underbaked. Aim for deep amber to mahogany.
6. Advanced Troubleshooting
Problem: Oven spring was great for my first few bakes but now it’s consistently poor
Why: Most commonly, the starter has weakened over time — either from infrequent feeding, contamination, or storing in conditions that have stressed it. A weak starter means weak fermentation and poor oven spring. Fix: Rebuild your starter with daily feedings at room temperature for 3–5 days before your next bake. Feed at a 1:5:5 ratio (starter:water:flour) and look for consistent doubling within 4–6 hours before using it. See our Starter Strength Guide for full rebuilding instructions.
Problem: My loaf springs well in the Dutch oven but collapses when I remove it
Why: The internal structure hasn’t set — the loaf is underbaked. The crumb needs to reach 205°F / 96°C internally to fully gelatinise and hold its shape. When removed from the oven too early, the still-liquid interior collapses under its own weight. Fix: Use an instant-read thermometer. Target 205–210°F / 96–99°C at the centre. If the outside is browning too fast, cover loosely with foil and continue baking.
Problem: Oven spring is good but the ear never forms
Why: The score angle is too steep — cutting straight down rather than at an angle. An angled score creates a flap of dough that peels back as the loaf expands, forming the characteristic ear. A vertical score just opens as a crack without creating a flap. Fix: Hold your lame almost parallel to the dough surface — 30–45° maximum. The more angled your cut, the more pronounced the ear.
Problem: Great oven spring on the top but the bottom is dense and heavy
Why: The baking surface wasn’t delivering enough bottom heat — either not preheated long enough, rack position too high, or using a thin baking sheet with low thermal mass. Fix: Move your rack to the centre or lower-centre position. Preheat for the full 60 minutes. If using a Dutch oven, ensure the base is cast iron — the base is where bottom heat transfers most critically. Consider investing in a baking steel for superior bottom heat if this is a recurring issue.
Problem: Score blooms beautifully but the overall loaf height is still disappointing
Why: The score is doing its job but the dough doesn’t have enough gas energy to rise significantly — pointing back to fermentation. Either the dough was slightly overproofed (past peak) or the starter wasn’t strong enough to generate sufficient CO₂ during bulk. Fix: End bulk slightly earlier — target 50% rise instead of 75% and see if spring improves. Also rebuild your starter if it’s been stored in the fridge for more than a week without feeding.
7. “My Loaf Came Out Flat — Is It Still Worth Eating?”
Always yes. A flat sourdough loaf is still sourdough — it still has the flavour, the tang, the crust, and the nutrition. It just didn’t reach its visual potential. Here’s how to make the best of it:
If it’s dense and gummy: Slice thinly and toast it. Toasting transforms a dense crumb into something genuinely delicious — crunchy outside, chewy inside. Dense sourdough also makes outstanding croutons and breadcrumbs.
If it’s flat but the crumb is reasonably open: It’ll still make excellent sandwiches and toast. The flavour is unaffected by shape. Don’t waste it.
If it’s severely overproofed and almost liquid inside: Scoop out the interior, dry it in the oven, and blend into breadcrumbs. The crust can be used for soup bowls or croutons. Nothing is wasted in a sourdough kitchen.
Most importantly: Every flat loaf is data. Take a photo, note what you think went wrong, and adjust one variable next bake. Most bakers crack their oven spring problem within 3–5 bakes of focused troubleshooting.
8. Frequently Asked Questions
How much oven spring should I expect?
A well-proofed, well-shaped loaf baked with proper steam should rise 30–50% in volume during baking. In height terms, a loaf that goes in at 3 inches tall should come out at 4–4.5 inches. Anything less than 20% height gain suggests one of the five root causes above needs addressing.
Does hydration affect oven spring?
Yes, significantly. Higher hydration doughs (78%+) tend to spread more and rise less dramatically unless the gluten is exceptionally well developed and shaping was very tight. Lower hydration doughs (68–72%) hold their shape more easily and often produce more dramatic upward spring. If you’re struggling with oven spring, dropping hydration by 3–5% for your next bake is a simple variable to test.
Can whole wheat flour reduce oven spring?
Yes — whole wheat contains bran particles that physically cut gluten strands, weakening the network’s ability to hold gas. A dough with 20%+ whole wheat will generally have less oven spring than an equivalent white flour loaf. Compensate by ending bulk slightly earlier (40–50% aliquot rise) and being extra attentive to shaping tension.
Does the size of my Dutch oven affect oven spring?
Yes. A Dutch oven that’s too large disperses steam too widely, reducing the steam concentration around the loaf. A pot that’s too small restricts the loaf’s ability to expand. For a standard 500g flour loaf, a 5–6 quart / 4.7–5.7 litre Dutch oven is ideal — large enough for spring, small enough to trap steam effectively.
My dough looks great going in but comes out flat. What’s wrong?
This almost always points to overproofing — the dough looks fine because it still holds its shape, but the gas energy has already been spent during proofing. The fix is ending both bulk and final proof slightly earlier. Use your aliquot jar for bulk and the poke test for final proof. When in doubt, err on the side of slightly underproofed — underproofed dough has gas energy left for the oven; overproofed dough does not.
Is cold proofing better for oven spring than room temperature proofing?
Generally yes, for two reasons. Cold dough is firmer and easier to score cleanly without deflating. And the retarded fermentation during a cold proof means the dough still has energy left for the oven even after a long proof period. Most experienced bakers cold proof overnight (8–16 hours at 37–39°F / 3–4°C) and bake straight from the fridge for consistently better oven spring.
Pro tip — the thermal shock advantage: Putting ice-cold dough directly into a 500°F / 260°C oven creates a more violent and immediate expansion of the trapped gases than room-temperature dough would. The steep temperature differential causes CO₂ and water vapour to expand more aggressively in those critical first minutes — effectively giving you a stronger, faster oven spring. It’s one of the less-talked-about benefits of baking cold, and a good reason never to let your fridge dough warm up on the counter before loading.
Want printable oven spring checklists, proofing trackers, and beginner-proof baking guides?
They’re all inside the Sourdough Mastery System:
👉 sourdougharchive.com/the-bundle
Related Sourdough Guides
- 📖 Aliquot Jar Guide — track bulk fermentation rise % to nail proofing every time
- 📖 How to Bake in a Dutch Oven — the full steam and heat setup for maximum oven spring
- 📖 How to Bake Without a Dutch Oven — steam alternatives that still deliver great spring
- 📖 How to Score Sourdough — scoring technique that directs oven spring upward
- 📖 Underproofed vs Overproofed Sourdough — diagnosing proofing problems from the crumb
- 📖 Shaping Sourdough Guide — building the surface tension that drives upward rise
- 📖 Sourdough Mastery: The Complete Beginner’s Guide — the full roadmap