Jump to Section
The Quick Answer
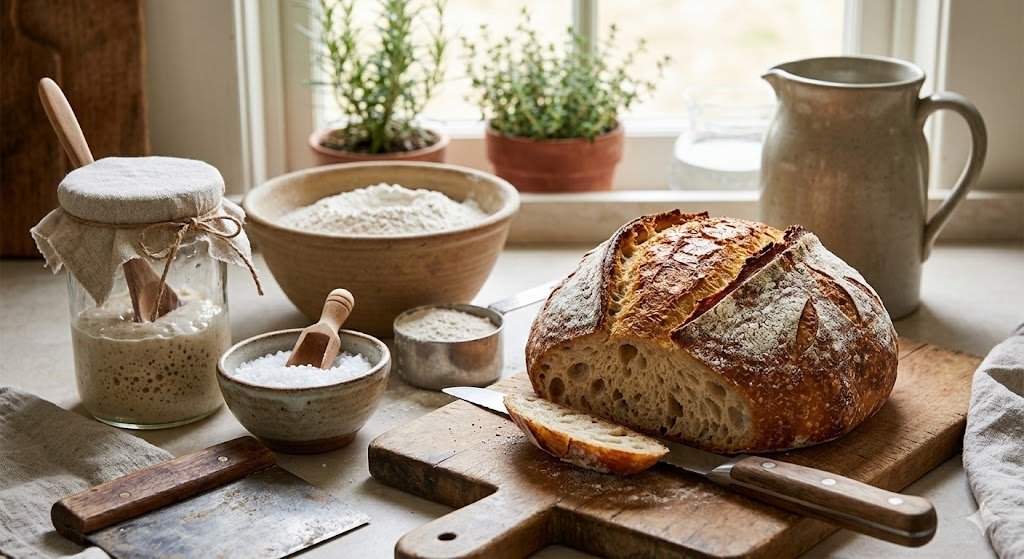
You can make real sourdough bread using just a starter, flour, water, and salt — no commercial yeast needed. The wild yeast and bacteria in an active sourdough starter provide all the leavening power. The recipe below uses a classic 70% hydration formula, takes about 24 hours from mix to bake (mostly hands-off), and produces a bakery-quality loaf with a crisp crust and open, tangy crumb.
The only catch: you need an active, bubbly sourdough starter. If you don’t have one yet, start with our sourdough starter without yeast recipe — it takes 7 days to build but then lasts indefinitely with regular feeding.
Ingredients You’ll Need
Just four ingredients. No yeast, no sugar, no oil, no dough conditioners.
- 100g active sourdough starter — fed and bubbly (peaked within the last 4–6 hours)
- 500g bread flour — high-protein flour gives the best structure and chew
- 350g filtered water — room temperature, unchlorinated
- 10g fine sea salt — non-iodized
This makes one large loaf at 70% hydration — a beginner-friendly ratio that’s easy to handle but still produces an open crumb. Bread flour works best, but you can substitute all-purpose flour (reduce water by 20g) or mix in up to 100g whole wheat for more flavor.
Equipment
- Large mixing bowl
- Digital kitchen scale (non-negotiable — cup measurements are unreliable for sourdough)
- Bench scraper or dough scraper
- Banneton (proofing basket) or a mixing bowl lined with a floured tea towel
- Dutch oven with lid (4–6 qt)
- Razor blade, lame, or sharp knife for scoring
- Parchment paper
Before You Start: Check Your Starter
Without commercial yeast, your starter is your leavening. A weak starter produces a dense, flat loaf. Before mixing, make sure your starter passes all three of these checks:
- Doubled in size within 4–6 hours of its last feeding
- Bubbly throughout — visible bubbles on top and through the sides of the jar
- Passes the float test — a teaspoon dropped into water floats instead of sinking
If your starter is sluggish, feed it once or twice more before baking. For a deeper look at timing and readiness, see our guide on how to use sourdough starter. A strong starter is the difference between a beautiful open crumb and a dense brick.
The Recipe: Step-by-Step
Step 1 — Mix the Dough (5 minutes)
In a large bowl, combine 100g active starter with 350g water. Whisk until the starter is fully dissolved. Add 500g bread flour and 10g salt. Mix by hand or with a wooden spoon until no dry flour remains. The dough will look shaggy and rough — that’s normal.
Cover the bowl with a damp towel or plastic wrap and let it rest at room temperature for 30 minutes to 1 hour. This rest (called autolyse) lets the flour fully hydrate and makes the dough much easier to work with during stretch and folds.
Step 2 — Stretch and Folds (2 hours)
Over the next 2 hours, perform 4 sets of stretch and folds at 30-minute intervals. To do a stretch and fold: with wet hands, grab one side of the dough, stretch it up, and fold it over onto itself. Rotate the bowl 90° and repeat. Do this 4 times per set.
Cover between each set. The dough will go from shaggy and sticky to smooth and stretchy. This builds the gluten network that traps the gas your starter produces — the replacement for kneading.
Step 3 — Bulk Fermentation (4–8 hours)
After your last stretch and fold, cover the bowl and let the dough rise at room temperature until it has increased in size by 50–75% and is domed, jiggly, and showing bubbles on the surface and sides.
Timing depends heavily on temperature:
- 68°F (20°C): 8–10 hours
- 72°F (22°C): 6–8 hours
- 78°F (26°C): 4–5 hours
Watch the dough, not the clock. For exact fermentation timing by temperature and starter percentage, see our sourdough bulk fermentation chart. The dough is ready when it passes the poke test — press a wet finger into the side 1 inch deep, and the indent should slowly spring back (not disappear instantly, not stay fully indented).
Step 4 — Shape the Loaf (10 minutes)
Turn the dough out onto a lightly floured surface. With a bench scraper, gently shape it into a round by pulling the edges up and into the center, working around the circle. Flip seam-side down and use the scraper to drag the dough across the counter, tightening the surface tension into a smooth ball.
Dust your banneton (or towel-lined bowl) heavily with flour — rice flour works best to prevent sticking. Place the dough seam-side up into the banneton.
Step 5 — Cold Proof (12–24 hours)
Cover the banneton with a plastic bag or shower cap and transfer to the fridge. Cold proof for 12–24 hours. This slow, cold fermentation develops flavor, makes the dough easier to score, and gives you flexibility on when to bake.
You can bake anytime from 12 to 48 hours after this point — the dough gets slightly more sour the longer it proofs.
Step 6 — Preheat and Bake (55 minutes)
Place your Dutch oven (with lid on) in the oven and preheat to 500°F (260°C) for 45 minutes. The Dutch oven needs to be blazing hot before the dough goes in.
Take the dough out of the fridge right before baking — do not let it come to room temperature. Cut a piece of parchment paper, place it over the banneton, and flip the dough out onto it. Score the top with a sharp blade (one long slash down the center, or a cross, or a decorative pattern).
Carefully lift the parchment with the dough and lower it into the hot Dutch oven. Put the lid on. Bake covered for 25 minutes, then remove the lid and bake another 20–25 minutes until the crust is deep golden brown.
Internal temperature should reach 205–210°F (96–99°C). Transfer to a wire rack and let it cool completely (at least 1 hour) before slicing. Cutting too early leads to a gummy crumb.
Sample Baking Schedule
This is the schedule most home bakers find easiest — mix in the morning, bake the next day:
- Night before — 9 PM: Feed your starter
- Day 1 — 8 AM: Check starter (should be peaked and bubbly). Mix dough.
- Day 1 — 8:30 AM – 10:30 AM: Stretch and folds
- Day 1 — 10:30 AM – 4:00 PM: Bulk fermentation
- Day 1 — 4:00 PM: Shape and transfer to fridge
- Day 2 — Morning or afternoon: Preheat Dutch oven, score, bake
How to Tell When It’s Properly Fermented
Since there’s no commercial yeast to force a predictable rise, reading the dough is the single most important skill in no-yeast sourdough. Here’s what “ready” looks like at each stage:
- End of bulk fermentation: Dough has risen 50–75% (not doubled), feels airy and jiggly, shows bubbles on the surface and sides, and passes the poke test
- End of cold proof: Dough feels firm but yielding, shows some expansion, and has a light tangy smell
- After baking: Deep golden-brown crust, hollow sound when tapped on the bottom, internal temperature 205–210°F
The motto: watch the dough, not the clock.
Why It Works Without Commercial Yeast
A healthy sourdough starter contains billions of wild yeast cells (primarily Saccharomyces species) along with lactic acid bacteria. Together, they produce the CO₂ that leavens the bread and the organic acids that give sourdough its signature tang.
Compared to commercial yeast, this wild fermentation is slower — hours instead of minutes — and that slowness is actually the source of sourdough’s advantages:
- Deeper flavor — long fermentation produces complex aromatic compounds you can’t get in a quick rise
- Stronger gluten structure — the acids gradually strengthen the dough, giving you better oven spring and an open crumb
- Easier digestion — long fermentation breaks down some of the starches and phytic acid, making the bread gentler on the gut
- Lower glycemic impact — sourdough produces a smaller blood sugar spike than yeasted bread
- Natural preservation — the organic acids keep sourdough fresh longer without any additives
Troubleshooting
Dense, heavy loaf
Most common cause: weak starter or underproofed dough. Your starter must double within 4–6 hours of feeding. If it doesn’t, feed it twice daily for 2–3 days before baking again. Also check your bulk fermentation — if the dough didn’t rise 50–75%, extend the time. See: why is my sourdough so dense.
Flat, spread-out loaf
Usually overproofed dough or weak shaping. Shorten the bulk fermentation next time, and build more surface tension when shaping by dragging the dough firmly across the counter.
Gummy interior
Either underbaked or sliced too early. Bake until internal temperature reaches 205–210°F, and always cool for at least 1 hour before cutting. Cutting hot bread traps steam and creates a gummy texture.
No ear, no oven spring
Your Dutch oven wasn’t hot enough, or you scored too shallow. Preheat the Dutch oven at 500°F for the full 45 minutes. Score at a 45° angle with a sharp blade, about ½ inch deep.
Starter smells like nail polish remover
That sharp acetone smell means your starter is hungry and out of food. Don’t bake with it — it won’t have the strength to leaven properly. See our fix guide: sourdough starter smells like acetone.
Dough sticks to the banneton
Dust much more heavily with flour next time — rice flour works best because it doesn’t absorb moisture. Also make sure the banneton is fully seasoned (use it several times without washing).
Frequently Asked Questions
Can I really make sourdough bread with no yeast at all?
Yes — traditional sourdough uses only a starter, flour, water, and salt. Commercial yeast isn’t needed because the wild yeast in your starter provides all the leavening power. This is how bread was made for thousands of years before packaged yeast was invented in the 1800s.
How long does it take from start to finish?
About 24 hours total, but most of it is hands-off waiting. Active time is only 30–45 minutes: 5 minutes to mix, 10 minutes of stretch and folds, 10 minutes to shape, and 10 minutes to score and bake.
Can I bake without a Dutch oven?
Yes, though the Dutch oven produces the best crust. Alternatives: a baking stone or steel with a pan of boiling water on the rack below for steam, or a cast iron skillet inverted over a baking sheet to trap steam. The goal is a sealed, steamy environment for the first 20 minutes.
Can I use all-purpose flour instead of bread flour?
Yes, but reduce the water by 20g (to 330g total) since all-purpose flour absorbs less water. The crumb will be slightly less open and the loaf less chewy, but still excellent.
Why is my sourdough not rising without yeast?
The issue is almost always your starter, not the recipe. A starter that doesn’t double reliably within 4–6 hours of feeding isn’t strong enough to leaven bread. Feed it twice daily for 3–4 days to build strength before baking. See our feeding sourdough starter guide for ratios and timing.
Can I skip the cold proof and bake the same day?
Yes. After shaping, let the dough proof at room temperature for 2–4 hours instead. You’ll get a less sour, less complex loaf, and the dough is harder to score when warm — but it works. The cold proof is recommended but not mandatory.
How long does homemade sourdough last?
Stored cut-side down on a cutting board or wrapped in a clean cloth, sourdough stays fresh for 3–4 days at room temperature — longer than commercial bread thanks to the natural acids. It also freezes beautifully for up to 3 months.
Can I add whole wheat flour to this recipe?
Yes. Substitute up to 100g of the bread flour with whole wheat flour and add an extra 10–15g water (whole wheat is thirstier). Keep whole wheat under 20% of the total flour to maintain a good open crumb.
Final Thoughts
Real sourdough bread has never needed commercial yeast — an active starter is enough. The recipe is simple, the ingredients are just four, and the result is a loaf that rivals anything you can buy from a bakery. The only thing you need is a healthy starter and a little patience.
If you’re new to sourdough, start with our sourdough starter without yeast recipe and come back to this post when your starter is doubling reliably. Once you’re comfortable with the basics, explore more ways to use your starter beyond bread.