👈 Back to Complete Malt Guide — All malt types, uses, and baking benefits explained
Explore other malt guides: Diastatic Malt Powder • Non-Diastatic Malt Powder • Malt Syrup • Malted Barley Flour • Malted Flour • Malted Barley • What Is Malting? • High-Rise Recipe
Why Malt Your Own Grain?
Most home bakers don’t know that malt powder sits on shelves for months—sometimes a year—before landing in their kitchen. By that time, the enzymes that make malt special have already started breaking down. What you’re paying $15–25 per pound for is basically stale grain flour.
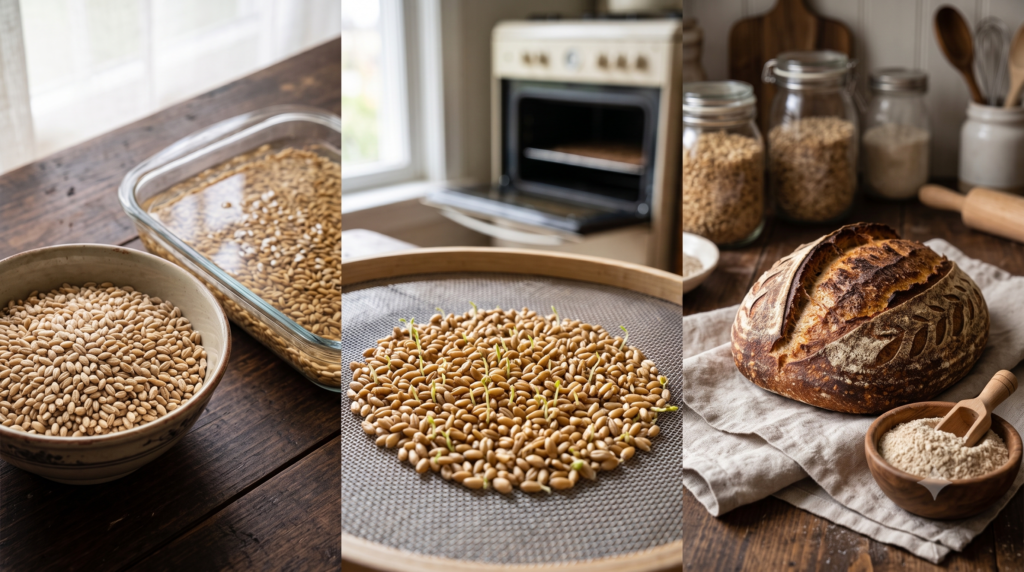
DIY malting changes everything. When you malt grain at home, the enzymes are alive. They’re at peak freshness. You’re essentially harvesting the most active fermentation tool nature makes, and you’ll use it within days while it’s still powerful.
Cost savings alone justify the effort. Store-bought malt powder runs $15–25/lb. DIY malting costs you $0.50–1.00/lb for raw grain plus 6 days of your attention. If you bake two loaves weekly (standard for serious sourdough nerds), DIY malting saves you $500–1,000 per year. That’s a no-brainer.
But there’s more. When you malt at home, you control the outcome. Need diastatic malt with maximum enzyme activity? Stop kilning at 140°F. Want non-diastatic (enzymes dead, better for long-ferment breads)? Push the kiln to 200°F. Store-bought malt is one-size-fits-all. Homemade malt is engineered for your formula.
There’s also something deeply satisfying about understanding the complete fermentation chain—from grain germination to sourdough rise. You’re not just baking; you’re growing your ingredients. Most bakers never get to see this side of fermentation.
Finally, freshness means flavor and function. Fresh-malted grain hits different. Your dough rises noticeably faster. Your crust browns deeper. Your crumb structure tightens in a way stale malt can’t match. This is the secret professional bakers don’t advertise—they use fresh malt because it works.
Ready to become a grain scientist? Let’s build your malting setup.
What You’ll Need: DIY Malting Equipment
You don’t need a lot to get started, and I’d bet you already own half of this stuff.
The Container (Steeping & Germination)
Budget Option: Mason Jars ($0–2 per jar)
The cheapest route is quart-sized mason jars. Fill with grain, add water, cover with cheesecloth secured by a rubber band. Soak, drain twice daily. It works, but it’s slow and you’ll lose some grain to spillage.
Better Option: Grain Sprouting Trays ($8–15)
Sprouting trays have built-in drainage and stacking capability. I recommend the plastic stackable trays you find on Amazon. They’re designed for mung beans and alfalfa, but they’re perfect for grain malting. The drainage means less mold risk, and the 3–4 tray stackability means you can malt multiple batches simultaneously without taking up counter space.
Essential: Cheesecloth & Mesh Screens ($2–5)
Regardless of your container choice, grab bulk cheesecloth (cheap on Amazon) and fine mesh screens. These let water drain while keeping grain in place. Mold is your enemy during steeping, and good drainage beats it every time.
The Germination Environment
This is where most home malters fail. Grain needs three things to germinate: moisture, warmth, and airflow.
Temperature Control: 65–75°F Ideal
Your grain will germinate outside this range, but slowly. Below 60°F and you’re looking at 8–10 days of germination (mold risk increases). Above 75°F and you risk competitive mold strains outpacing your grain.
The sweet spot? 68–72°F. If your kitchen naturally sits there, you’re golden. If not, you’ll need to get creative—a proofing box, a closet with a heating pad, or even a cooler with a water bottle heated to a specific temperature works.
Humidity Management: 80–90% RH
Grain needs moisture in the air, not just in the soak water. Open germination in a dry kitchen? You’ll get brown rootlets and poor germination. Keep the area humid—run a humidifier, cover your sprouting trays loosely with cloth, or set them in a bathroom while you shower daily. The moisture helps prevent drying out between hand-misters.
Air Circulation: The Underrated Factor
Here’s what kills most home malts: stagnant air. Poor airflow = mold, mold, and more mold (looking at you, black fuzzy grain disaster).
Solution? A small fan running 2–3 hours daily near your germinating grain. Nothing fancy—a $10 USB fan from Amazon works. Just get air moving. This alone cuts mold risk by 80%.
The Kilning Equipment: Three Options
This is where your choice determines the quality of your malt.
Option 1: Food Dehydrator ($30–120) — Best for Control
A food dehydrator is the Cadillac of home malting. Temperature precision, airflow built-in, stackable trays, zero mess. If you have $80–120 to spend, go this route.
I recommend Excalibur dehydrators (the 5-tray model runs $120–160 on Amazon). Yes, it’s an investment, but the temperature control is precise to 1°F, and the airflow is engineered for even drying. You’ll use it for malt AND jerky AND herbs AND dried fruits. It’s not just a malt tool—it’s a kitchen workhorse.
Check out Excalibur dehydrators on Amazon for current pricing and reviews.
If budget is tight, Nesco makes solid mid-range dehydrators ($50–80) that still give you good temperature control. Less fancy than Excalibur, but they get the job done.
Option 2: Your Oven ($0) — Free But Finicky
Your home oven works, but it’s a pain. Ovens fluctuate in temperature. Most home ovens can’t hold steady at 140–160°F (the ideal drying temp for malt). You’ll need to crack the door slightly, monitor constantly, and rotate trays halfway through.
Honestly? I’d skip this unless you’re dead-broke. The stress isn’t worth it.
Option 3: Brod & Taylor Proofer ($299) — Luxury Dual-Use
If you already own a Brod & Taylor Proofer (the fancy sourdough tool), congratulations—you have a killer malting kiln hiding in plain sight. The B&T maintains rock-solid temperatures and has excellent airflow. You can proof dough AND kiln malt in the same machine, just not at the same time.
Want to learn more about how the B&T works beyond sourdough? Check out our guide on Brod & Taylor proofer uses beyond bread—including kilning malt at the right temperature.
Grain Selection
Two-Row Barley: The No-Brainer
Start with 2-row barley. It’s forgiving, widely available, and produces beautiful pale malt. Most craft breweries use 2-row malted barley for a reason—it’s reliable.
Want to understand the grain you’re about to malt? Read what is malted barley? — it covers the history, grain types, and why 2-row wins for sourdough.
Where to Buy: Azure Standard (bulk, $0.30–0.50/lb), Mountain Rose Herbs, or local brewery supply shops. Don’t buy from grocery stores (usually organic whole grain, overpriced, and not optimized for malting).
Budget: For your first batch, grab 2–3 lbs. This is your experimental batch. You’ll learn what works, what doesn’t, and you’ll have enough grain to test in actual bread.
The 3-Stage DIY Malting Process
Here’s where the magic happens. Malting is just controlled germination—you’re coaxing the grain’s enzymes awake, then stopping them at peak power with heat.
Stage 1: Steeping (Day 1–2) — Wake Up the Grain
The Goal: Soak grain until it splits open and a tiny root emerges.
What You Do:
- Measure 1 lb of 2-row barley
- Fill your sprouting tray with grain—it should sit about 1 inch deep, single layer (no piling)
- Cover completely with water (grain should be submerged, but just barely—grain floats when empty, so weigh it down if needed)
- Set in a cool spot (60–70°F is fine for steeping)
- After 8 hours, drain all water through cheesecloth (don’t throw grain out—this is important)
- Rinse grain by running cool water over it for 10 seconds
- Drain completely (tilt tray to get water out)
- After another 8–12 hours, repeat: drain, rinse, drain
- Keep repeating until you crack open a grain with your thumbnail and see the embryo splitting (usually day 2)
Why This Matters: You’re not just hydrating grain—you’re triggering metabolic awakening. The grain “wakes up” and prepares to germinate. The multiple soak-drain-rinse cycles prevent mold by removing surface sugars that mold loves.
Troubleshooting:
- Grain won’t split: Temperature too cold. Move to warmer spot or add heating pad underneath. Steeping takes longer in cold conditions.
- Mold appears: Grain is staying too wet between rinses. Drain harder next time—tilt the tray and let gravity do work for 2–3 minutes. Make sure airflow is moving around the grain.
- Grain smells sour/like vinegar: This is normal. Fermentation has started. Not a problem unless it smells rotten (then discard and start over).
Time Estimate: 16–24 hours total steeping, 2–3 drain-rinse cycles.
Stage 2: Germination (Day 2–6) — Enzyme Production Peaks Here
The Goal: Trigger the grain’s growth, which activates all the enzymes you want.
What You Do:
- After your steeping is done and grain has split, transfer to your sprouting tray (with drainage holes)
- Stop soaking—no more water baths. Instead, mist with a spray bottle 2–3 times daily
- The grain should be moist (like damp soil texture), not waterlogged
- Ensure airflow: run a small fan nearby 2–3 hours daily
- Keep temperature at 65–72°F
- Maintain humidity at 80–90% (if air is dry, cover loosely with cloth)
- Harvest when you see:
- Tiny white rootlets emerging from grain (day 2–3 of germination)
- Rootlets growing to about 1/8″ long (day 3–4)
- Most importantly: An acrospire (the growing shoot inside the grain) pushing through the husk (day 4–6)
Why This Matters: This is when enzymes activate. The grain is growing, which means amylase enzymes are multiplying like crazy. These enzymes will later convert starches into fermentable sugars in your dough.
The acrospire is your visual cue. When you see it peeking out of the husk (even a tiny bit), enzymes are at maximum power. This is the perfect moment to stop germination and start kilning.
Troubleshooting:
- Rootlets are brown/mushy: Overwatering. Let grain dry slightly between mistings. Mushy grain is rotting grain.
- Mold is visible: Poor airflow. Turn up fan, ensure area is ventilated. If mold is bad (black fuzz, not white), throw out batch and restart—the mold spores will spread.
- Grain won’t sprout: Temperature too cold or grain was dead to begin with. Ensure room is 68–72°F. If in cold season, use heating pad under tray.
- Acetone smell: Anaerobic fermentation. This is actually okay—it means grain is fermenting well. Increase airflow and the smell will pass. Still usable.
Time Estimate: 4–6 days total germination, depending on temperature.
Stage 3: Kilning (Drying + Enzyme Lock-In) — Stop the Grain, Lock the Enzymes
The Goal: Dry the grain to halt germination while preserving enzymes (or killing them, depending on your intent).
What You Do:
- Spread your germinated grain on dehydrator trays (if using dehydrator) or oven-safe tray (if using oven)
- Set temperature to 140–160°F for pale malt (highest enzyme activity preserved)
- Turn on dehydrator/oven and let it run for 8–12 hours
- Grain is done when:
- It cracks when you bend it (not rubbery)
- It snaps cleanly in half (not brittle like glass)
- Rootlets are dry and fall off easily
- Moisture content is about 5–8% (basically dry)
Temperature Matters:
- 140–160°F: Maximum enzyme retention (diastatic malt). This is what you want for sourdough.
- 160–200°F: Medium enzyme retention, darker color, nutty flavor (specialty malts)
- 200–220°F: Enzymes dead, chocolate/roasted flavor (non-diastatic malt, good for long-ferment breads where you don’t want fast rise)
For your first batch targeting sourdough use, stay at 150°F for 10 hours. This is the sweet spot.
Why This Matters: Heat stops germination (the grain thinks it’s time to stop growing), but lower temps preserve the enzymes you’ve worked 5 days to create. Too hot, too fast, and you lose enzyme activity.
Troubleshooting:
- Kilning took too long: Temperature too low or airflow insufficient. Increase temp by 10°F next time. With a dehydrator, low airflow sometimes happens if trays are packed too tight—space them out.
- Grain is still soft/rubbery after 12 hours: Temperature wasn’t high enough. Increase to 160°F and keep going another 2–4 hours.
- Grain smells burnt: Temperature spiked or you let it go too long. Next time, use an oven thermometer to verify actual temp (some dehydrators run hot or cold vs. what you set).
Time Estimate: 8–12 hours kilning (drying time varies by grain moisture and dehydrator).
Post-Kiln Cooling & Storage
- Cool grain to room temperature (let it sit 1–2 hours). Don’t seal hot grain in containers (condensation = mold)
- Remove loose rootlets by rubbing grain gently in your hands over a bowl. Rootlets fall away; save the clean malt
- Store in airtight containers in a cool, dark place (pantry is fine)
- Shelf life: 3 months for maximum enzyme activity, up to 6 months if stored cool and dark
Pro Tip: If you plan to grind malt flour, grind it fresh from your dried malt. Pre-ground malt flour loses enzyme activity faster than whole malt grains.
How to Use Your Home-Malted Grain in Sourdough
You’ve spent 6 days growing this stuff. Now what?
Grinding Your Malt
You need malt flour, not whole grains. A simple grain mill will handle this. Nothing fancy—a Mockmill or even a NutriMill works. Grind your dried malt to fine powder.
Storage: Use ground malt within 2 weeks for maximum enzyme activity. After that, enzyme degradation speeds up. If you’re grinding weekly, you’re golden.
Not sure what form you need? Jump to our guides:
- What is malted flour? — Covers grinding, storage, and shelf life
- What is malted barley flour? — Specific guide to the grain you just malted
- What is malt? — Quick reference for malt terminology
Hydration & Ratios
Here’s the critical part: malt absorbs water differently than flour.
Malt flour is enzyme-dense but lower in gluten. When you add it to your dough, the enzymes immediately start breaking down starches into sugars, which means the dough feels wetter than normal.
Start with 1.5% malt flour by baker’s percentage (that’s 1.5g per 100g flour).
This is how you’d apply it to a 500g loaf:
- 500g bread flour (100%)
- 375g water (75% hydration)
- 75g starter (15%)
- 10g salt (2%)
- 7.5g malt flour (1.5%)
The malt flour goes into your flour weight (so total flour is 507.5g, including malt). Then follow your standard sourdough process.
Hydration Adjustment: Your dough will feel slightly wetter than normal because malt enzymes increase water absorption. If your dough feels too sticky, reduce water by 1–2% next time (to 73–74% hydration instead of 75%).
Detailed percentages and hydration adjustments are covered in depth in our guide on exact percentages and mixing techniques for malt, including a calculator tool for adjusting recipes on the fly.
What to Expect
- Faster bulk fermentation: Expect bulk to finish 30–45 minutes earlier than your standard recipe (enzymes speed yeast activity)
- Bigger oven spring: 20–40% taller loaves is typical (more sugar = more gas = bigger rise)
- Deeper crust color: Malt provides sugars for browning (Maillard reactions)
- Subtle sweetness: Not “dessert sweet,” but you’ll taste it in the crust
- Open crumb: Enzyme activity helps gas retention and gluten development
This is why professional bakers sweat malt. It works.
Troubleshooting: Common DIY Malting Problems
| Problem | Cause | Fix |
|---|---|---|
| Mold on grain (black/green fuzz) | Poor airflow, too wet | Increase air circulation (fan 2–3 hrs daily), reduce water between mistings |
| Grain won’t germinate | Too cold, dead grain, stale stock | Warm to 68–72°F, source fresher grain from reputable supplier |
| Rootlets are brown/mushy | Overwatering, extended germination | Reduce moisture, harvest earlier (shorter rootlet = less water exposure) |
| Smells like nail polish (acetone) | Anaerobic fermentation (normal) | Harmless—this is fermentation working. Increase airflow if odor intensifies. Still usable |
| Kilning took too long | Oven/dehydrator too weak or overpacked | Increase temp by 10°F, space trays apart for airflow |
| Grain has no flavor impact on bread | Under-kilned (enzymes consumed before grain split) | Don’t over-germinate; stop at acrospire peeking, not full emergence |
| Still don’t understand enzyme timing | Overwhelmed by science | Jump to the hub explanation on enzyme activation and retention during malting stages—it breaks down exactly why timing matters |
DIY vs. Buying Pre-Malted Grain: When to DIY
Let’s be real—DIY isn’t always the move.
| Factor | DIY Malting | Buy Pre-Malted |
|---|---|---|
| Cost per lb | $0.50–1.00 | $15–25 |
| Time investment | 6–10 hours active + 4–6 days wait | 0 hours |
| Freshness | Maximum (enzymes peak day 7) | 6–12 months old (enzyme decay) |
| Enzyme strength | Customizable (you control kilning) | Fixed by supplier |
| Consistency | Varies batch to batch (learning curve) | Consistent (engineered product) |
| Best for | Hobbyists, high-volume bakers, science nerds | Commercial bakeries, small-batch bakers, “just bake it” folks |
My recommendation: If you bake 2+ loaves per week, DIY saves you $500+/year and gives you superior freshnessyou can’t buy. The effort is worth it.
If you bake once a week or less, buy pre-malted and spend your time on other things. The marginal benefit isn’t worth 6 days of attention per batch.
Advanced: Specialty Malts at Home
Once you nail pale malt, try these variations.
Chocolate Malt (High-Kilned, Deep Flavor)
Kiln at 200–220°F for 8–12 hours instead of 140°F. The grain darkens to deep brown/chocolate color. Flavor shifts from subtle sweetness to roasted, nutty, almost coffee-like notes.
Use Case: Whole wheat sourdough, pumpernickel, darker bread formulas where you want complexity without sourness.
Cara Malt (Crystal Malt, Sweetness Development)
This is advanced: you add a mash step before kilning.
- After germination (when acrospire is peeking), stop usual drying
- Spread grain on tray and hold at 150–155°F for 1–2 hours (not drying—resting)
- At this temp, the grain’s starch converts to sugars (the “mash”)
- Then ramp kiln to 160–170°F and finish drying normally
Result: Grain develops subtle sweetness and deeper color. Perfect for brioche sourdough or sweet rye formulas.
Smoked Malt (Unique Flavor, Experimental)
After kilning normally, expose hot grain to smoke from applewood or hickory chips for 30 minutes. The smoke penetrates the grain while warm.
Caution: This is experimental. Smoke flavor in bread isn’t for everyone. But if you want truly unique sourdough? Smoked malt is it.
Advanced: Beyond whole grain malts, you can also work with what is malt syrup? — an alternative form that requires different application. Research before using syrup vs. powder in your formula.
The Loop Closes Here
You started with a question: Why buy stale malt when you can grow fresh?
Now you understand the complete cycle. You’ve learned the malting process foundation (if you haven’t yet, that hub post goes deep into enzyme science), you know how to DIY malt from seed to kiln, and you know exactly how to apply it to your sourdough formula.
Your loaves are about to get much taller. Your crust is about to get much darker. And your appreciation for fermentation science is about to deepen in ways most bakers never experience.
Start with pale malt. Nail the 3-stage process. Then experiment. Your bread—and your pizza dough, and your whole grain formulas—will thank you.
READY TO START?
Grab 2 lbs of 2-row barley, set up your sprouting tray, and begin. Six days from now, you’ll be holding the most active, enzyme-rich malting agent you can buy at any price.
The baker’s secret isn’t a secret at all. It’s just grain, water, warmth, and patience.
Questions or Problems?
Drop them in the comments below. Have you tried malting at home? I’d love to hear about your process—especially if you discovered something I missed.
Next Step: Once you’ve got fresh malt, learn exactly how to use it in your sourdough for maximum oven spring and flavor.