Jump to Section

If sourdough feels intimidating — all those ratios, hydration percentages, and baking schedules — this guide is for you. We’re skipping the advanced stuff. No baker’s math. No complicated terminology. Just the simple, honest truth about what a sourdough starter is, how to make one, and how to keep it alive.
By the end of this page you’ll know exactly what to do on Day 1, Day 7, and every week after that. When you’re ready to bake your first loaf, head to our complete sourdough bread guide. And if you’ve already got a starter, jump to our post on how to use your sourdough starter.
What Is a Sourdough Starter? (Plain English)
A sourdough starter is just flour and water that’s been left to ferment. That’s it.
When you mix flour and water and leave it out, wild yeast and bacteria that naturally live in the flour (and the air) start to grow. Over about a week, those microorganisms multiply into a bubbly, sour-smelling culture. That culture is your starter — and it’s what makes sourdough bread rise without any store-bought yeast.
Think of it like a living pet. You feed it flour and water. It grows. It gets stronger. And when it’s healthy and active, you use a small spoonful of it to make bread rise.
That’s the whole concept. Everything else is just details.
What You Need (Keep It Simple)
You do not need special equipment. Here’s the full list:
- Flour — plain unbleached all-purpose flour. Don’t use bleached flour — it can kill the bacteria you’re trying to grow.
- Water — tap water is fine for most people. If yours tastes strongly of chlorine, leave a glass out overnight before using.
- A jar — a wide-mouth mason jar or any glass jar works. At least 16oz so there’s room to grow.
- A rubber band — to mark where the starter is after you feed it so you can see it rise.
- A spoon or spatula — for mixing.
A kitchen scale is helpful but not required to get started. If you have one, use it — it makes things more consistent. If you don’t, tablespoon measurements work fine in the beginning.

How to Make a Sourdough Starter: Day-by-Day
The whole process takes about 7 days. Each day takes roughly 5 minutes of actual work. The rest is just waiting.
Day 1 — Mix It and Forget It
In your jar, mix together:
- 50g (about 4 tablespoons) of flour
- 50g (about 3.5 tablespoons) of water
Stir until it looks like thick pancake batter — no dry flour lumps. Cover loosely (don’t seal it airtight) and leave on your counter at room temperature. Walk away. You’re done for today.
Day 2 — Check and Feed
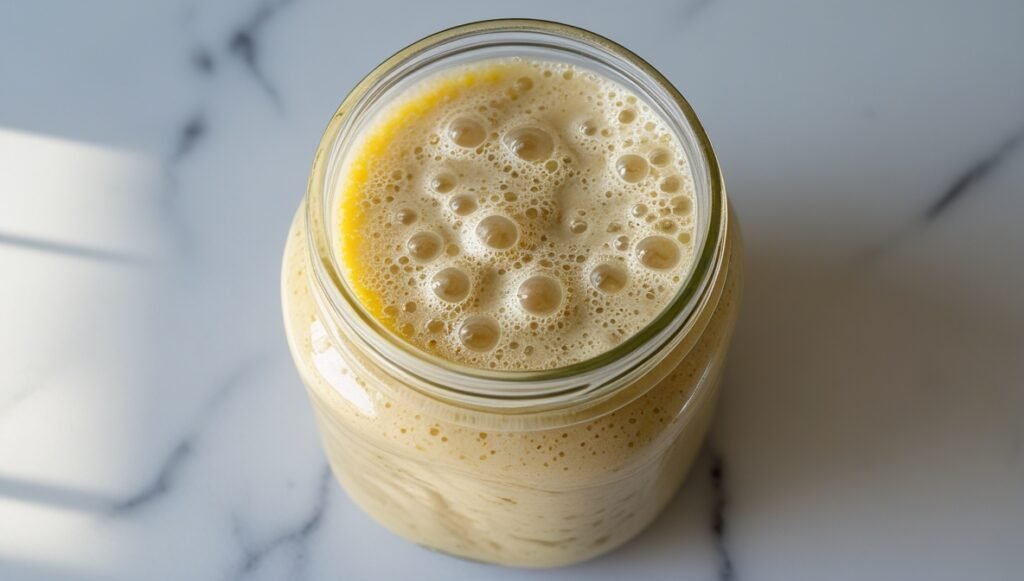
Look for any small bubbles on the surface or sides. You might see them, you might not — both are normal on Day 2. Either way, it’s time to feed it.
How to feed: Pour out (discard) about half the starter. Then add 50g flour and 50g water. Stir well, put your rubber band at the new level, cover loosely, and leave for another 24 hours.
Why discard? If you just kept adding flour and water, you’d have a huge bucket of starter within a week. Discarding keeps the quantity manageable and prevents the acid from building up too fast.
Days 3–4 — The Ugly Phase
Your starter might go flat, smell weird, or look like nothing is happening. This is completely normal and has a name: the “false start.” Bad bacteria dominate briefly before the good wild yeast takes over. Keep discarding and feeding every 24 hours no matter what. Don’t give up here — almost everyone’s starter goes through this.
If it smells like nail polish remover, it’s just hungry. See our fix: sourdough starter smells like acetone.
Days 5–6 — It Wakes Up
Now you should start to see real activity — consistent bubbles, a rising level above your rubber band mark, a pleasantly sour smell. Feed daily and keep watching that rubber band. If the starter rose and fell while you weren’t looking, the residue left on the jar above the band is your evidence.

Day 7 — Is It Ready?
Your starter is ready to use when it reliably doubles in size within 4–8 hours after feeding, is full of bubbles, and smells pleasantly sour (like yogurt or beer, not like gym shoes).
You can also try the float test: drop a small spoonful into a glass of water. If it floats, it’s ready. Pro tip: don’t stir the starter before testing — you’ll knock out the air bubbles it needs to float, and a perfectly ready starter will sink and fool you.
If it’s not ready by Day 7, keep going. Some starters take 10–14 days, especially in cold kitchens. Not doubling? Read: sourdough starter not doubling.
For a more detailed day-by-day breakdown, see our full sourdough starter recipe.
How to Feed Your Starter (Ongoing)
Once your starter is established, feeding it is simple. The basic rule: equal parts starter, flour, and water by weight. This is called a 1:1:1 ratio.
- Baking often (multiple times a week)? Keep it on the counter and feed it once a day.
- Baking once a week or less? Store it in the fridge and feed it once a week.
Before any bake, pull it from the fridge, feed it, and wait until it doubles — then it’s ready to use. Never put a hungry, falling starter into the fridge. Always refrigerate it right at or just after it peaks.
Full feeding guide with ratio options: feeding sourdough starter — complete schedule breakdown. Or see our sourdough starter feeding ratio chart for every scenario.
Is It Ready? 3 Signs to Look For
You’ll know your starter is ready to bake with when you see all three of these:
- It doubles in size within 4–8 hours of feeding at room temperature
- It’s bubbly throughout — bubbles on the surface, on the sides, and when you stir it
- It smells pleasantly sour — tangy like yogurt or mildly yeasty like beer
If your starter meets all three, you’re good to bake. See our how to feed and maintain sourdough starter guide for ongoing care tips. Also see our sourdough poke test guide to check your dough readiness once you start baking.
What Can Go Wrong (And How to Fix It)
Nothing is happening
Most likely your kitchen is too cold. Wild yeast is sluggish below 68°F. Move the jar somewhere warmer — on top of the refrigerator, inside the oven with just the light on, or near a heat source. See: how to keep sourdough starter warm.
There’s grey liquid on top
That’s called hooch — it’s alcohol produced when your starter runs out of food. It’s not dangerous. Stir it in or pour it off, then feed immediately. More detail: why sourdough discard has liquid hooch.
It smells terrible
A very sharp, chemical, or acetone smell means it’s very hungry and stressed. Feed it twice a day for 2–3 days to bring it back. A mild sour or vinegary smell is totally normal and actually a good sign. Fix: sourdough starter smells like acetone.
It won’t stop going flat after rising
Your starter peaked and you missed the window. That’s okay — just feed it again and use it at its next peak. The key is to catch it when it’s domed at the top and hasn’t started to fall yet. See: sourdough starter not working.
I see pink, orange, or fuzzy stuff
That’s mold — the only time you should throw a starter out and start over. This usually happens if the jar wasn’t clean or if the starter sat neglected for a very long time. Always use a clean jar.
Don’t Throw Away the Discard
Every feeding means you throw away half your starter. Before you do — save it. Sourdough discard isn’t ready to leaven bread, but it’s perfect for quick recipes that don’t need a full rise. Some of our easiest beginner-friendly discard recipes:
- Sourdough discard crackers with rosemary and sea salt
- Fluffy sourdough discard pancakes
- Sourdough discard tortillas
- Sourdough discard flatbread (no yeast needed)
Keep discard in a covered container in the fridge for up to 2 weeks. See: how long is sourdough discard good for?
What to Make First
Once your starter is reliably active and doubling, you’re ready to bake. Start with our step-by-step how to make sourdough bread guide — it’s written specifically for beginners and walks you through every stage from mixing to scoring to baking in a Dutch oven.
Also helpful before your first bake: bulk fermentation for beginners, how to shape a sourdough boule or batard, and how to score sourdough.

Frequently Asked Questions
Do I need a kitchen scale?
Not to get started. But as you progress, a scale makes everything more consistent and accurate. If you have one, use it from Day 1. If not, tablespoon measurements work fine while you’re learning.
Can I use whole wheat flour?
Yes — and it actually helps in the first few days. Whole wheat has more natural sugars and wild yeast, so it kickstarts fermentation faster. Switch to all-purpose after Day 2 for routine feedings.
What if I forget to feed it?
If it’s been a day or two at room temperature, feed it right away and it’ll recover. If it’s been weeks in the fridge, feed it 2–3 times over a couple of days to bring it back to full strength. It’s almost always saveable unless there’s visible mold.
How long does it take before I can bake?
Most starters are ready in 7–10 days. Some take up to 2 weeks in cold kitchens. Patience is the main ingredient here — there are no real shortcuts.
Can I make sourdough without gluten?
Yes. You’ll need a gluten-free starter built with rice flour or another gluten-free flour. We cover this in detail in our gluten free sourdough starter guide.
Is sourdough actually good for you?
Sourdough fermentation breaks down some of the gluten and phytic acid in flour, making it easier to digest than regular bread. See: sourdough gut health benefits and is sourdough bread good for you?
You Can Do This
Sourdough looks complicated from the outside. From the inside it’s just flour, water, and a little daily attention. You don’t need to understand wild yeast biology or baker’s percentages to make a great starter and a beautiful loaf of bread.
Start on Day 1 today. Feed it tomorrow. By next week you could be baking your first loaf. Our complete sourdough bread guide is waiting for you when you’re ready — and our how to use sourdough starter post covers everything that happens between a ready starter and a finished loaf.
2 Responses
Hi
I have followed the sour dough starter recipe (half cup bakers bread to one quarter water (tepid) it has now been over a week and it ain’t looking like fermenting it just looks like a gooey sticky mess…….What have I do wrong?
Peter
When creating your starter, make sure it is almost like peanut butter. I made the mistake of making it to gooey. I notice a change when I made it less gooey and more on the chunky peanut butter side. Also the room i had the starter in made it dormant, it did not like the walk in pantry. it wanted to be a little bit warmer. i live in the south, and outside at the moment is 91 degrees. and its very cold in the house but my office is different , due to it having 8 large windows and i keep 1 or 2 curtains open ( so the sun can poke through and warm up the office around 75 or so.) its perfect and the starter loves it. So it could be where you are leaving your starter, the recipe may need to be adjusted for you.keep at it. it took me some time to realize i needed to move my starter to another area and adjust my recipe, the humidity here is crazy. again keep at it.